
Patch extraction is a fundamental operation in deep learning, especially for computer vision.
By the end of this thread, you’ll know how to implement an efficient vectorized patch extractor (no for loops) in a few lines of code and learn about memory allocation in numpy.
1/n
By the end of this thread, you’ll know how to implement an efficient vectorized patch extractor (no for loops) in a few lines of code and learn about memory allocation in numpy.
1/n

In deep learning we often need to preprocess inputs into patches. This can mean splitting an image into overlapping or non-overlapping 2D patches or splitting a long audio or text input into smaller equally sized chunks.
2/n
2/n
Implementing patches efficiently is harder than it seems. For example, we can load an image into a numpy array, then write a for loop to index into the array and get patches. This works but requires extra memory and the for loop is slow. Can we do better?
3/n
3/n

Yes - we can make patch extraction fast and lightweight by leveraging how numpy (or torch, tf, jax, etc) stores arrays in memory. Numpy stores arrays in contiguous memory. This structure makes reading data from the image array very efficient.
4/n
4/n

Instead of creating a new patches array, we only need to specify how to view the image as an array of patches. This is where the concept of strides comes in. You’ll notice that each numpy array has shape, strides, and itemsize properties. What do these properties mean?
5/n
5/n

Shape = dimension of array. Itemsize = the number of bytes per cell (float32 = 32 bits = 4 bytes). Strides = the number of bytes required to traverse the contiguous memory block to read the next element along a given dimension. Strides = # steps-to-traverse * itemsize.
6/n
6/n

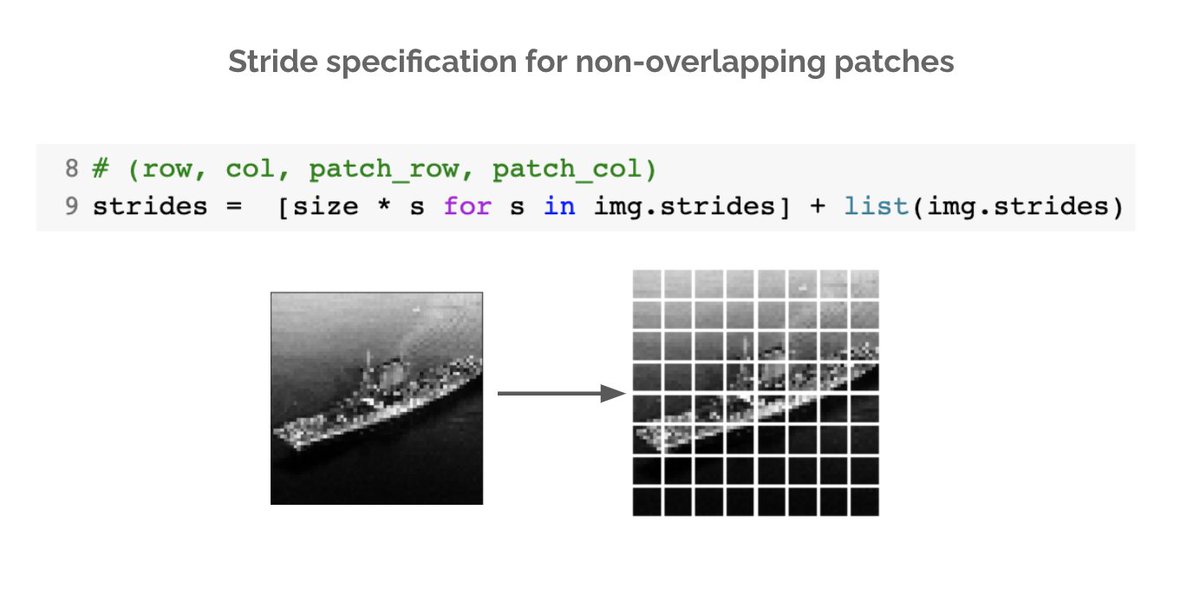
If we know the output shape of the patch tensor, we can then specify the strides appropriately to get the desired patches. In numpy, the stride_tricks module provides this functionality. For example, here is how you implement non-overlapping patch extraction (e.g. for ViT).
7/n
7/n

stride_tricks.as_strided is a general purpose function for viewing any array. By specifying the shape and strides we fully define how to traverse this array for viewing. In our case we want to view it as patches - the main trick is to figure out the correct strides.
8/n
8/n

The best way to understand how to specify strides is to work through each dimension in the output shape. For each dimension ask - how many steps need to be traversed to access the next element along this dimension?
9/n
9/n

You'll notice that the patch_row & patch_col strides are the same as the image strides. For row & col strides they are the images strides * by the patch size. Now take a look at the strides code again. Does it make more sense now right?
10/n
10/n
We've now learned how to efficiently extract patches from grayscale images. What about RGB images - how do we deal with the channel dimension? Turns out the fix is quite simple. We just need to modify the row & col strides to ignore the channel dimension.
11/n
11/n
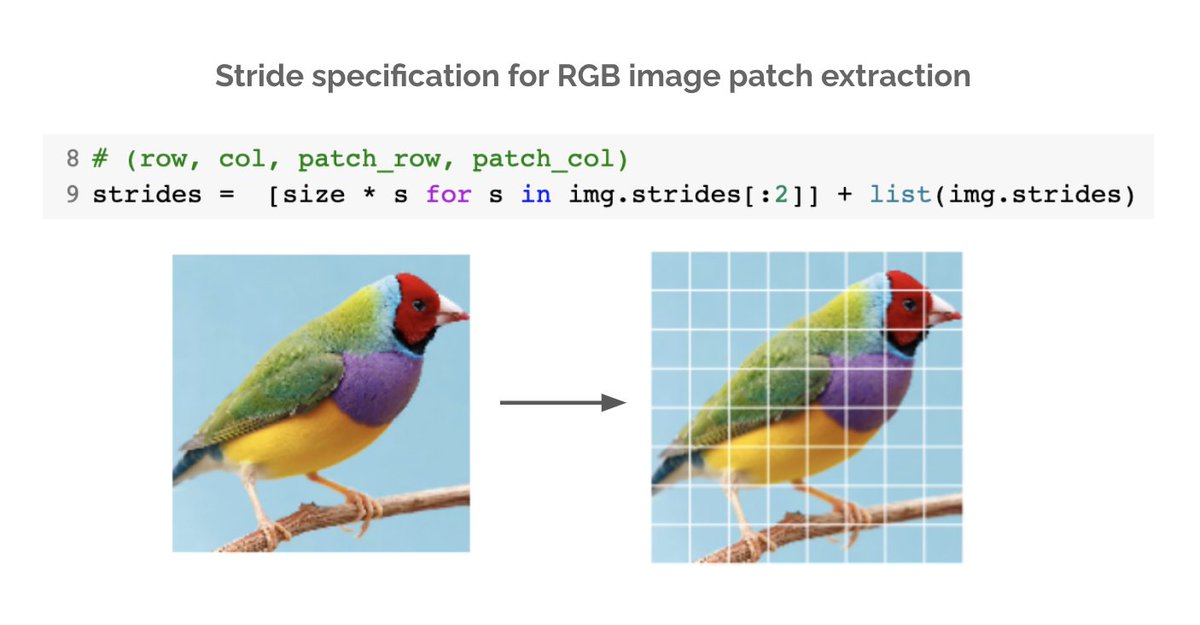
Now you know how to implement vectorized patch extraction. We covered non-overlapping patches but the same logic can be used to deduce the strides for overlapping ones (e.g. for CNNs, mean / max pooling, data aug).
Will be posting more of these. Hope you enjoyed it.
12/n END
Will be posting more of these. Hope you enjoyed it.
12/n END
Loading suggestions...