

Defensive principles and interactions - Pressure, defensive support, and balance. [Thread]
➡️ Pressure: the closest defender to the ball.
➡️ Defensive support (cover): close enough to cover the space behind the first defender.
➡️ Balance: All other defenders are giving balance.
➡️ Pressure: the closest defender to the ball.
➡️ Defensive support (cover): close enough to cover the space behind the first defender.
➡️ Balance: All other defenders are giving balance.
![Defensive principles and interactions - Pressure, defensive support, and balance. [Thread]
➡️ Press...](https://pbs.twimg.com/media/FLOELFfWQAAo0iq.png)
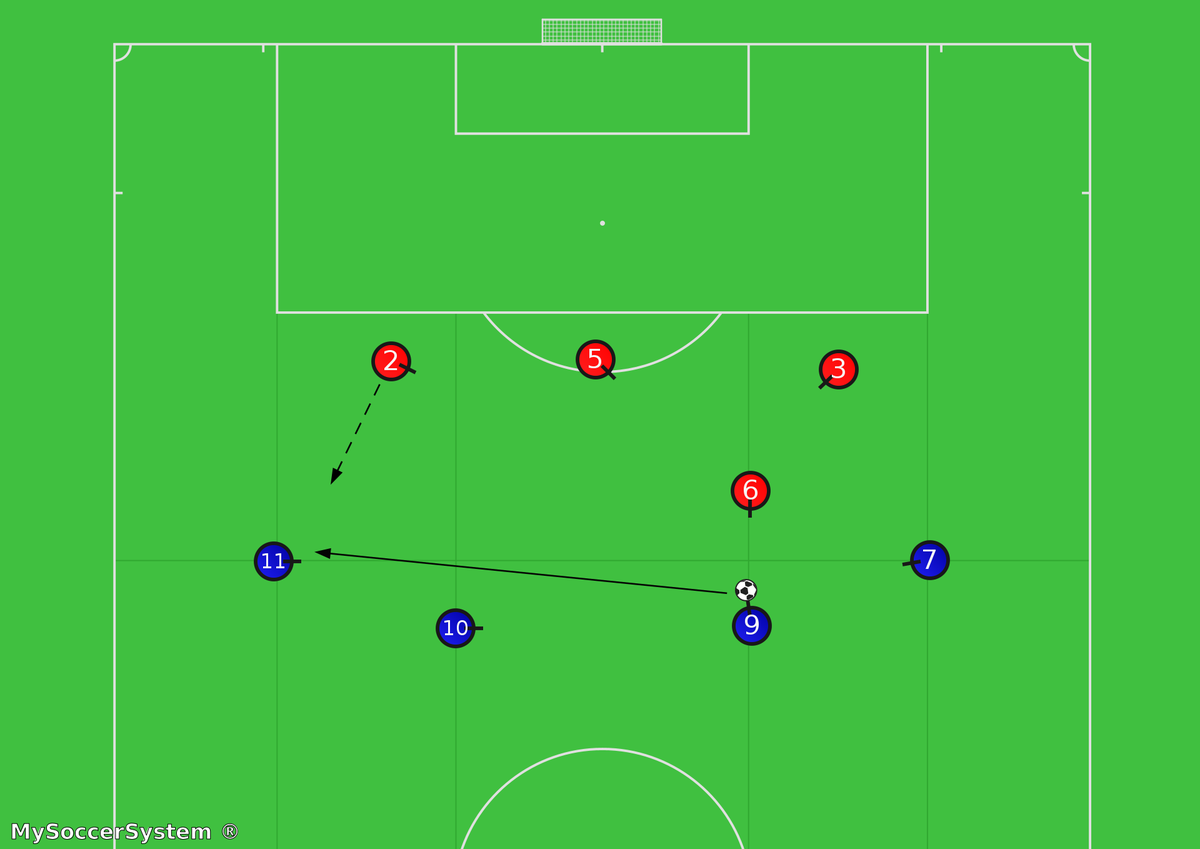
If Blue 9 receives the ball, Red 6 is the closest defender so we call him the 1st Defender – his job is to PRESSURE the player with the ball, he should move while the ball is moving and be ready to tackle if Blue 9 has a bad first touch.
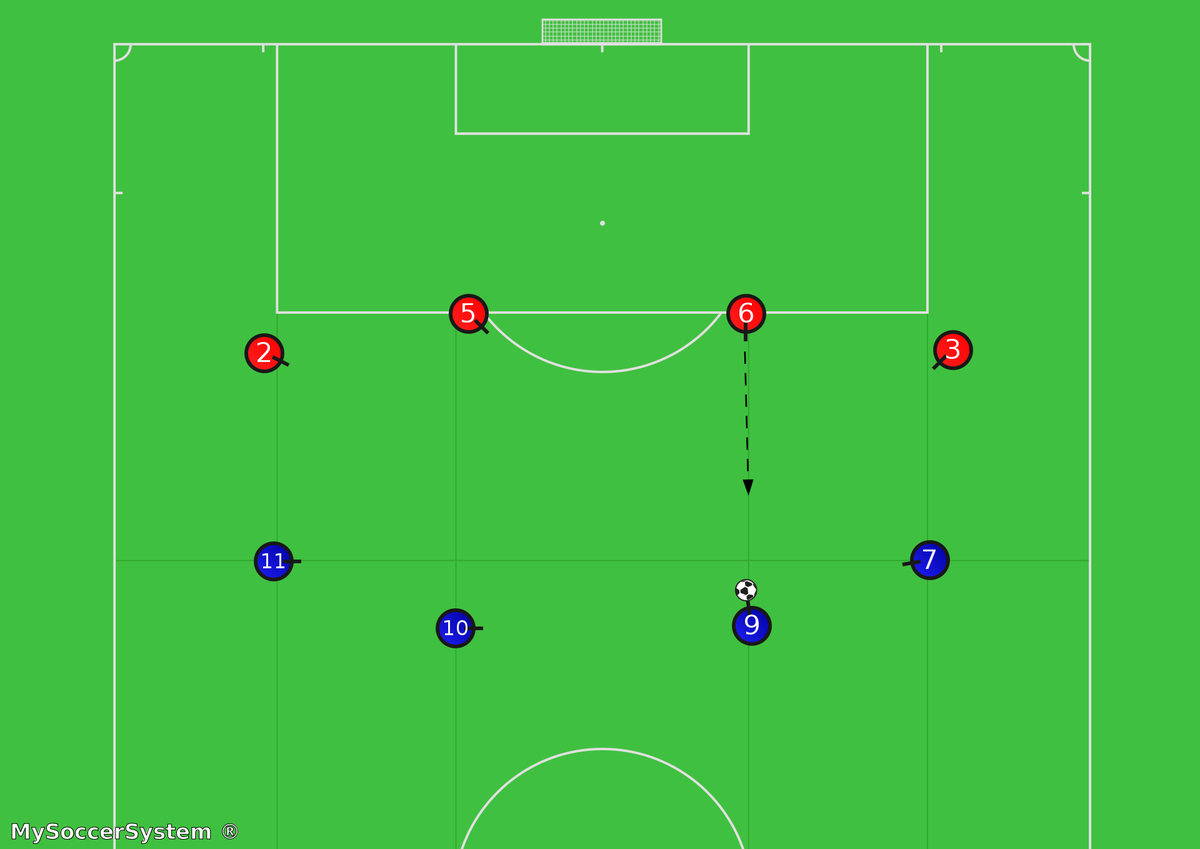
Red 6 should open his body to direct the attacker in one direction.
The 1st defender must not dive into the tackle! If he has support he can apply PRESSURE If not, he should try to DELAY the attacker from playing forward.
The 1st defender must not dive into the tackle! If he has support he can apply PRESSURE If not, he should try to DELAY the attacker from playing forward.
Red 5 & 3 are the next closest to the ball so we call them the 2nd Defenders – Their job is to SUPPORT the 1st Defender (Red 6) in covering positions, if the 1st defender is beaten they need to be ready to tackle Blue 9.
Red 5 & 3 must be ready to pressure any other attacker if the ball comes towards them and they become the 1
st Defender.
st Defender.
Red 2 now needs to BALANCE the defence by moving into a covering position beside Red 5. But Red 2 must also be ready to pressure Blue 11 if the ball is passed wide.
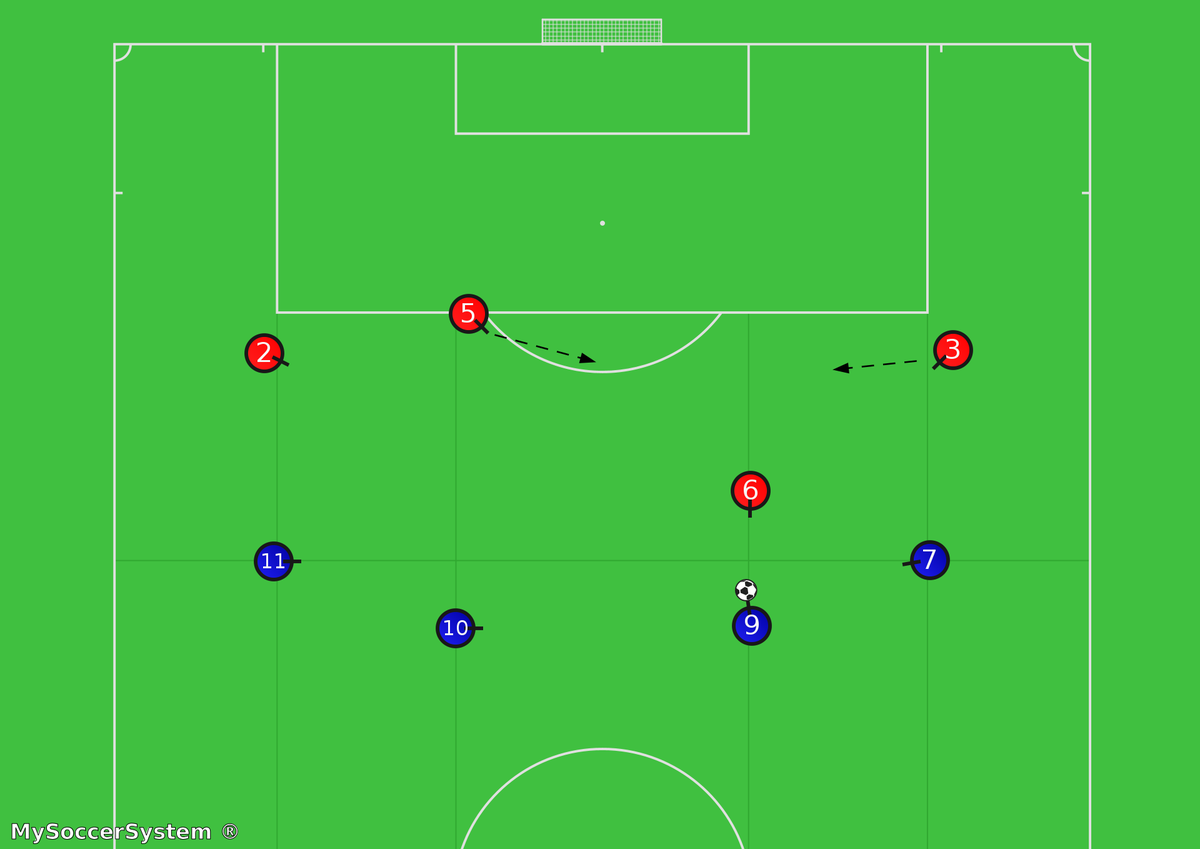
Now that all the Reds are in the correct defensive positions we can be sure that all the different attacking options are covered. At this stage, we can apply more pressure to the player with the ball to try
to win it back.
to win it back.
Blue 9 decides to pass the ball wide to Blue 11. Red 2 will become the 1st Defender (closest) and must PRESSURE Blue 11 – he has to get there as quickly as he can while the ball still is moving!
Red 2 must shape his body to direct the player one way.
Red 2 must shape his body to direct the player one way.
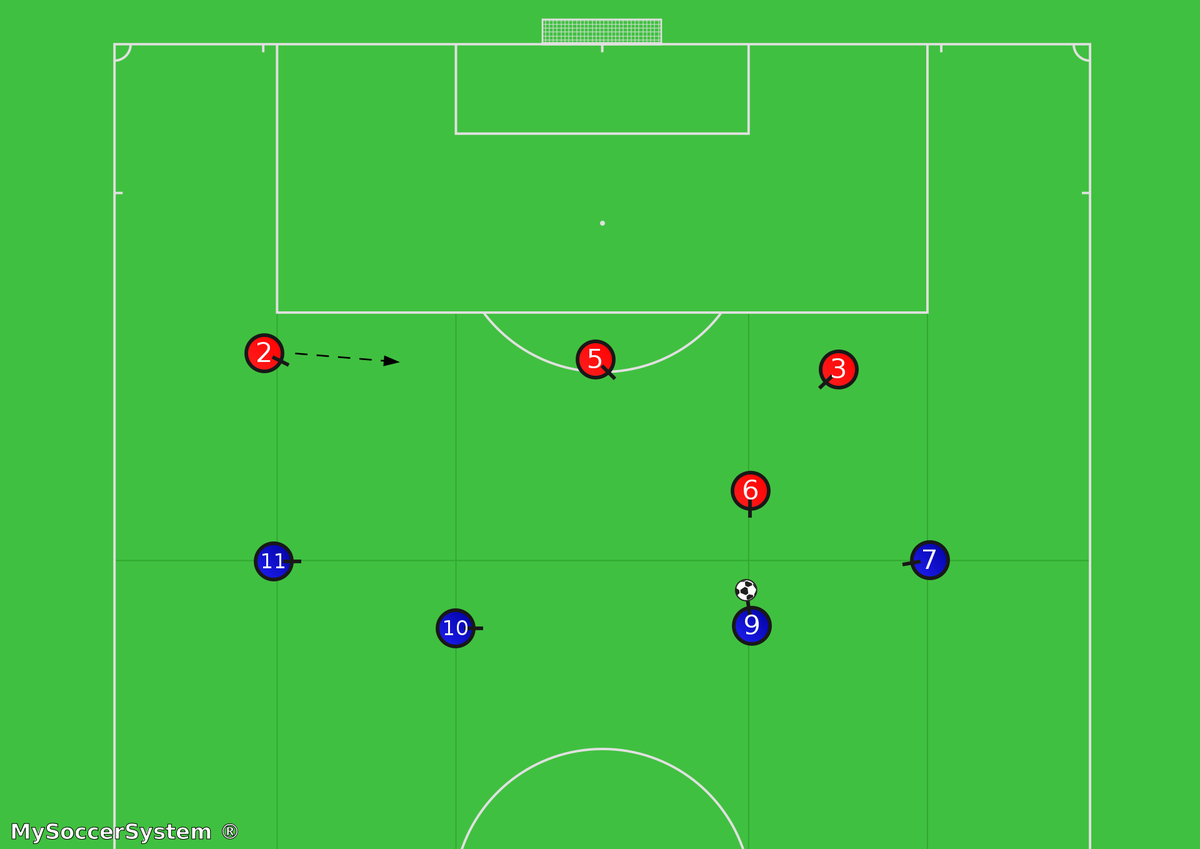
With Blue 11 now on the ball all the defenders must now move to new positions, Red 2 is the 1st defender and must PRESSURE Blue 11, Red 5 is the 2nd defender – he must SUPPORT Red 2 in case he is beaten, Red 3 provides BALANCE by supporting Red 6.
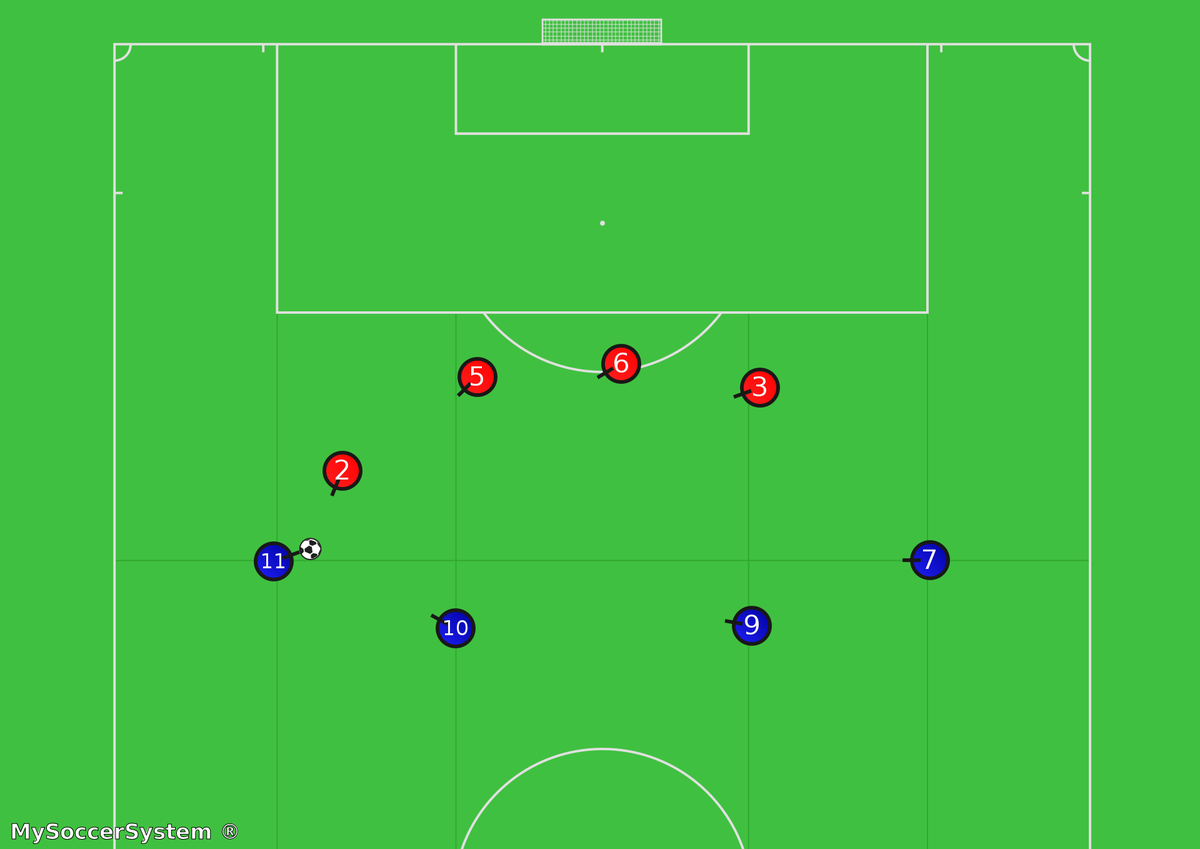
Red 3 must be ready to intercept the ball if it’s passed back across the pitch to Blue 7 but must also be ready to drop back to help his defence if the blues break through.
Red 3 must be in front of Red 6 so that Red 6 is able to watch for attackers running through into offside.
Red 3 must be in front of Red 6 so that Red 6 is able to watch for attackers running through into offside.
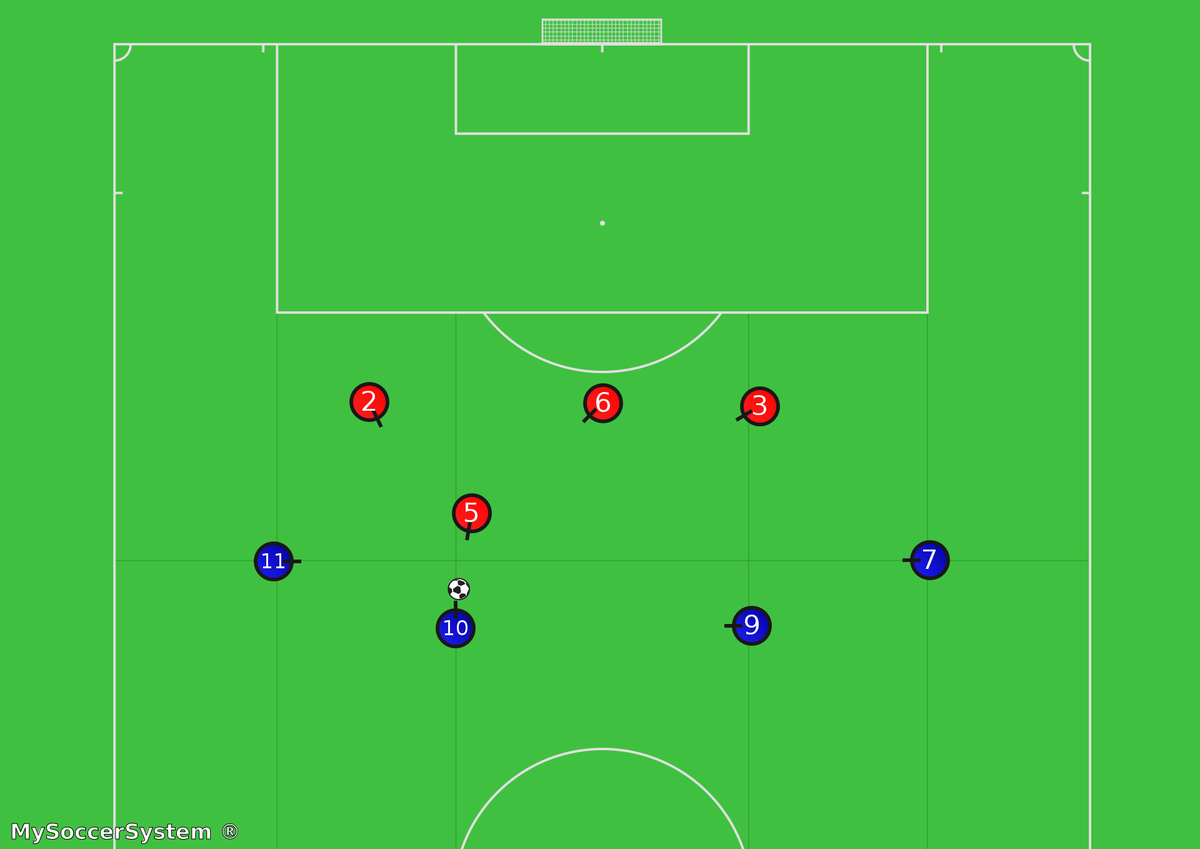
As the ball moves across the attack, the reds must change their positions, Red 5 is the 1st defender and must PRESSURE Blue 10, Red 2 & 6 are the 2nd defenders who must SUPPORT Red 5, Red 3 provides BALANCE by supporting Red 6.
Red 6 must still be ready to intercept the ball.
Red 6 must still be ready to intercept the ball.
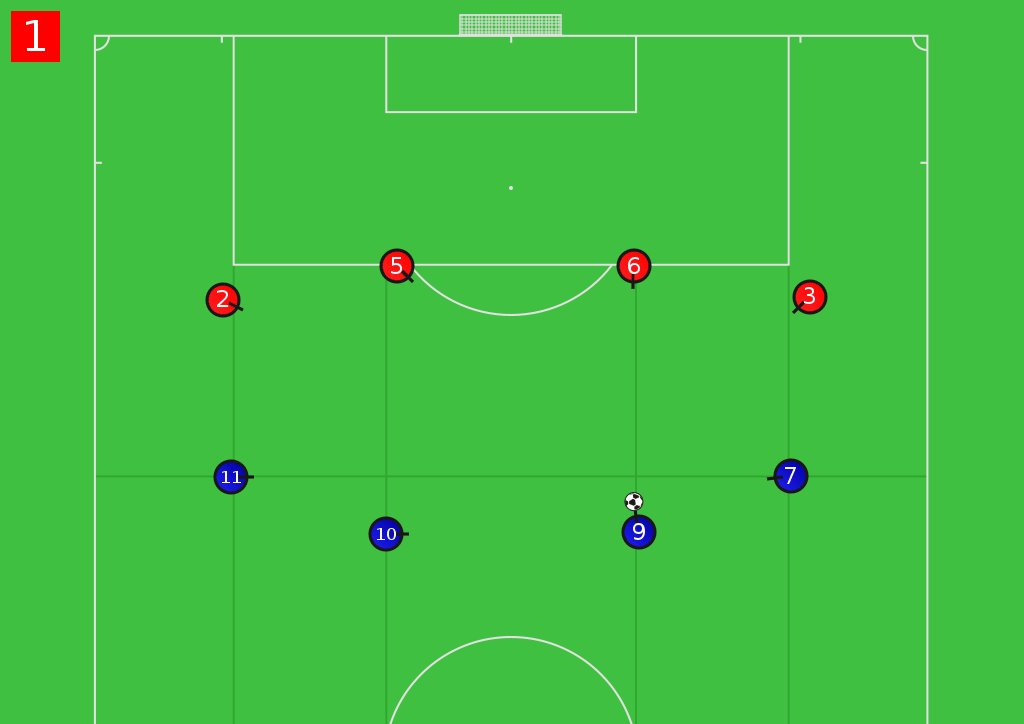
As the ball moves again, the reds must change their positions, Red6 is the 1st defender and must PRESSURE Blue 9, Red 3 & 5 are the 2nd defenders who must SUPPORT Red 6, Red 2 provides BALANCE by supporting Red 5. Red 2 must still be ready to intercept the ball.
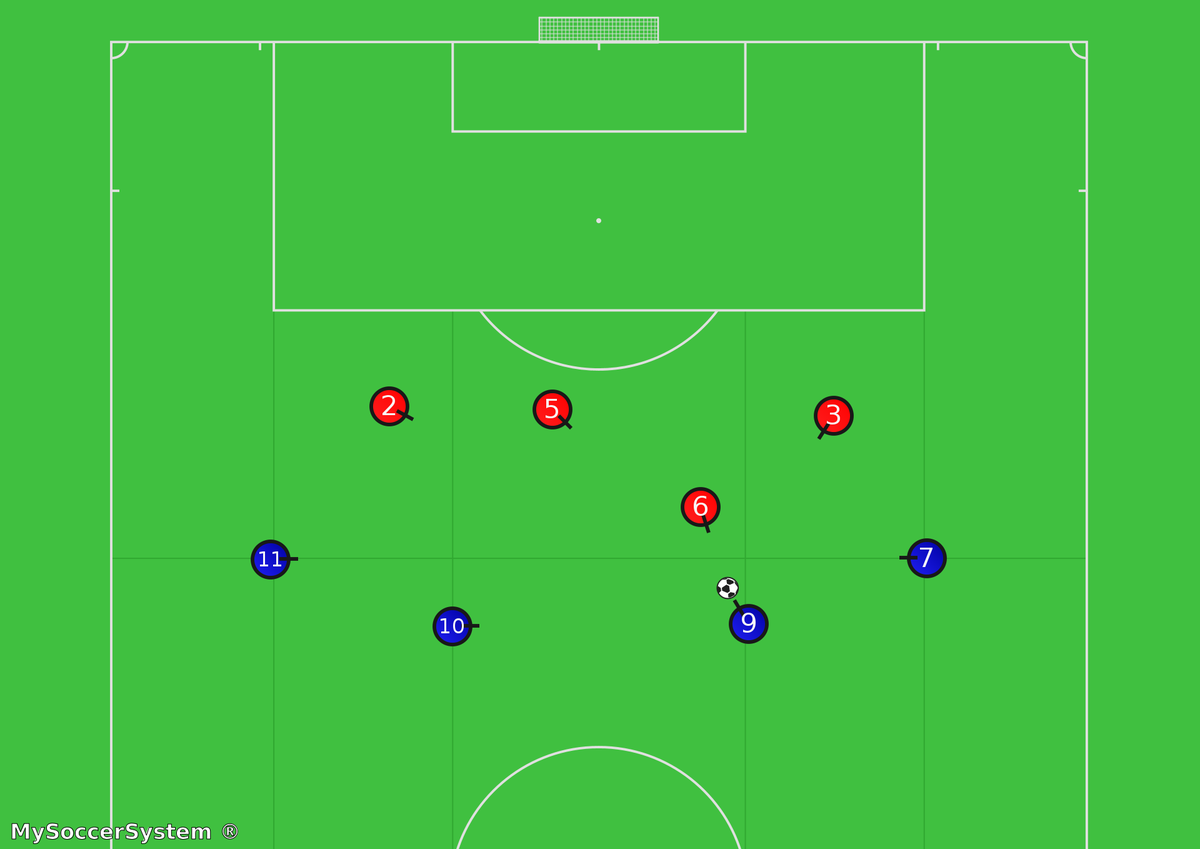
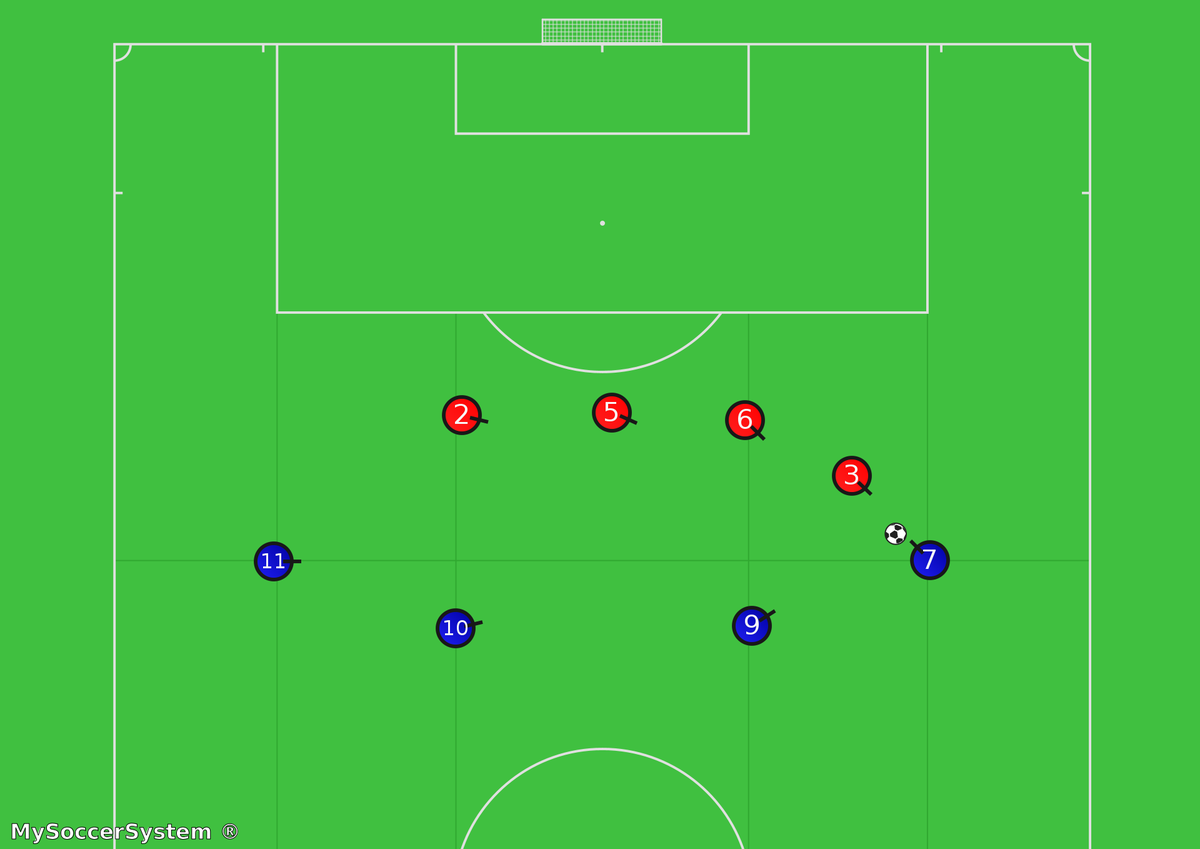
Now the ball is with Blue 11, Red 3 is the 1st defender and must PRESSURE Blue 7, Red 6 is the 2nd defender who must SUPPORT Red 3, Red 2 & 5 provide BALANCE by supporting Red 6. Red 2 must still be ready to intercept the ball if it’s passed back across the
pitch to Blue 11.
pitch to Blue 11.
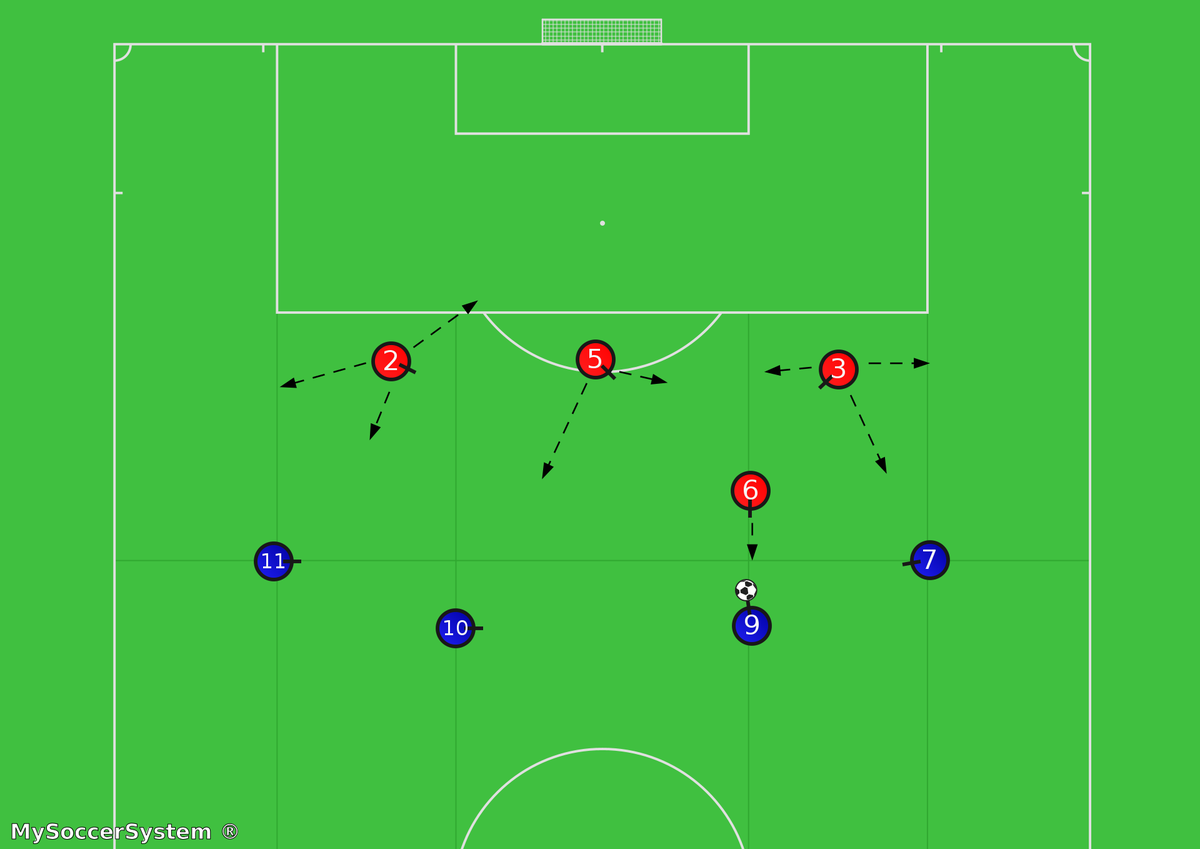
And now a nice and easy animation to summarize the whole concept.
Loading suggestions...