

How to create your own NFT collection from scratch with no coding experience:
+ how we created pixelated pastries (coming soon..)
+ how we created pixelated pastries (coming soon..)
Prerequisites:
- A great idea
- VS code
- NodeJS installed
- Images for each “layer” of your NFTs
A layer is a folder that contains individual images for each component of your NFT. (ie Background, Head, etc)
- A great idea
- VS code
- NodeJS installed
- Images for each “layer” of your NFTs
A layer is a folder that contains individual images for each component of your NFT. (ie Background, Head, etc)


In order to get started, open terminal on your computer.
Enter “npm install -g yarn”, and press enter.
This will download yarn, a package manager we will be using later.
Enter “npm install -g yarn”, and press enter.
This will download yarn, a package manager we will be using later.
If you plan to use PNGs for your collection, being the simpler file type, head to the Hashlips Art Engine repo, which can be found here:
github.com
github.com

Once there, copy the link of the url and open a new terminal window.
Enter “git clone <URL>”.
To name it, simply add text after the URL.
Ex. “git clone <URL> test”
Open this folder on visual studio.
Enter “git clone <URL>”.
To name it, simply add text after the URL.
Ex. “git clone <URL> test”
Open this folder on visual studio.
While this code may look intimidating, we will not be making many changes.
The majority of work will be done in the config.js file. This is located in the src folder.
Once in it, scroll down to the “layerConfigurations” code block
The majority of work will be done in the config.js file. This is located in the src folder.
Once in it, scroll down to the “layerConfigurations” code block

As specified in the repository’s read me, the code block under “layerConfigurations” is how we will be inputting our own custom images into the project.
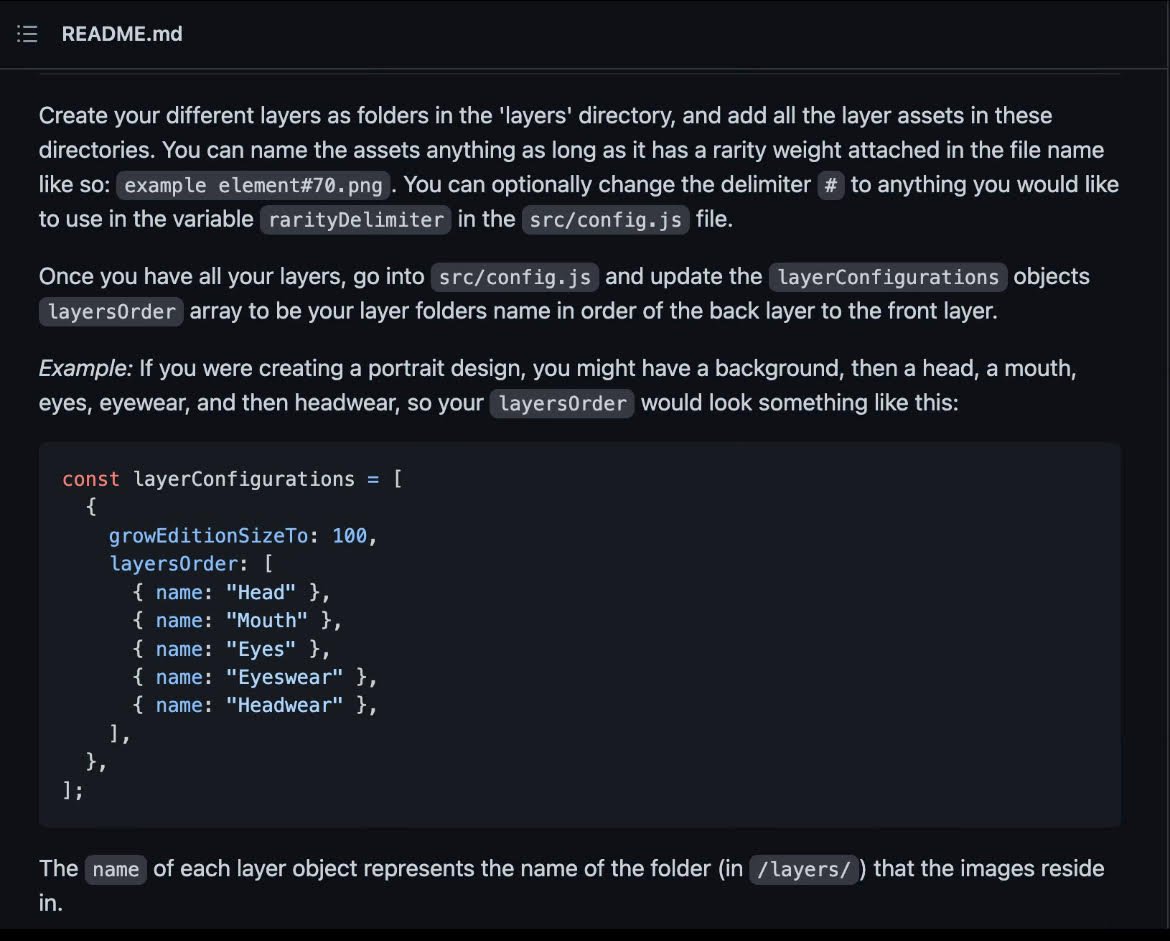
What this program does is grab images from the “Layers” folder that we added to and spits out random combinations of them to make a final product.
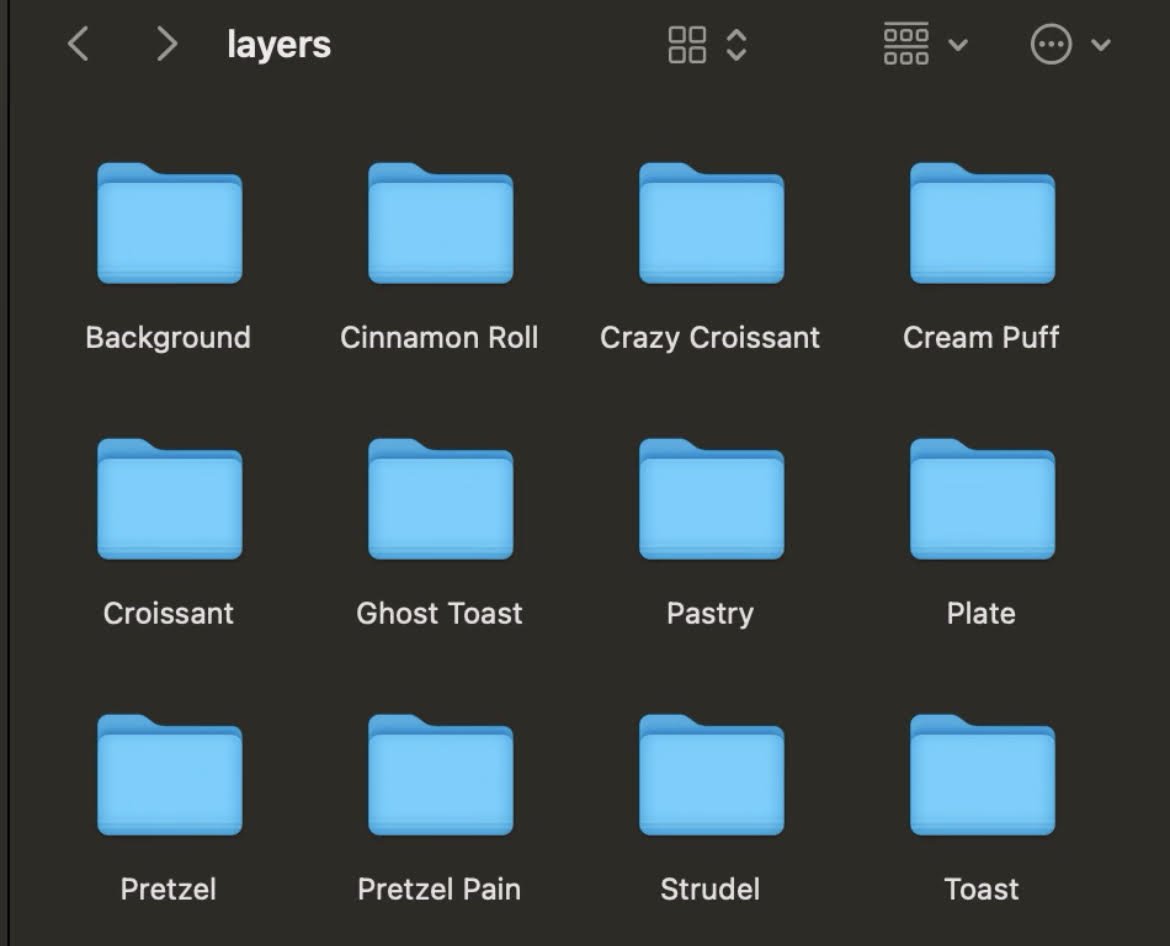
For the pastries, this is what our “Layers” folder would look like:
For the pastries, this is what our “Layers” folder would look like:

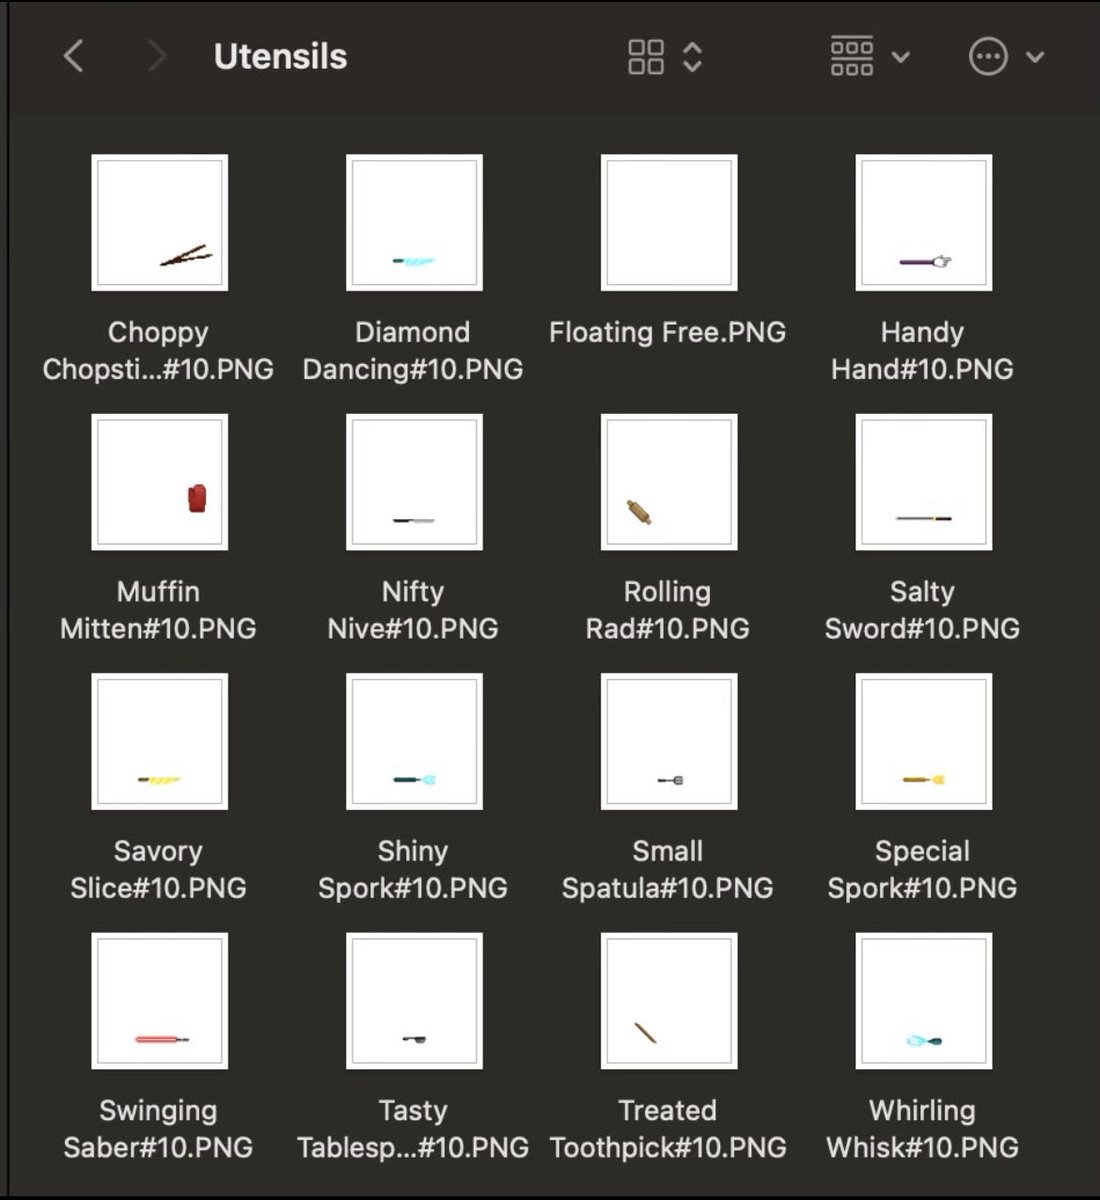
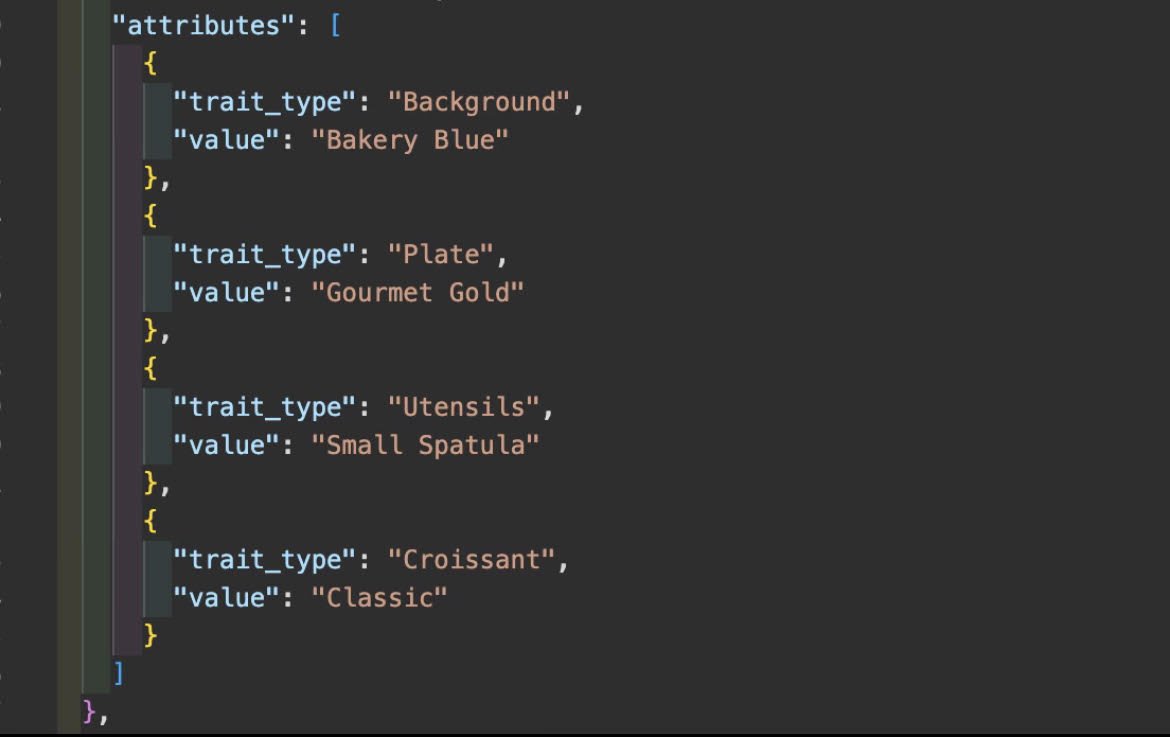
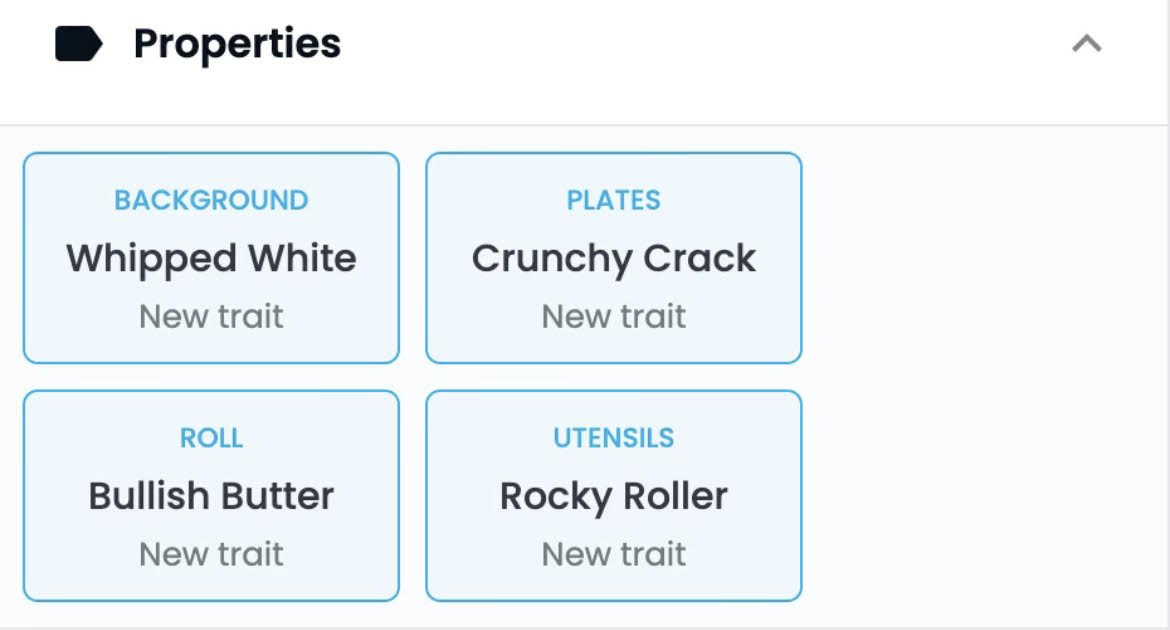
Within each of these folders, every possible image for a specific component of your NFT is laid out in PNG form.
The name of the folder is what pops up on OS as “Properties” for the NFT, while the file name will be the trait type.
Hence, the naming of these is important.
The name of the folder is what pops up on OS as “Properties” for the NFT, while the file name will be the trait type.
Hence, the naming of these is important.
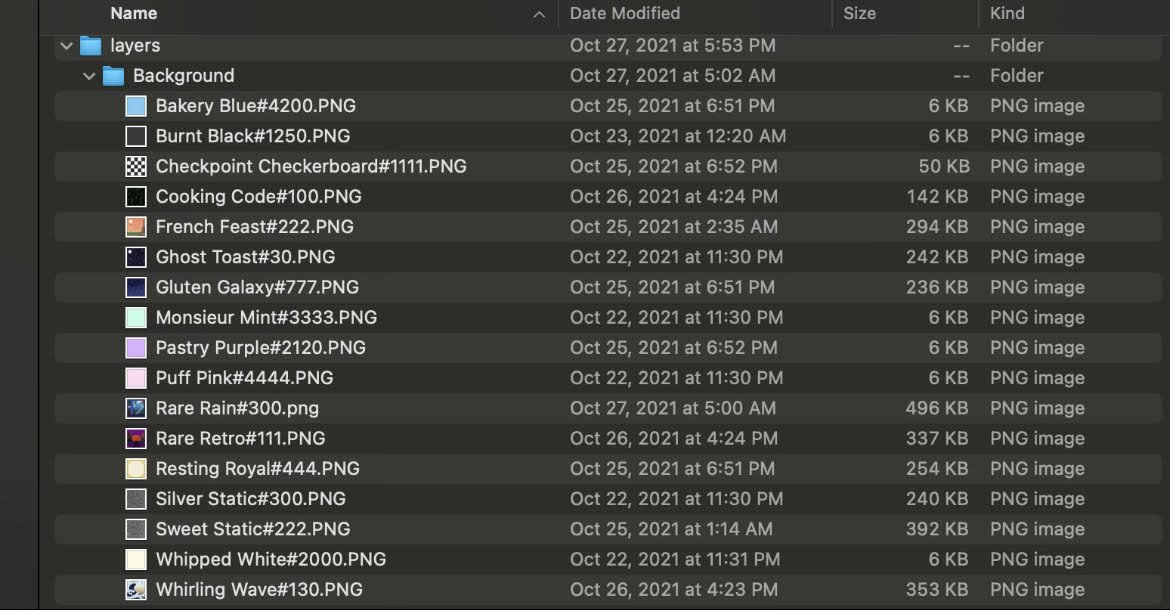
Additionally, you may have noticed the “#” at the end of our file names.
This allows you to customize the rarities for your NFTs.
The way rarity can be determined is by adding up the “weights” for a specific folder, then dividing the value of one of them by that number.
This allows you to customize the rarities for your NFTs.
The way rarity can be determined is by adding up the “weights” for a specific folder, then dividing the value of one of them by that number.
For example, the total value of all the weights inside of my “Background” folder is 21000.
If I wanted to calculate the rarity for “Bakery Blue”, I would take 4200 and divide it by 21000.
This makes it seek 20% rarity.
If I wanted to calculate the rarity for “Bakery Blue”, I would take 4200 and divide it by 21000.
This makes it seek 20% rarity.
Once you have all the images and Layers ready + named, it’s time to jump into the code.
Take the new folders, and replace them with the existing ones inside “Layers” from the repo.
It should look something like this, albeit different depending on your collection.
Take the new folders, and replace them with the existing ones inside “Layers” from the repo.
It should look something like this, albeit different depending on your collection.
Now, head back to the “layerConfigurations” block inside of src/config.js that we discussed earlier.
This is where you will change the names inside to match the names of your Layers.
**After every change to the code, you must save the changes for them to take effect**
This is where you will change the names inside to match the names of your Layers.
**After every change to the code, you must save the changes for them to take effect**
The names need to be in the order you want them to appear from front to back
Here’s what mine looks like:
I have placed “Background” in front of “Plate.”
This means the background will be below all other layers after it.
Here’s what mine looks like:
I have placed “Background” in front of “Plate.”
This means the background will be below all other layers after it.
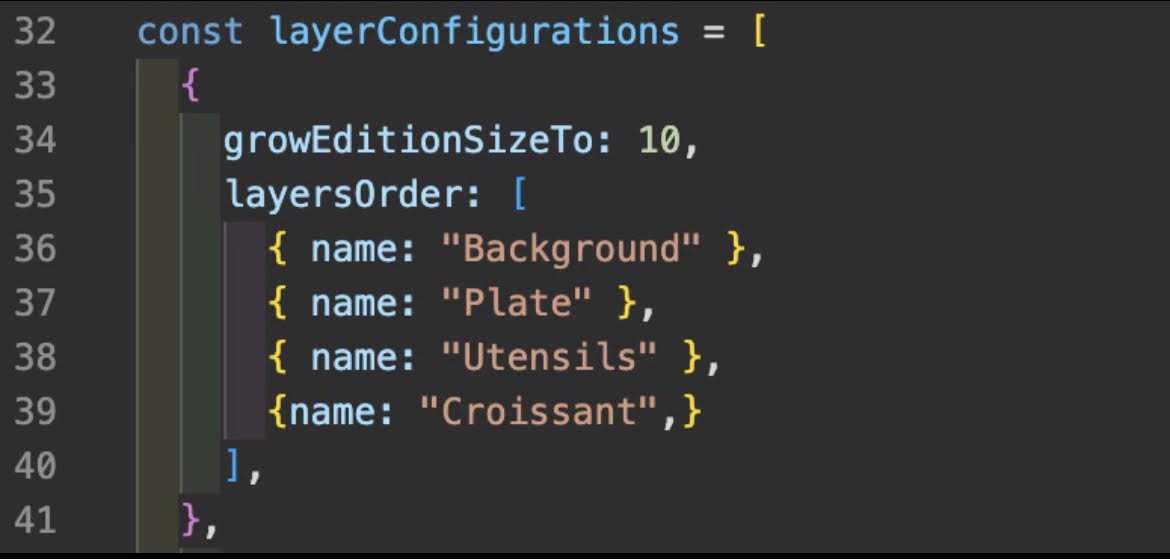
Notice that I have set the “growEditionSizeTo” to 10.
This block of code will generate 10 NFTs by grabbing images from the folders I specify.
Starting with Background, it will pick a random image inside the folder, then move to plate and so on.
This block of code will generate 10 NFTs by grabbing images from the folders I specify.
Starting with Background, it will pick a random image inside the folder, then move to plate and so on.
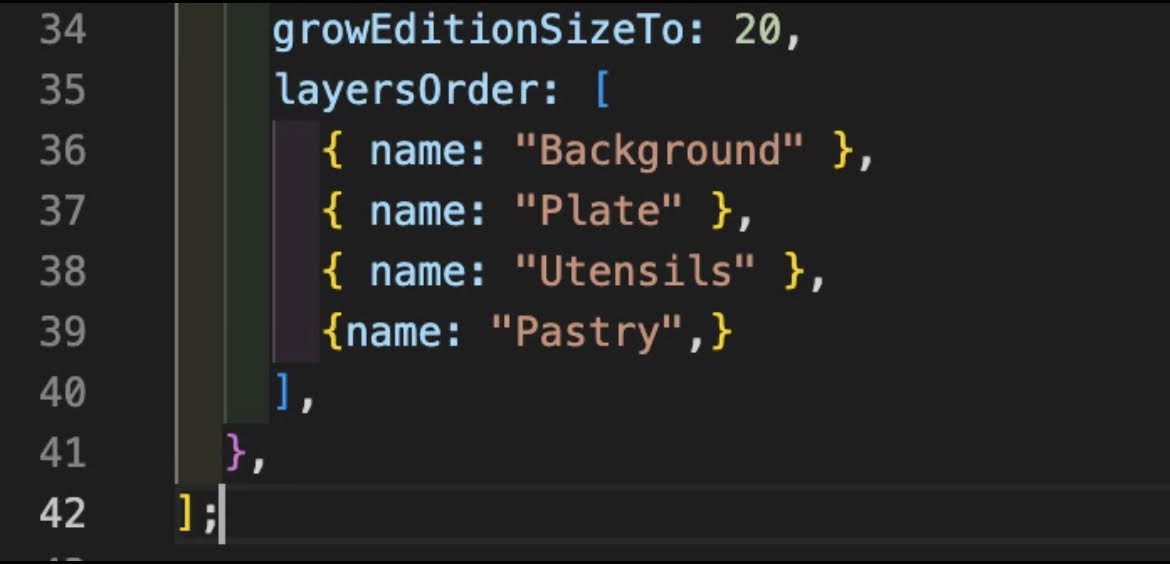
If you wanted to generate NFTs other than croissant, you would do it like so:
I set growEditionSizeTo 20 on this one.
This will add 10 more NFTs to the 10 that I already have, making 20 total NFTs.
File save after editing.
I set growEditionSizeTo 20 on this one.
This will add 10 more NFTs to the 10 that I already have, making 20 total NFTs.
File save after editing.
Now it’s time to generate.
Open a new terminal using the project folder inside of VS code.
Type “Yarn” and hit enter.
This will install the project’s dependencies and make it ready for production.
After this, type “Yarn build” and hit enter.
Open a new terminal using the project folder inside of VS code.
Type “Yarn” and hit enter.
This will install the project’s dependencies and make it ready for production.
After this, type “Yarn build” and hit enter.
The program will create an important folder called “Build” which contains folders with each NFT’s image and json content.
If you want the NFTs to be shuffled in order like the picture below, switch “false” to “true” under the layerConfigurations block.
If you want the NFTs to be shuffled in order like the picture below, switch “false” to “true” under the layerConfigurations block.
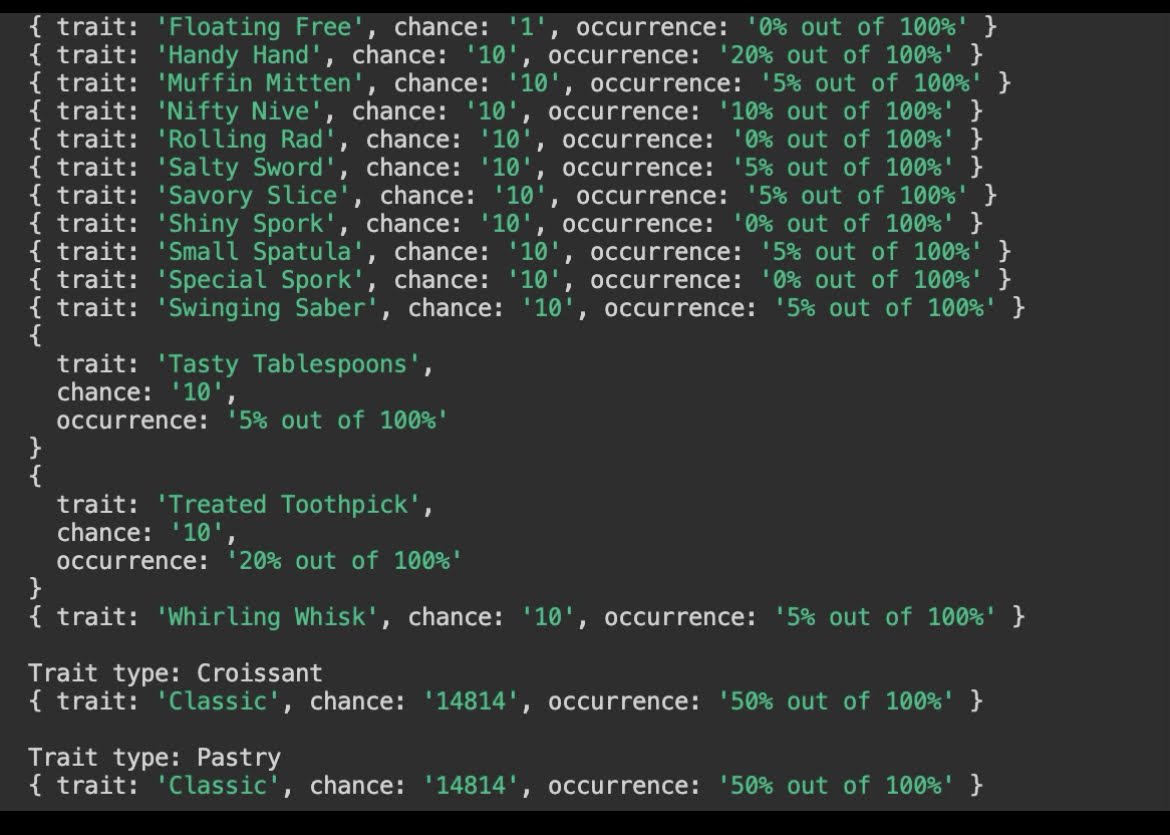
If you’re happy with the build you have, head back into your terminal and type “Node utils/rarity.js”
This will display the rarity percentages for each trait in your collection.
You can configure these to your liking.
This will display the rarity percentages for each trait in your collection.
You can configure these to your liking.
Now for some housekeeping.
Scroll to the top of your config.js.
Under “Metadata for Ethereum”, change namePrefix to the name you want for the title of your collection.
For description, type a brief description of it
These entries are what will be displayed on NFT marketplaces
Scroll to the top of your config.js.
Under “Metadata for Ethereum”, change namePrefix to the name you want for the title of your collection.
For description, type a brief description of it
These entries are what will be displayed on NFT marketplaces
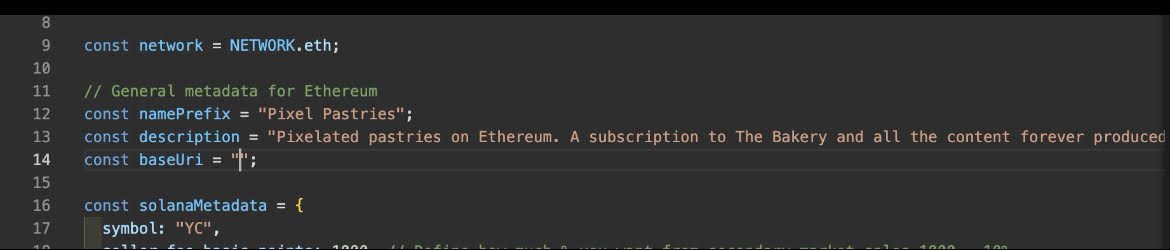
You don’t have anything to put into baseURI, which is what we’ll be doing now.
Head to pinata.cloud and register an account.
This is where we will be hosting the images and json files for our NFTs.
Head to pinata.cloud and register an account.
This is where we will be hosting the images and json files for our NFTs.

Click the blue “Upload” button, and navigate to your project folder, open build, and submit the images folder.
You’ll be given a “CID”, a long string of seemingly random numbers, which you need to copy to your clipboard.
You’ll be given a “CID”, a long string of seemingly random numbers, which you need to copy to your clipboard.
Head back into VS code under the Metadata section you were just at.
For baseURI, enter “ipfs://<YOUR CID HERE>”
File save, then open a new terminal and enter: “Node utils/update_info.js”
For baseURI, enter “ipfs://<YOUR CID HERE>”
File save, then open a new terminal and enter: “Node utils/update_info.js”
This makes every NFTs metadata point to the correct CID of where the images are hosted.
File save, then repeat the same process we did uploading the images folder to pinata, but doing the json folder instead.
File save, then repeat the same process we did uploading the images folder to pinata, but doing the json folder instead.

Ensure that the files you are uploading here are titled “1”, “2”, etc, rather than “1.json”, “2.json” and so on.
Keep this tab open, because we will have to reference the new CID in a bit.
Now to the Ethereum side of things.
For the sake of simplicity, we will use OpenZeppelin’s ERC721PresetMinterPauserAutoId contract.
Head to the GitHub page for it, copy the URL, & open a new tab
Now to the Ethereum side of things.
For the sake of simplicity, we will use OpenZeppelin’s ERC721PresetMinterPauserAutoId contract.
Head to the GitHub page for it, copy the URL, & open a new tab

Type in your search bar “Remix.Ethereum.org remix.ethereum.org” and click the blue icon in the top left.
Next, click the GitHub button near the bottom of the page.
Here is where we will paste the URL link we just copied.
Next, click the GitHub button near the bottom of the page.
Here is where we will paste the URL link we just copied.
On the left, the files for the new import will be displayed.
We want ERC721PresetMinterPauserAutoId.sol
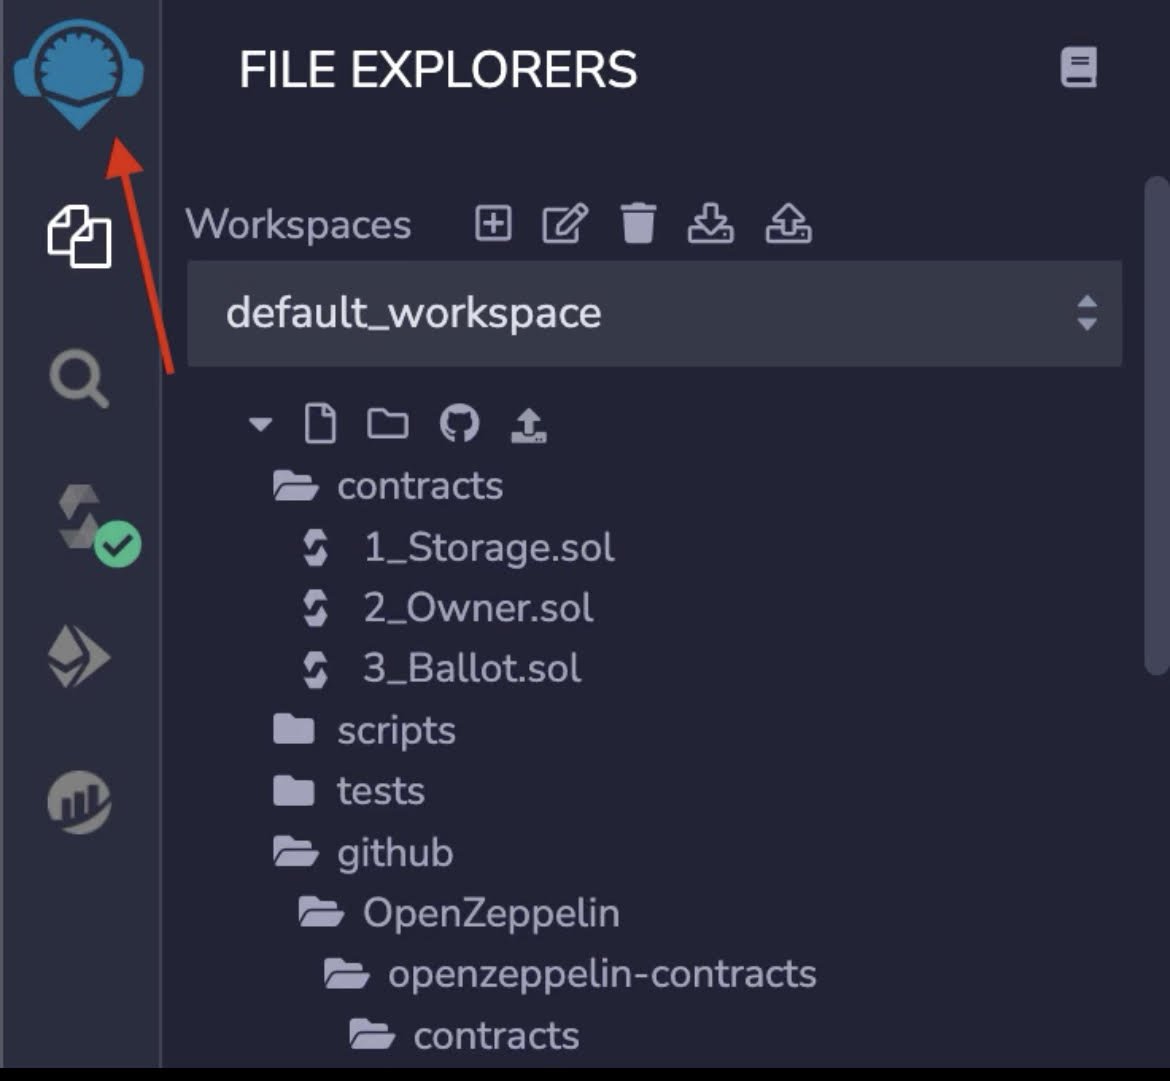
With that file open, click the “S” looking icon displayed on the left.
Then compile the file.
This will allow us to interact with it
We want ERC721PresetMinterPauserAutoId.sol
With that file open, click the “S” looking icon displayed on the left.
Then compile the file.
This will allow us to interact with it
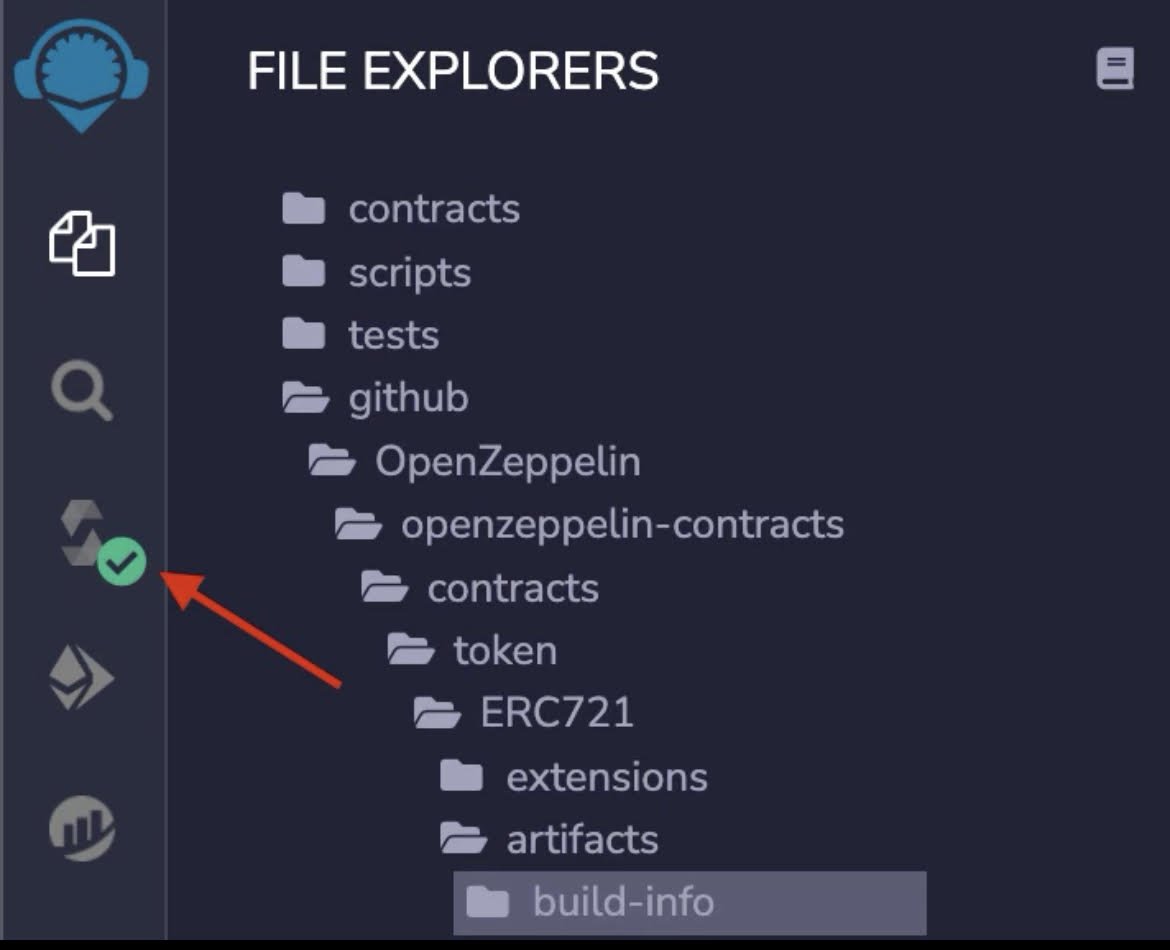
If you’re getting errors here, be sure to have every import included.
At the bottom, it will display errors that tell you which ones are missing.
All of which can be found on OpenZeppelins GitHub, and are imported using the same method described above.
At the bottom, it will display errors that tell you which ones are missing.
All of which can be found on OpenZeppelins GitHub, and are imported using the same method described above.
Click the white icon below the one you’re on, and at the top switch environment to “Injected Web3”.
You will be prompted in MM to connect your wallet.
After connecting, click the drop down arrow under “Contract”.
You want to choose ERC721PresetMinterPauserAutoId for this.
You will be prompted in MM to connect your wallet.
After connecting, click the drop down arrow under “Contract”.
You want to choose ERC721PresetMinterPauserAutoId for this.

After selecting ERC721PresetMinterPauserAutoId, we can deploy the contract
For NAME_, enter the name for your collection.
For SYMBOL_, create the ticker for the collection.
For BASETOKENURI, enter “ipfs://(CID FOR YOUR JSON FOLDER)/“
The backslash at the end is very important
For NAME_, enter the name for your collection.
For SYMBOL_, create the ticker for the collection.
For BASETOKENURI, enter “ipfs://(CID FOR YOUR JSON FOLDER)/“
The backslash at the end is very important

Once you enter these, hit “transact”, and follow through with the prompts in MM.
When it deploys, go back to Remix.
Click the plug icon displayed in the bottom left, and search for “Etherscan - Contract Verification”.
It will make a new icon for it on the left
When it deploys, go back to Remix.
Click the plug icon displayed in the bottom left, and search for “Etherscan - Contract Verification”.
It will make a new icon for it on the left
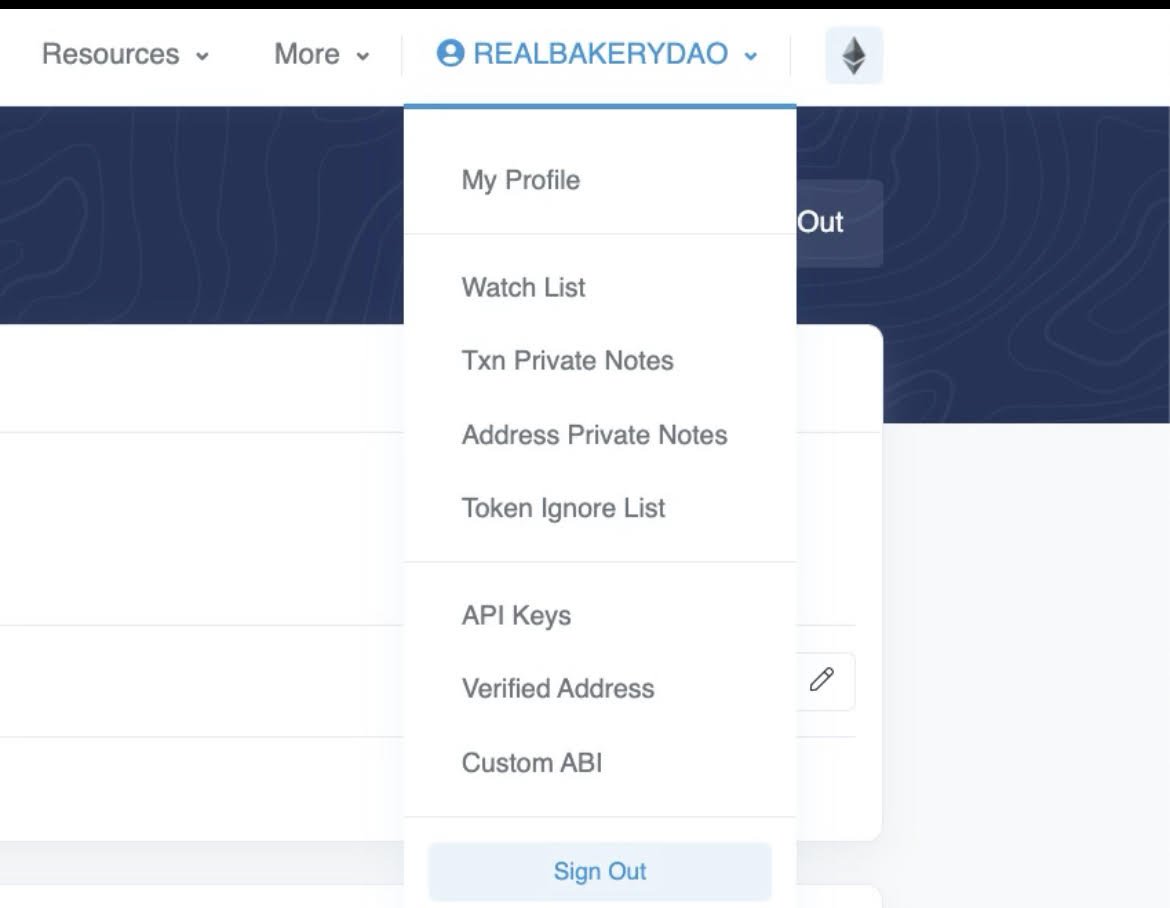
They will ask you to enter your API key, which can be found by logging into your account on Etherscan.
Hover over your profile, then click API keys near the bottom.
Now copy the entire string for “Token”
Head back to Remix, and enter that for the API key
Hover over your profile, then click API keys near the bottom.
Now copy the entire string for “Token”
Head back to Remix, and enter that for the API key
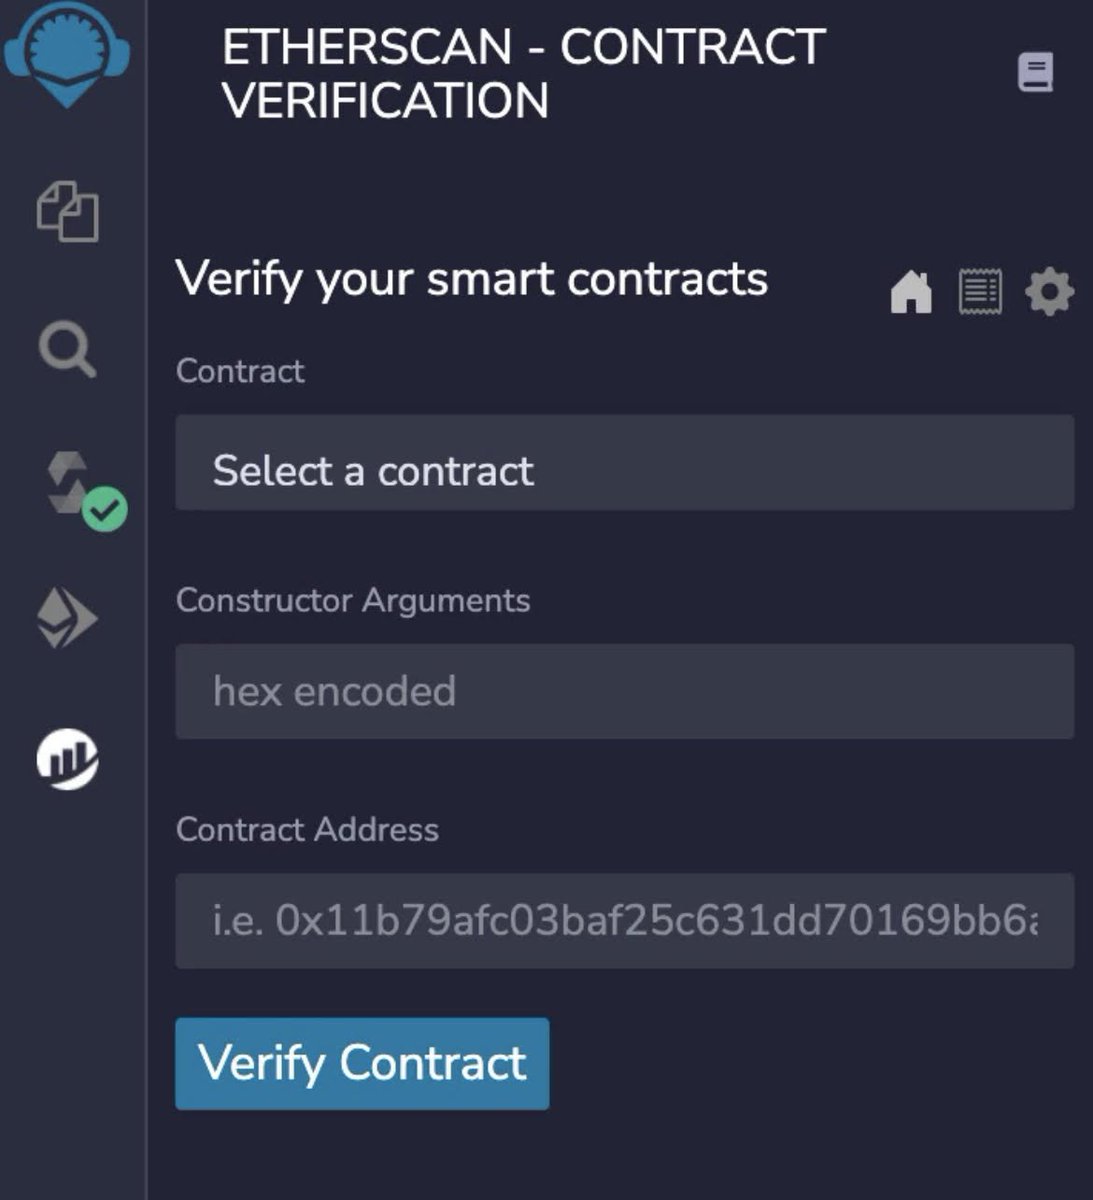
You will see a screen like this:
Choose ERC721PresetMinterPauserAutoId for contract.
The constructor arguments will require a bit of work on your part
Choose ERC721PresetMinterPauserAutoId for contract.
The constructor arguments will require a bit of work on your part
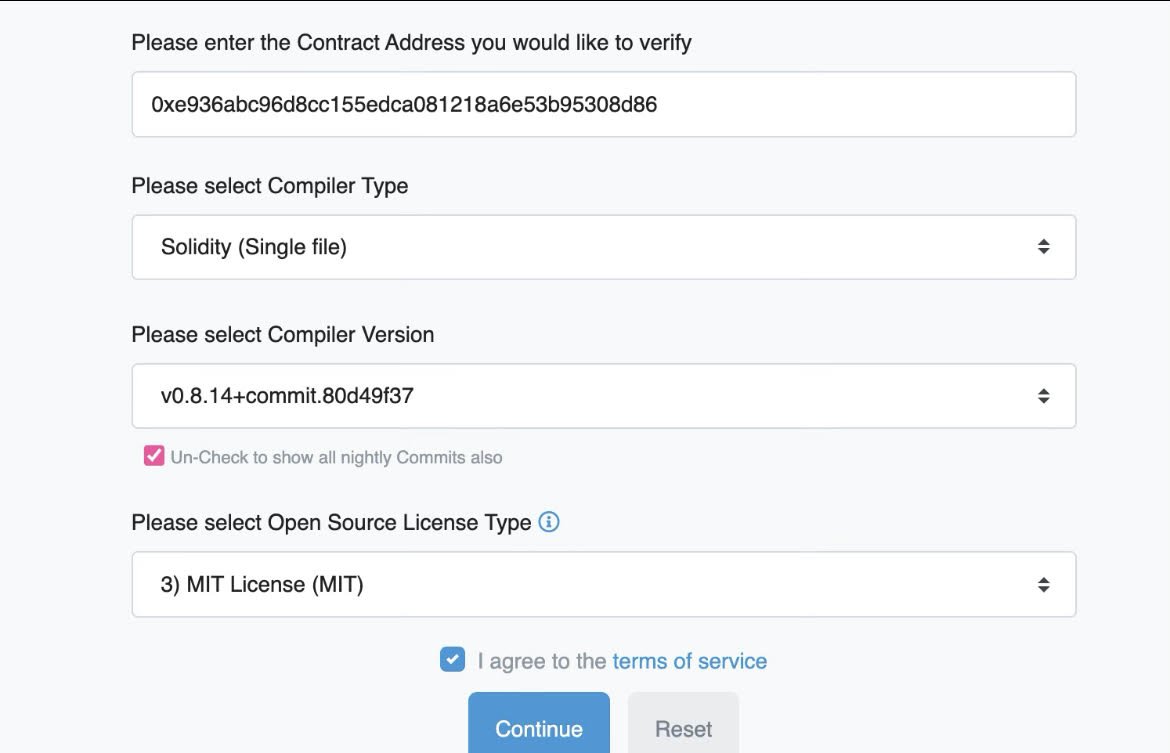
To find the constructor arguments, head to the Etherscan page for you contract.
Hit “contract” in the middle, then click “verify and publish”.
On this page, you can select arbitrary inputs for everything other than the contract address
We just need to get to the next page
Hit “contract” in the middle, then click “verify and publish”.
On this page, you can select arbitrary inputs for everything other than the contract address
We just need to get to the next page
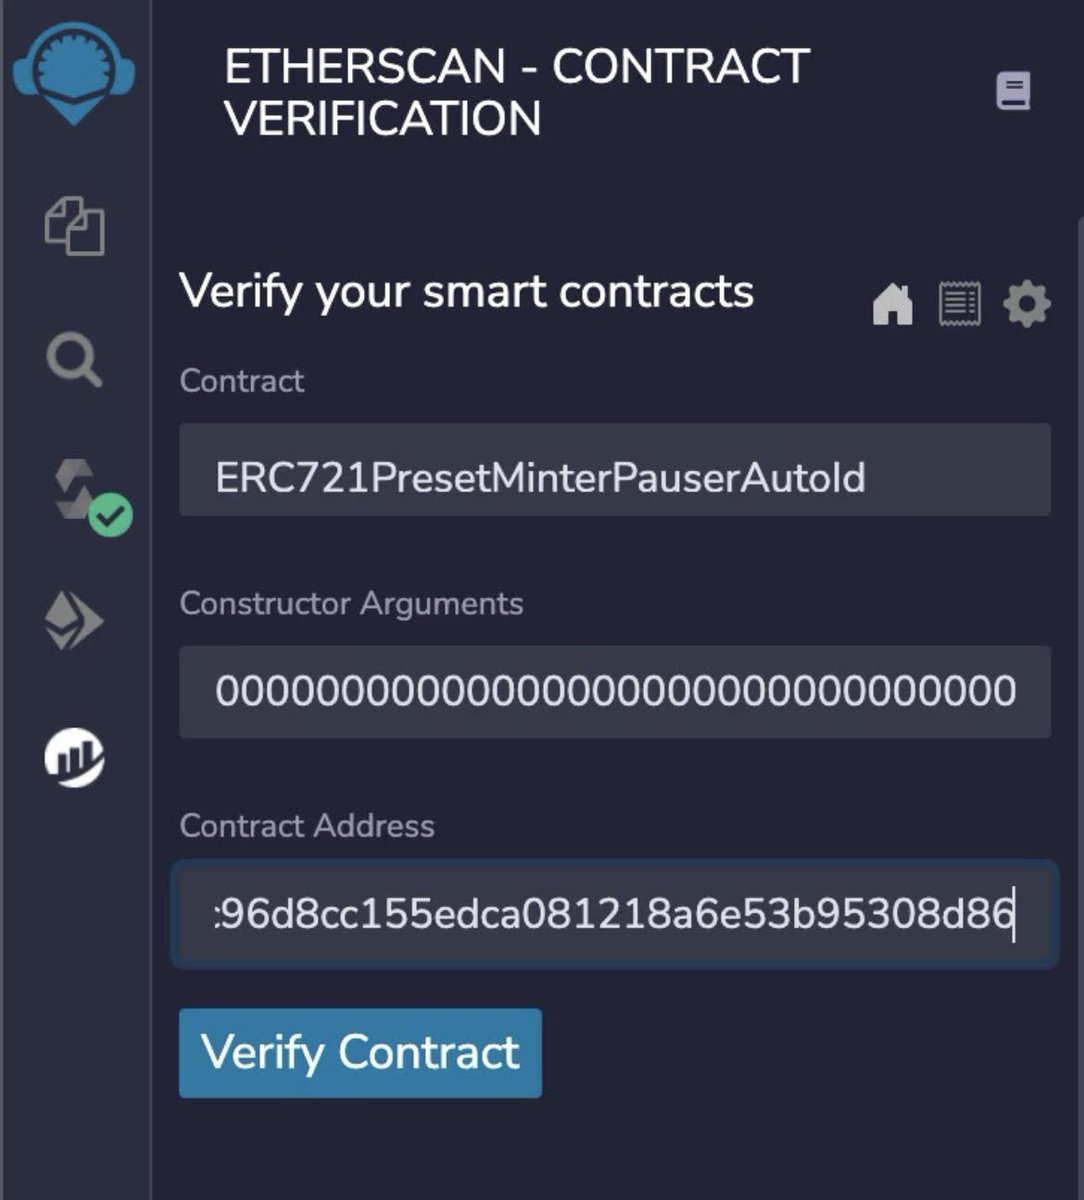
Once you reach the next page, find the second column labeled “Constructor arguments”
Copy everything in this field, then go back to remix and paste it for the constructor arguments.
Next, enter the contract address and click “Verify Contract”
Copy everything in this field, then go back to remix and paste it for the constructor arguments.
Next, enter the contract address and click “Verify Contract”
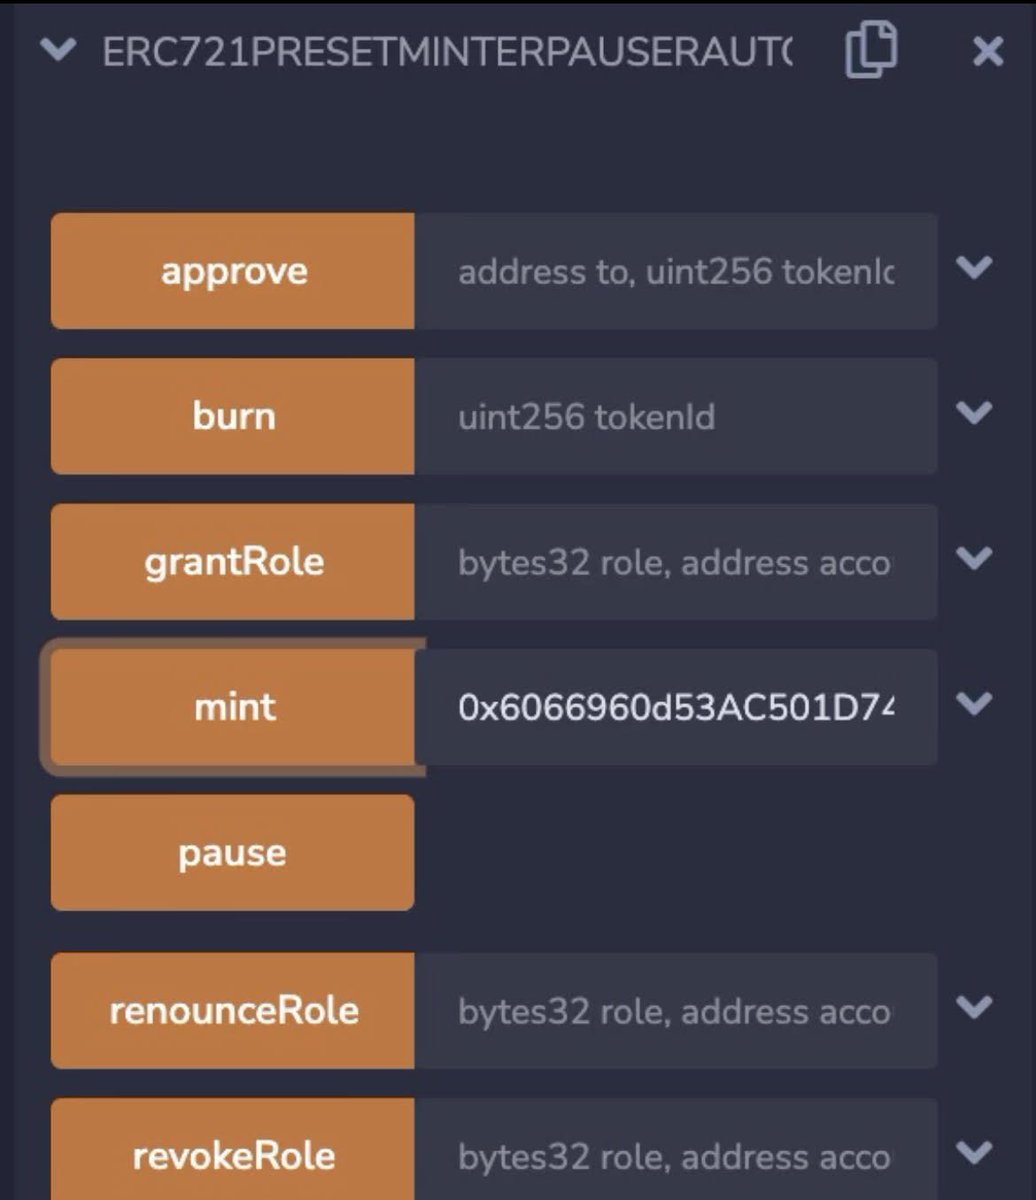
Time to mint some tokens.
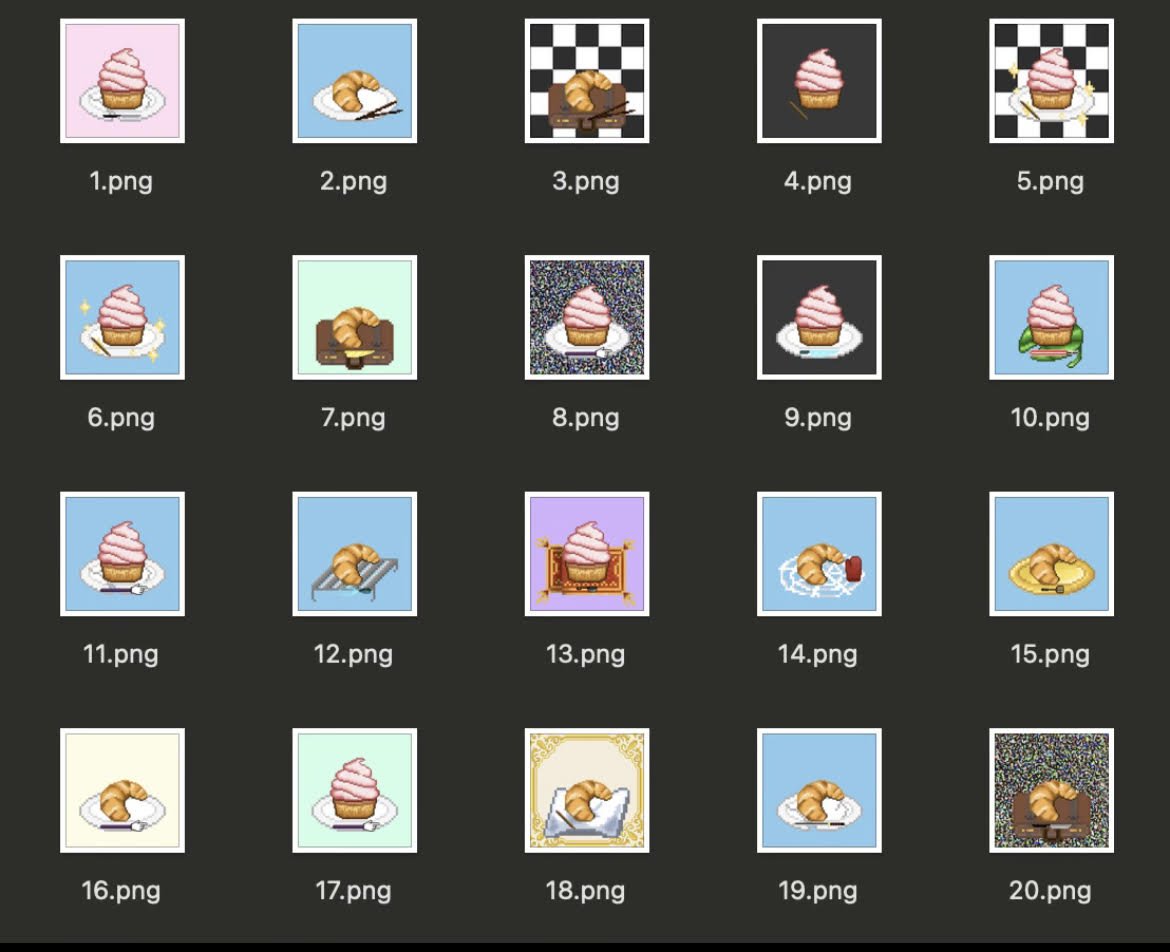
While this typically happens during a sale, I will be minting all 20 of my NFTs.
This can be done by clicking the drop down arrow for the deployed contract on remix.
Find “Mint”, then paste your address in the field and make the transaction.
While this typically happens during a sale, I will be minting all 20 of my NFTs.
This can be done by clicking the drop down arrow for the deployed contract on remix.
Find “Mint”, then paste your address in the field and make the transaction.
Once minted, they will be viewable on OpenSea if done successfully.
Are you still here? Congratulations, now it is time to get a bit more tasty…
PNGs are cool & all, but they are static once deployed. This is kind of boring.
PNGs are cool & all, but they are static once deployed. This is kind of boring.
To our luck, SVGs are very small file types which can be animated, or even change their display dynamically on-chain.
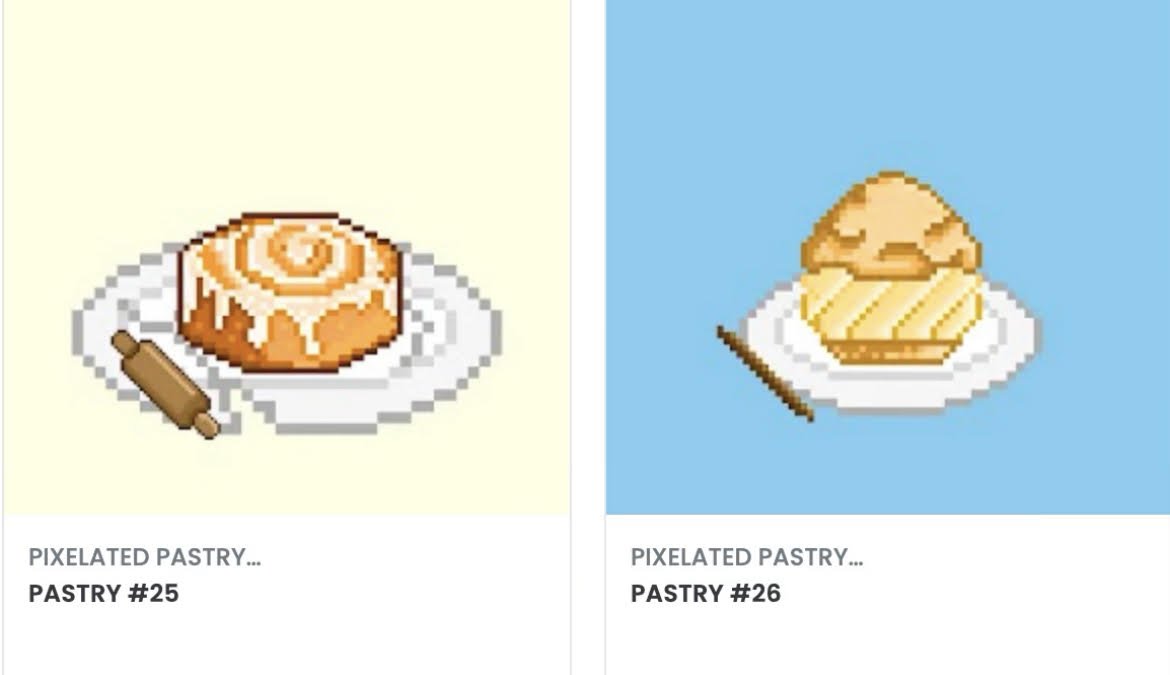
For the .@thebakerydao, we developed SVG NFTs with the Pastry NFT memberships.
For the .@thebakerydao, we developed SVG NFTs with the Pastry NFT memberships.
@theBakeryDAO With a few lines of code, these cute little pastries change display based on their subscription status.
Green and moldy if they are expired, pink if they are valid!
Green and moldy if they are expired, pink if they are valid!
@theBakeryDAO In the future, these mechanics will be used to let users “level up” from their contributions to the Bakery.
This is all made possible with the use of hooks. Hooks are external contracts that are used to alter the behavior of the pastry NFTs or trigger actions in other contracts.
This is all made possible with the use of hooks. Hooks are external contracts that are used to alter the behavior of the pastry NFTs or trigger actions in other contracts.
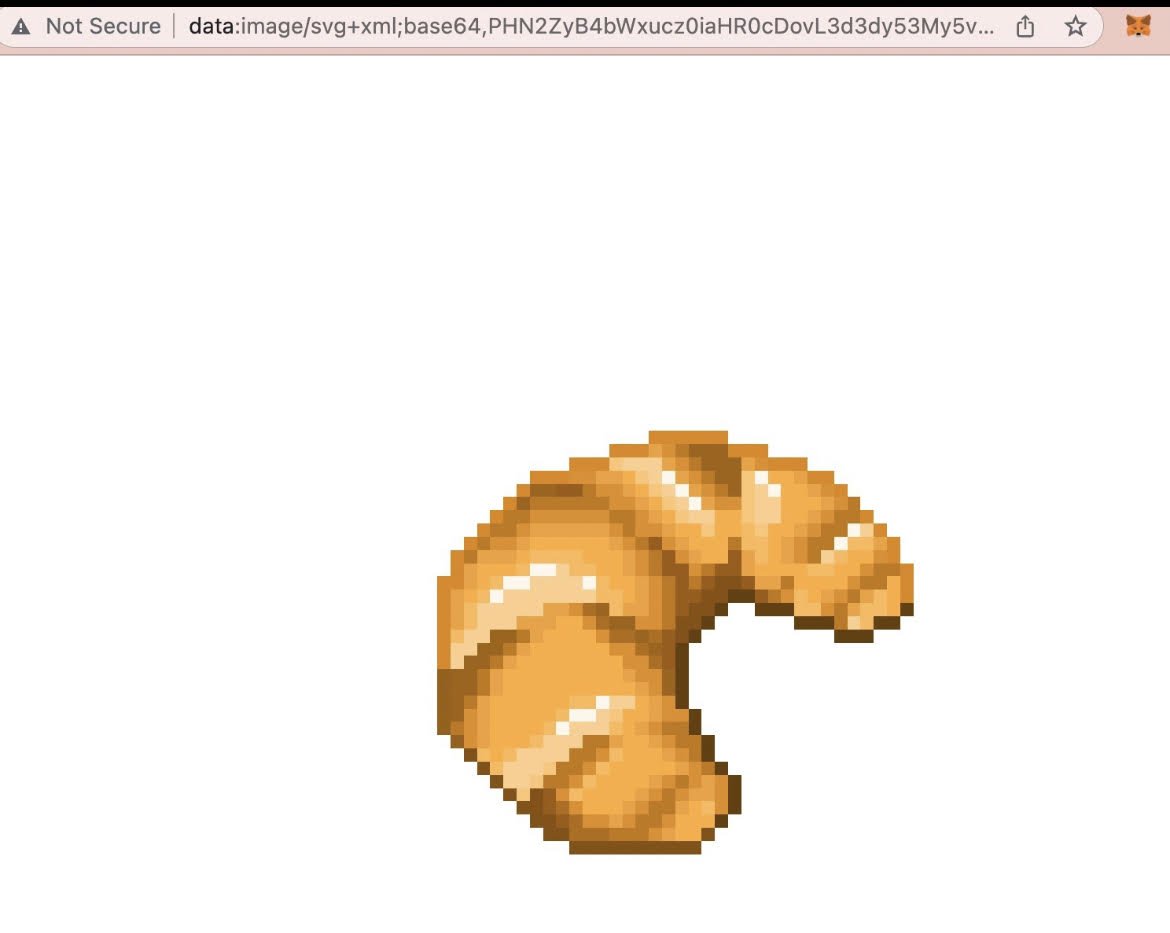
@theBakeryDAO On the baseTokenURI function, we can override functionality and use data URLs of our SVGs to tell the browser what to display 100% on-chain.
This process only requires a few simple steps, and the results are phenomenal.
This process only requires a few simple steps, and the results are phenomenal.
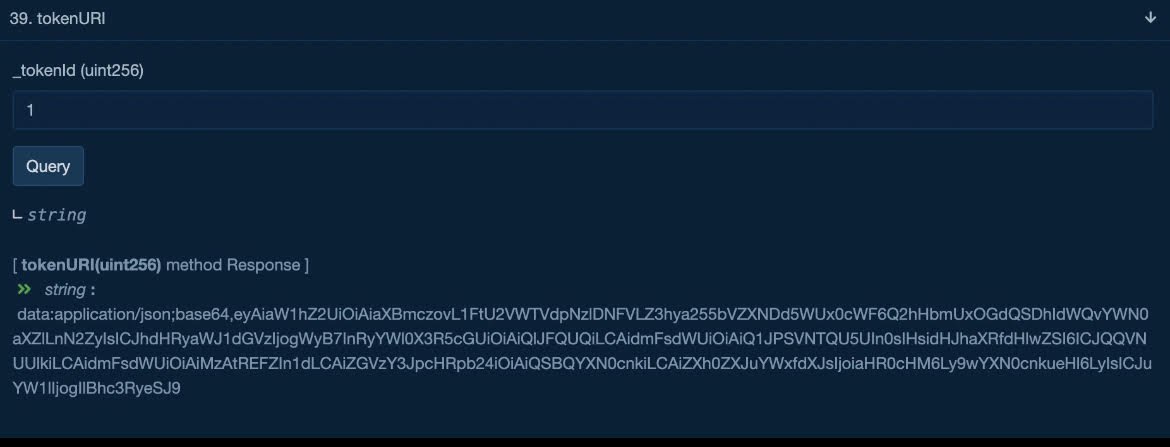
@theBakeryDAO First, grab an SVG you like.
Then, we will need to base64 encode our NFT, and use this for the image linked in the hook contract which will help to generate, encode, and return our NFTs based on different on-chain characteristics.
Then, we will need to base64 encode our NFT, and use this for the image linked in the hook contract which will help to generate, encode, and return our NFTs based on different on-chain characteristics.
@theBakeryDAO Once the hook contract is deployed, we can simply configure event hooks on our NFT contract to render different images based on what we define!
After all this hard work, you should now have dynamic, animated, and/or interactive on-chain SVG NFTs to show off in your collection!
After all this hard work, you should now have dynamic, animated, and/or interactive on-chain SVG NFTs to show off in your collection!
@theBakeryDAO It sounds confusing, but it’s not too bad
Im just a pastry on twitter.
If you have any troubles following the tutorial, feel free to dm me and i’ll try my best to help.
This took me 8+ hrs to write, so an RT on the first post would be much appreciated.
Im just a pastry on twitter.
If you have any troubles following the tutorial, feel free to dm me and i’ll try my best to help.
This took me 8+ hrs to write, so an RT on the first post would be much appreciated.
Loading suggestions...