

Here's a Thread 🧵on how to easily chart supply and demand zones
We are going to focus on my favorite ones and in my opinion the most powerful and consistent zones for day trading - The previous day S/D $spy $qqq $iwm
I use them daily and think you will as well. Let's dive in!
We are going to focus on my favorite ones and in my opinion the most powerful and consistent zones for day trading - The previous day S/D $spy $qqq $iwm
I use them daily and think you will as well. Let's dive in!
This thread will focus on a week of $iwm price action.
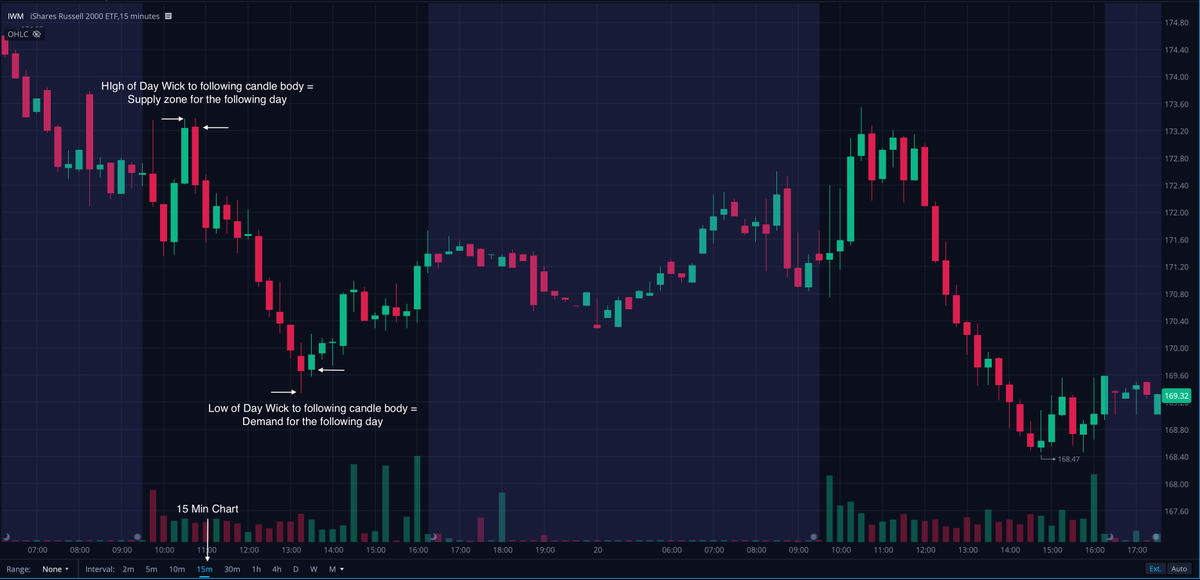
Let's start with drawing the zones. I use the 15 min chart.
Supply zone is drawn from the High of day wick to the following candle body.
Demand zone is drawn from Low of day wick to following candle body. Examples Below 👇
Let's start with drawing the zones. I use the 15 min chart.
Supply zone is drawn from the High of day wick to the following candle body.
Demand zone is drawn from Low of day wick to following candle body. Examples Below 👇


Supply and Demand Zones can be played 3 ways.
1- You buy the bounce or rejection.
2- You buy the breakout.
3- You buy the retest.
All 3 have a good r/r ratio and fit different styles of traders. My personal favorite are the retest buys.
1- You buy the bounce or rejection.
2- You buy the breakout.
3- You buy the retest.
All 3 have a good r/r ratio and fit different styles of traders. My personal favorite are the retest buys.

Take notes on how price reacts to these zones throughout these examples.
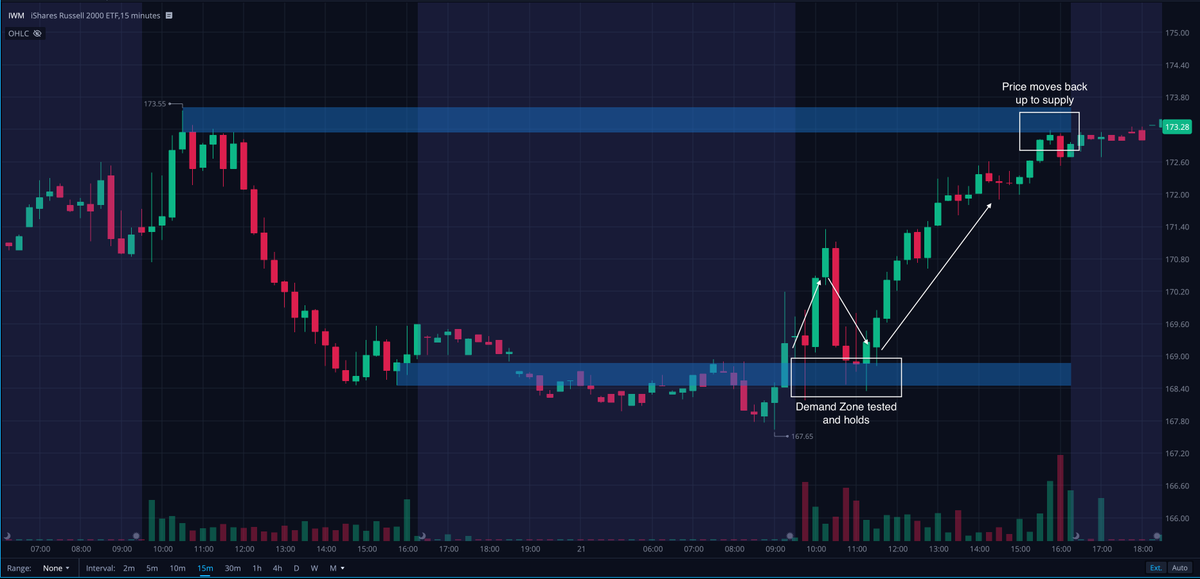
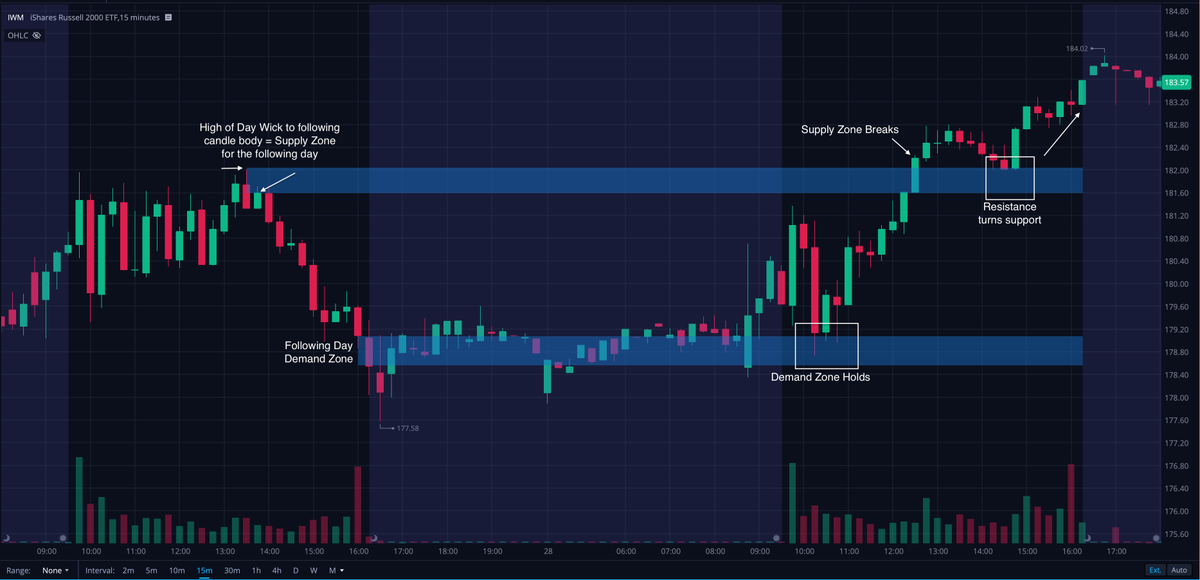
In this first one we see price open up in the middle of both zones. Then moves up and tests Supply, rejects and heads straight back to Demand. Breaks support and now its resistance.
In this first one we see price open up in the middle of both zones. Then moves up and tests Supply, rejects and heads straight back to Demand. Breaks support and now its resistance.

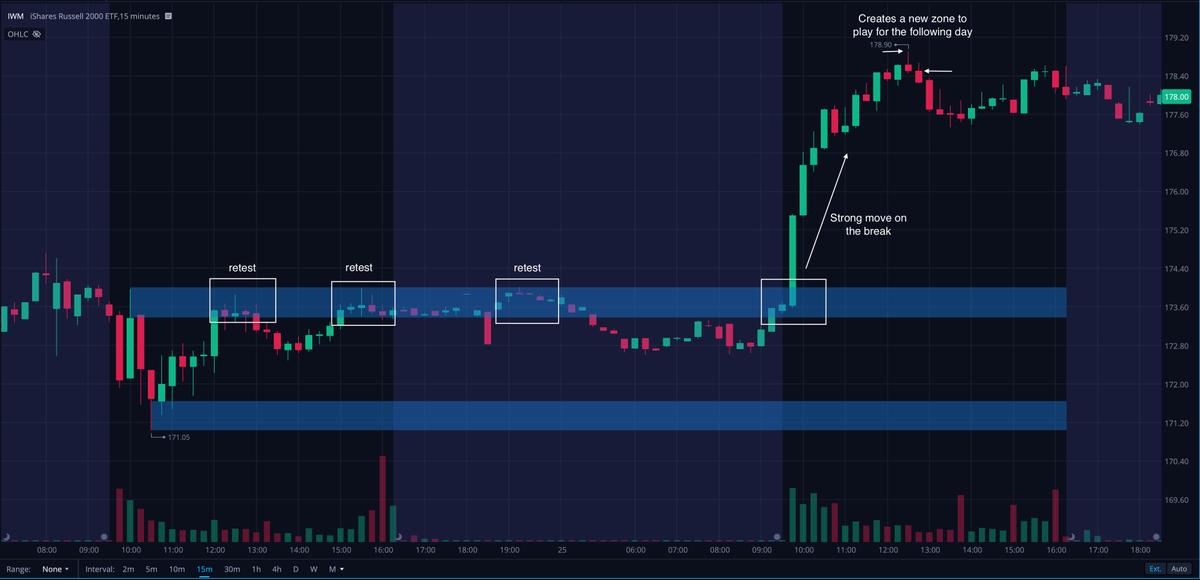
Now coming into the following day we have a new low of day demand to watch.
Look how price reacts to this new zone. Not only do we get a strong move off open from it but we come down for another retest and explode off of it for a second time. Then we move back to our PDH supply.
Look how price reacts to this new zone. Not only do we get a strong move off open from it but we come down for another retest and explode off of it for a second time. Then we move back to our PDH supply.
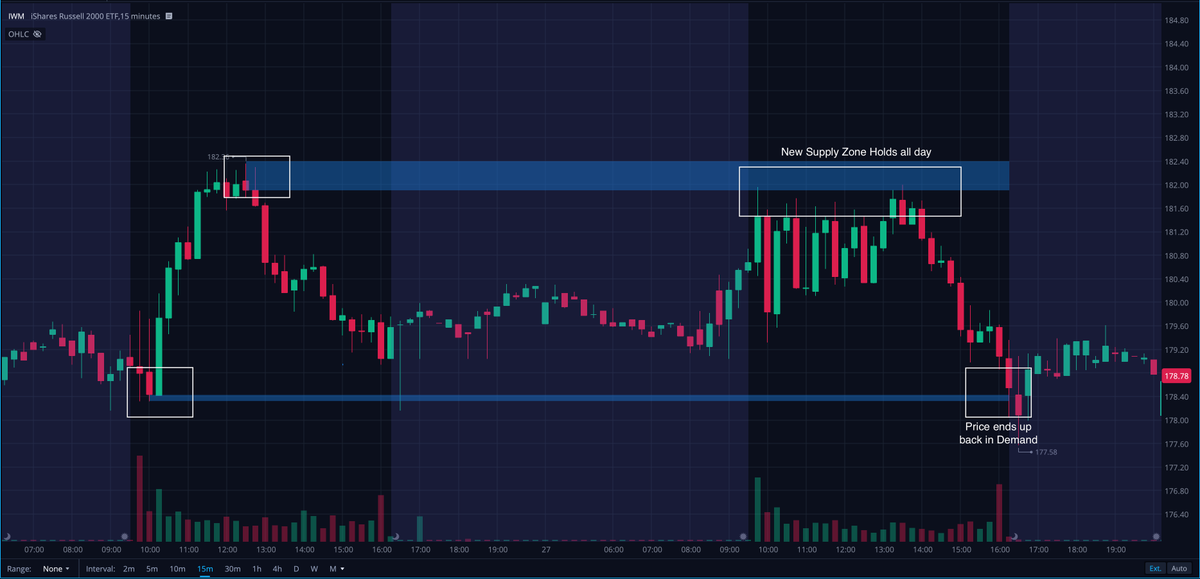
I accidentally skipped a day here but none the less another great example. Here we see the type of move you get when supply/demand keeps getting tested. Usually the break will give an explosive move after being tested several times. Where it cools off is your new Supply zone.
Now we have this strong Supply zone after such a big move up the previous day. Naturally we consolidate here (can't break it) and end up right back in our PDL demand zone. Like clockwork.
Last day here and I think you get the point of just how powerful these zones are.
As we roll into the next day our new zones are respected perfectly. Which brings us back to our example of how to plays these zones. Bounce, Break, or Retest.
As we roll into the next day our new zones are respected perfectly. Which brings us back to our example of how to plays these zones. Bounce, Break, or Retest.
If this thread helps you at all please give it a like and a retweet. These supply and demand zones treat me well almost everyday and I hope they will do the same for you. I will add some more examples of trades and links below. Thanks for reading 🤙
$amd $nvda $baba $coin $aapl
$amd $nvda $baba $coin $aapl
Here an example from today of how to play these zones combined with my 2 minute strategy. It’s a great way to pinpoint entries after zones break.
The strategy itself if you want to check that out as well to pair with the zones👇
Loading suggestions...