

🌟Got 30 minutes to make your first AI animation? This thread is for you!🌟
STEP BY STEP AI ANIMATION TUTORIAL: THREAD ONE
(link in the last tweet for thread 2, which is a deep dive of tips and tricks!) #AIArt
STEP BY STEP AI ANIMATION TUTORIAL: THREAD ONE
(link in the last tweet for thread 2, which is a deep dive of tips and tricks!) #AIArt

This thread looks complicated, but is written for anyone to be able to do. If you follow this, you'll end up with an animation--today! Hang in there, it's not hard, just wordy, and I promise: you'll be glad you did.
You've got this!
Okay, Ready? Let's go!🌟
You've got this!
Okay, Ready? Let's go!🌟

Step 1) Create a fresh gmail. This is important, as when you explore more tools in the future, you want to be sure your primary google drive is protected if any are untrustworthy! 🕵️♀️

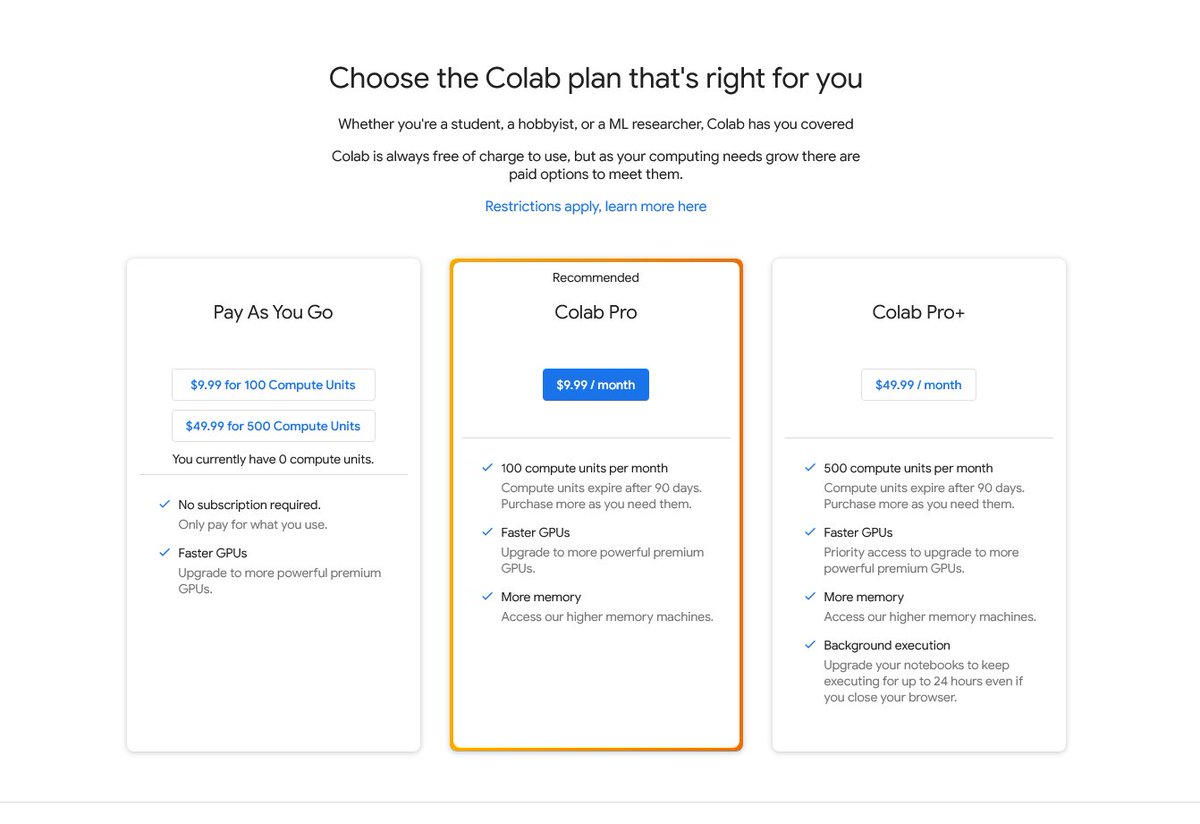
2) Decide if you need a google colab pro or pro+ account. This tutorial can absolutely be done for free, but pro (or better, pro+) will make creating videos take seconds instead of minutes (or hours)! 💀
If you don't have Nvidia GPU, you need this step. colab.research.google.com
If you don't have Nvidia GPU, you need this step. colab.research.google.com
3) Time to pull up the tool! Make sure you're signed into your new gmail, and visit:
#scrollTo=IJjzzkKlWM_s" target="_blank" rel="noopener" onclick="event.stopPropagation()">colab.research.google.com
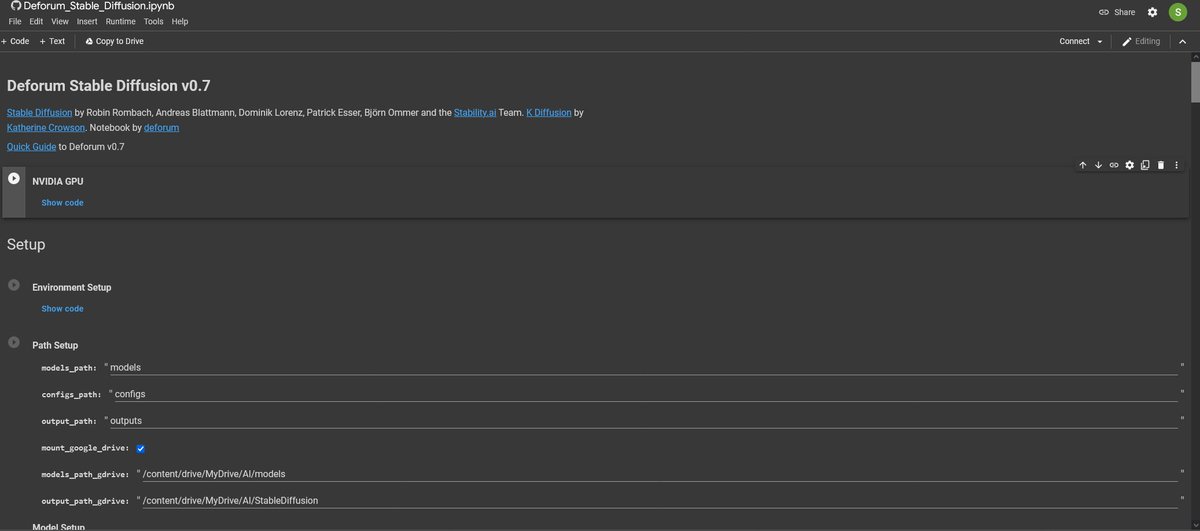
If it's your first time seeing a colab notebook, don't be intimidated! We're gonna go through step by step, you'll be a wizard in no time :)
#scrollTo=IJjzzkKlWM_s" target="_blank" rel="noopener" onclick="event.stopPropagation()">colab.research.google.com
If it's your first time seeing a colab notebook, don't be intimidated! We're gonna go through step by step, you'll be a wizard in no time :)

4) Bookmark it! There are earlier versions, & finding this newest one again is less easy.
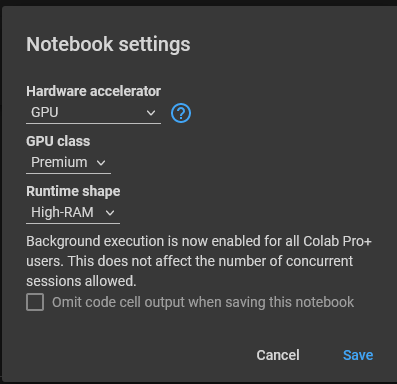
If you have colab pro or pro+, now is the time to click Runtime at the top of the site, and click "change runtime type." Select Premium and High RAM from the dropdown menus.
If you have colab pro or pro+, now is the time to click Runtime at the top of the site, and click "change runtime type." Select Premium and High RAM from the dropdown menus.
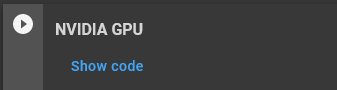
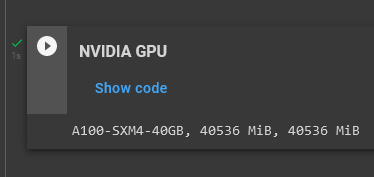
5) Whether or not you're using pro/pro+ or doing the free version, now's the time to click the little play button to the left of the first cell: the one that says NVIDIA GPU.
Wait until it displays a green check next to the play button to proceed to the next step. ✅
Wait until it displays a green check next to the play button to proceed to the next step. ✅
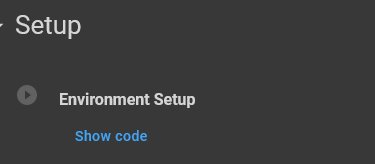
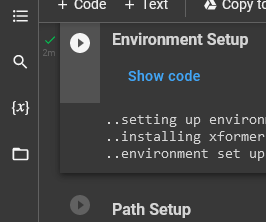
6) Click the play button to the left of Environment Setup--this will take awhile. ⏳🫠
Wait until it displays the green check to proceed to the next step. ✅
Wait until it displays the green check to proceed to the next step. ✅
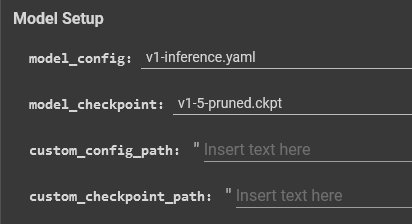
7) The next cell is Path Setup. This is where you switch out models; we'll come back to it in thread 2.
For now, click the text next to model_config to show a dropdown menu, & select v1-inference.yaml.
Then, click the text next to model_checkpoint to show a dropdown menu, and-
For now, click the text next to model_config to show a dropdown menu, & select v1-inference.yaml.
Then, click the text next to model_checkpoint to show a dropdown menu, and-
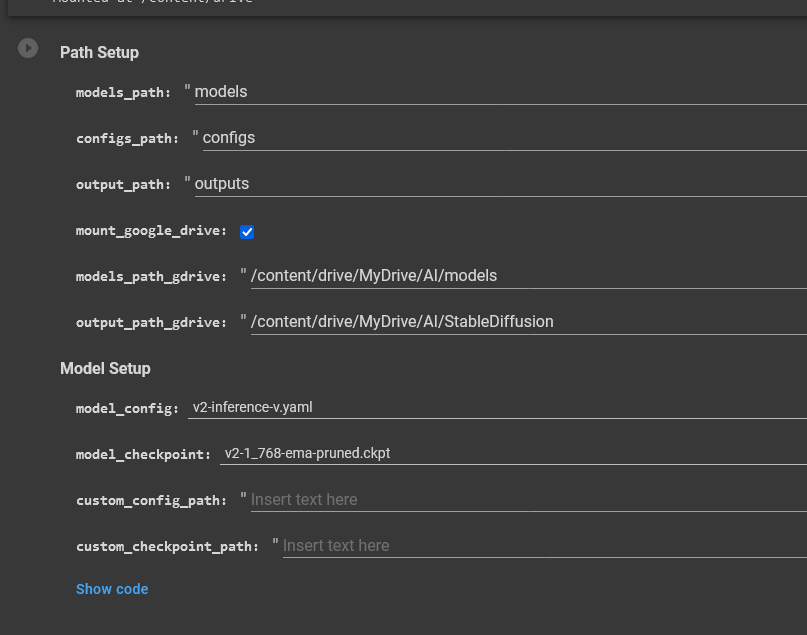
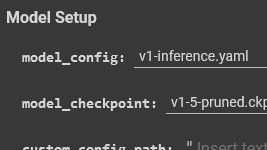
select v1-5-pruned.ckpt. This picks Stable Diffusion version 1.5 and its related files as the model we will use today. It's a good one!
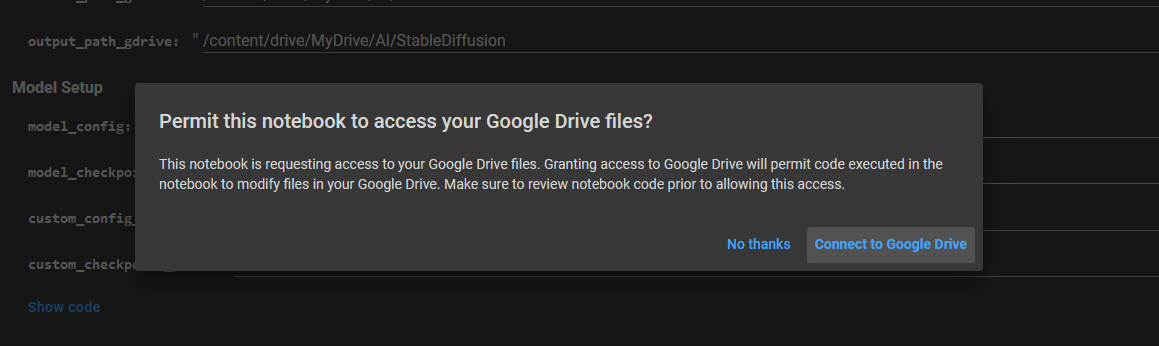
Click the play button next to Path Setup. Agree to the popups. Wait til it displays the green check to move on. ✅
This will take awhile. ⏳🫠
Click the play button next to Path Setup. Agree to the popups. Wait til it displays the green check to move on. ✅
This will take awhile. ⏳🫠
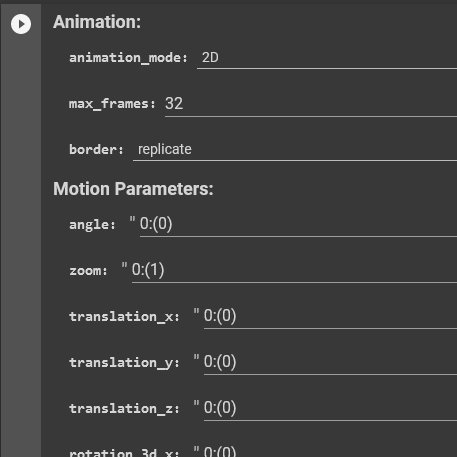
8) You're doing great. On to Settings! 🌟
This is where we start the meat and potatoes of our animation.
Pic related is the default parameters we'll change. I'm going to list some I use, but after you've finished this tutorial, feel free to come back and play around with them!
This is where we start the meat and potatoes of our animation.
Pic related is the default parameters we'll change. I'm going to list some I use, but after you've finished this tutorial, feel free to come back and play around with them!
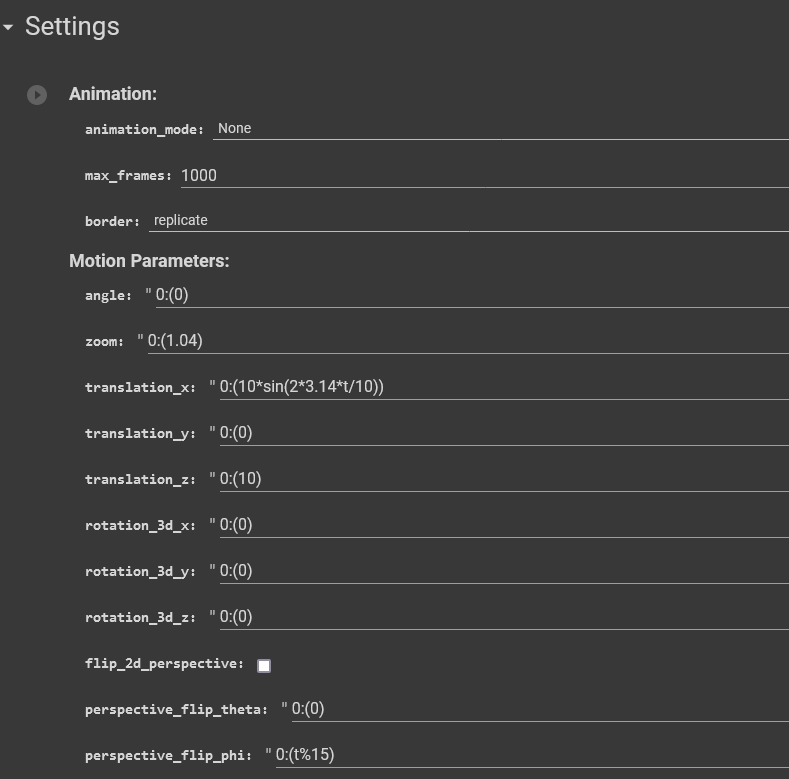
9) Here's what we'll change:
Animation Mode: 2D (frame by frame animation)
Max Frames: 32 (# of frames in your animation. 32 is short, so wont waste time if you dislike the look)
Zoom: Delete the .04 from 1.04, so it looks like this (1). This makes the camera not move in.
Animation Mode: 2D (frame by frame animation)
Max Frames: 32 (# of frames in your animation. 32 is short, so wont waste time if you dislike the look)
Zoom: Delete the .04 from 1.04, so it looks like this (1). This makes the camera not move in.
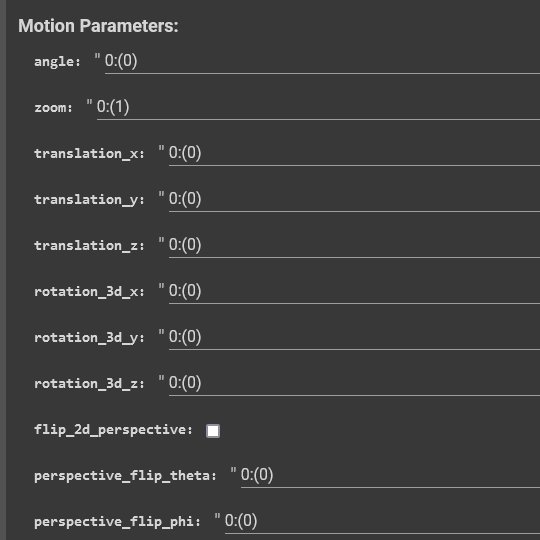
translation_x: delete all inside the () and type 0, so it now looks like this (0) This keeps the camera still.
translation_z: same, delete so it now looks like (0)
perspective_flip_phi: same, delete so it looks like (0)
perspective_flip_fv: same, delete so it looks like (0)
translation_z: same, delete so it now looks like (0)
perspective_flip_phi: same, delete so it looks like (0)
perspective_flip_fv: same, delete so it looks like (0)
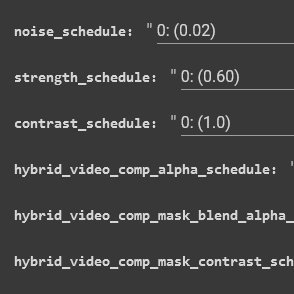
noise_schedule: .02 or ⬆️ will give visual variety, but may get a grainy look. ⬇️ to .01 will do the opposite. Your pick!
strength_schedule: ⬇️ will give more variety in content/movement, but be less visually cohesive. ⬆️does the opposite. I like from .45 to .65.
strength_schedule: ⬇️ will give more variety in content/movement, but be less visually cohesive. ⬆️does the opposite. I like from .45 to .65.
9) There are obviously a million more parameters, but you can skip them for now (Yay!)🥳
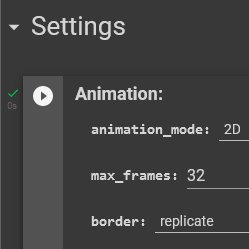
Scroll back up to click the play button to the left of "Animation Mode." Wait until it displays the green check to move on. ✅
Scroll back up to click the play button to the left of "Animation Mode." Wait until it displays the green check to move on. ✅
9) Prompt time! 📣
Look below animation_prompts. The # left of the prompt is the frame it begins animating that text from.
So in this example, an apple turns into a banana by frame 20, coconut by frame 30, durian by frame 40.
For my tutorial, we're only using one prompt.👍
Look below animation_prompts. The # left of the prompt is the frame it begins animating that text from.
So in this example, an apple turns into a banana by frame 20, coconut by frame 30, durian by frame 40.
For my tutorial, we're only using one prompt.👍
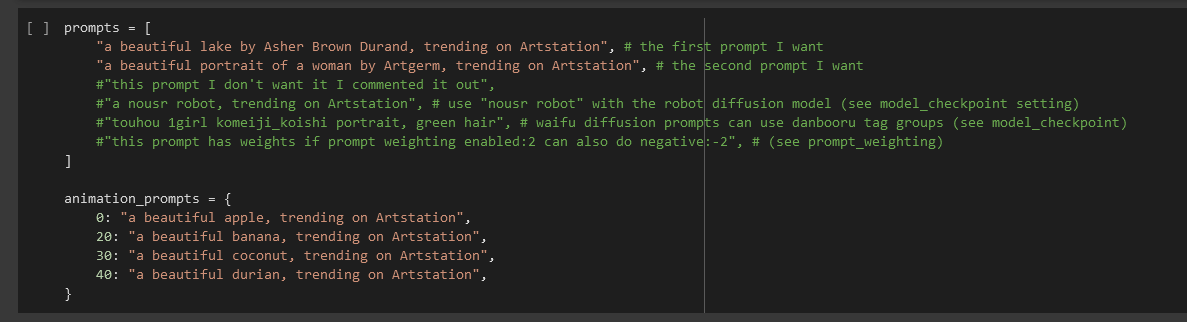
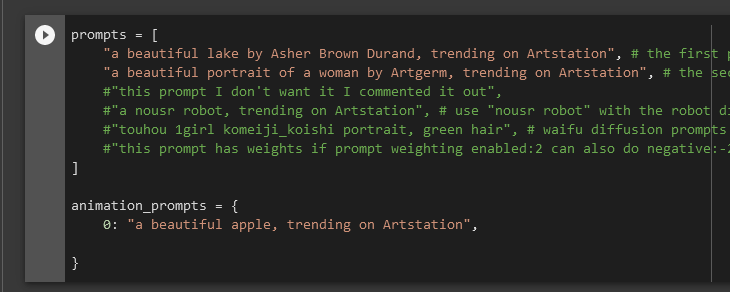
Delete prompts 20, 30, & 40, leaving only prompt 0 intact. Don't delete the } at the bottom.
Now, on prompt 0, replace *only* the text in the "" with YOUR prompt. Don't delete the "" or anything else.
Press the play button left of the prompt cell, and wait for the green check✅
Now, on prompt 0, replace *only* the text in the "" with YOUR prompt. Don't delete the "" or anything else.
Press the play button left of the prompt cell, and wait for the green check✅
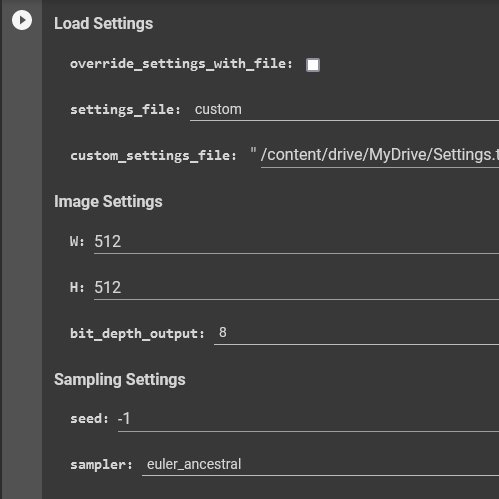
11) Load Settings: More parameters💀Use mine, & when the tut is done, come experiment!
Here's what we'll change:
W:512 (width, 512 loads fast)
H:512 (height)
Sampler: Click dpmpp_2s_a & select euler_ancestral from dropdown. Samplers change looks; this one is fast & aesthetic.
Here's what we'll change:
W:512 (width, 512 loads fast)
H:512 (height)
Sampler: Click dpmpp_2s_a & select euler_ancestral from dropdown. Samplers change looks; this one is fast & aesthetic.

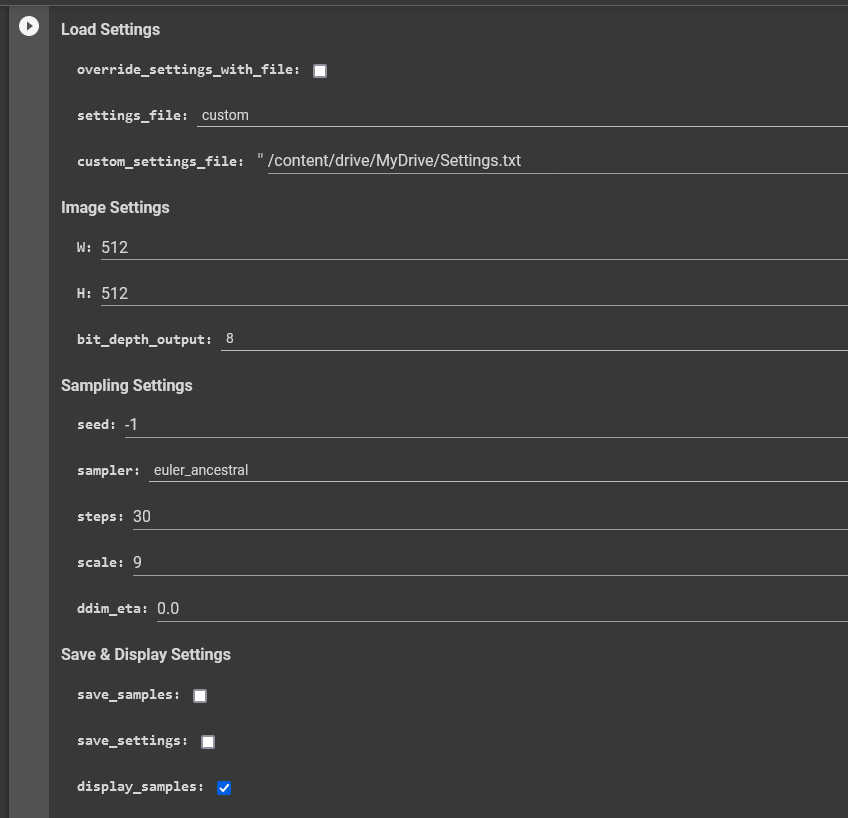
Steps: 30
(# of steps to make a frame. ⬆️ is detailed, ⬇️ is fast. 30-60 is 👍 for euler_ancestral.)
Scale: 9
(How strictly it follows your prompt. ⬇️ gives it more freedom, ⬆️ sticks to your words. I like 8.5-12.)
Uncheck the boxes next to "save_samples" and "save_settings."
(# of steps to make a frame. ⬆️ is detailed, ⬇️ is fast. 30-60 is 👍 for euler_ancestral.)
Scale: 9
(How strictly it follows your prompt. ⬇️ gives it more freedom, ⬆️ sticks to your words. I like 8.5-12.)
Uncheck the boxes next to "save_samples" and "save_settings."
12) You can leave the rest of the settings alone for now, we'll go deeper in thread 2. 👀
Scroll back up and click the play button left of "Load Settings."
Don't wait for a green check--Scroll below the Load Settings cell until you see an image!🥳(may take a minute ⏳👀)
Scroll back up and click the play button left of "Load Settings."
Don't wait for a green check--Scroll below the Load Settings cell until you see an image!🥳(may take a minute ⏳👀)
13) This is frame 1 in your animation! Let it make all 32.
If you hate frame 1, click stop button left of load settings, wait til it turns red, then click again to get a new one. To adjust prompt, go to prompts & retype, hit play left of prompt, then hit play on load settings.
If you hate frame 1, click stop button left of load settings, wait til it turns red, then click again to get a new one. To adjust prompt, go to prompts & retype, hit play left of prompt, then hit play on load settings.

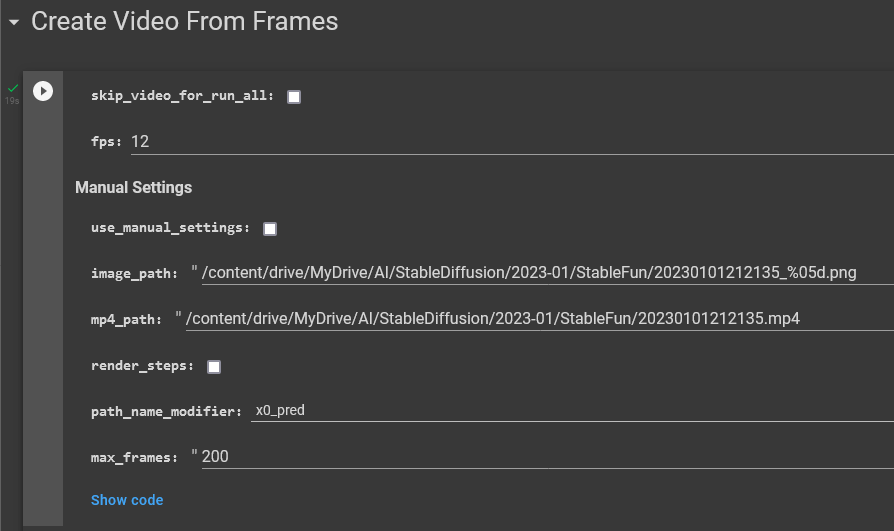
14) Create Video From Frames: Uncheck "skip_video_for_run_all," change the fps if you want, and click play.
Your video is below! HOORAY! Download it🥳
Okay! Got your animation? Congrats! On to the good stuff. Tips, tricks, & photo animation in thread 2, linked in tweet below!
Your video is below! HOORAY! Download it🥳
Okay! Got your animation? Congrats! On to the good stuff. Tips, tricks, & photo animation in thread 2, linked in tweet below!

And here's the link to AI ANIMATION THREAD 2: the fun one :D
And here's the link to thread 2 when you're done: AI ANIMATION: The Fun One #AIArt
Loading suggestions...