

A thread 🧵 on how to find A+ setups to trade! Part 2 of my quick thread series. All examples are trades I took this week on $spy and $qqq
January win rate was 74.71%
February win rate is 77.27%
All trades were based off these easy to learn techniques shown below👇 Lets get it!
January win rate was 74.71%
February win rate is 77.27%
All trades were based off these easy to learn techniques shown below👇 Lets get it!

Levels and Zones - I use these to help me identify where the best r/r will be (long or short)
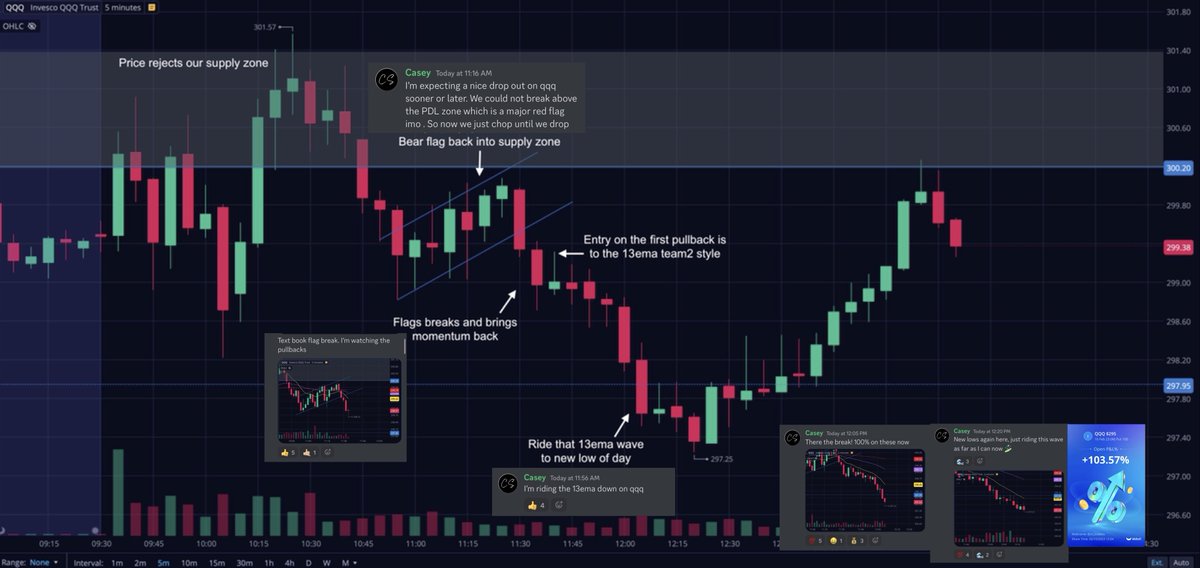
This first example we have is $qqq on Friday. After a nice downtrend on Thursday i'm watching that PDL zone to hold. Below it I favor going short , Above it I favor going long 👇
This first example we have is $qqq on Friday. After a nice downtrend on Thursday i'm watching that PDL zone to hold. Below it I favor going short , Above it I favor going long 👇
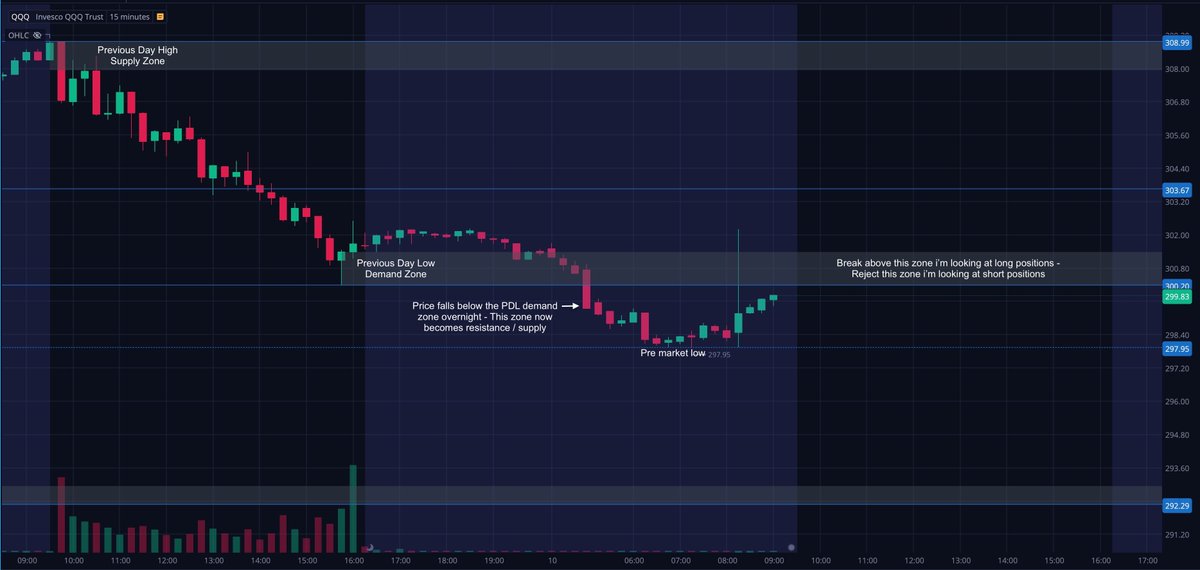
When the market opens I wait and watch the reaction to this zone. As you can see we could not break above this zone, this has me favoring short positions.
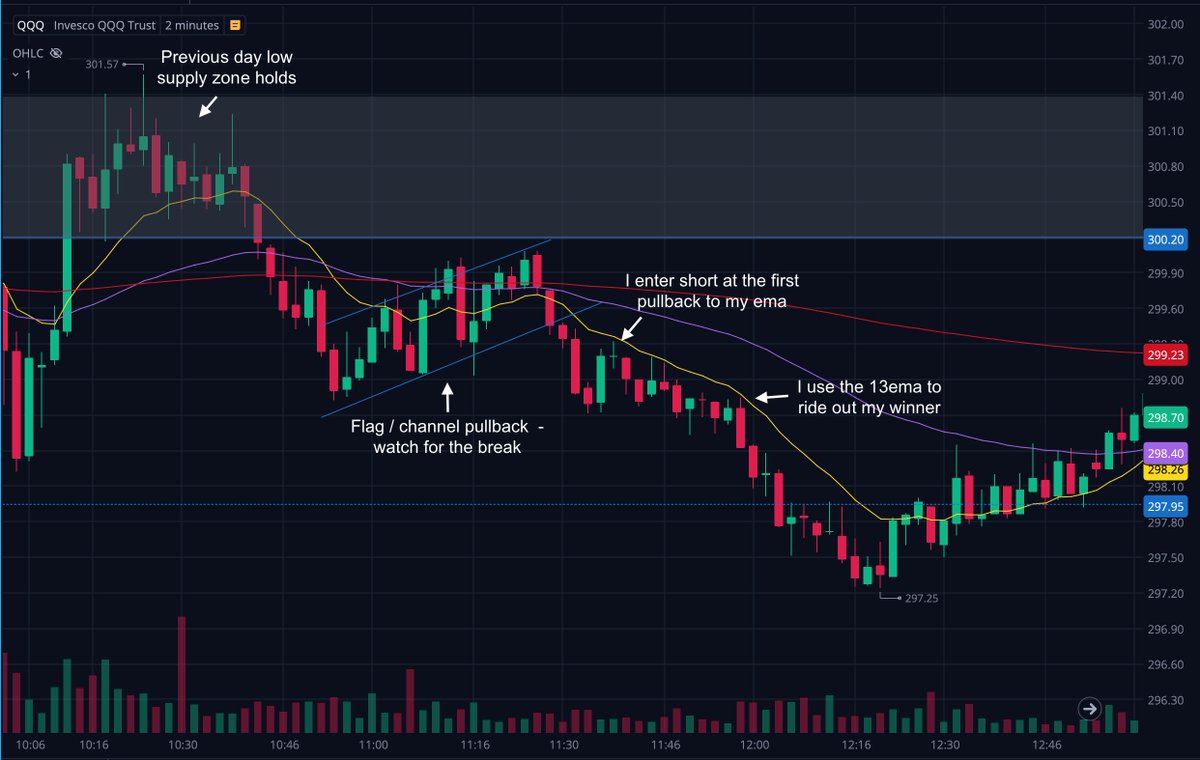
Now that I have the direction I want to play decided, I need to find a safe entry to base my risk off of for a good r/r 👇
Now that I have the direction I want to play decided, I need to find a safe entry to base my risk off of for a good r/r 👇

I enter all my trades on the 2 minute timeframe using my ema system. This helps me keep tight stops and get the entries needed for playing closer dated option contracts
I will add a link to the bottom of this thread that quickly details this method I call the "2 minute strategy"
I will add a link to the bottom of this thread that quickly details this method I call the "2 minute strategy"
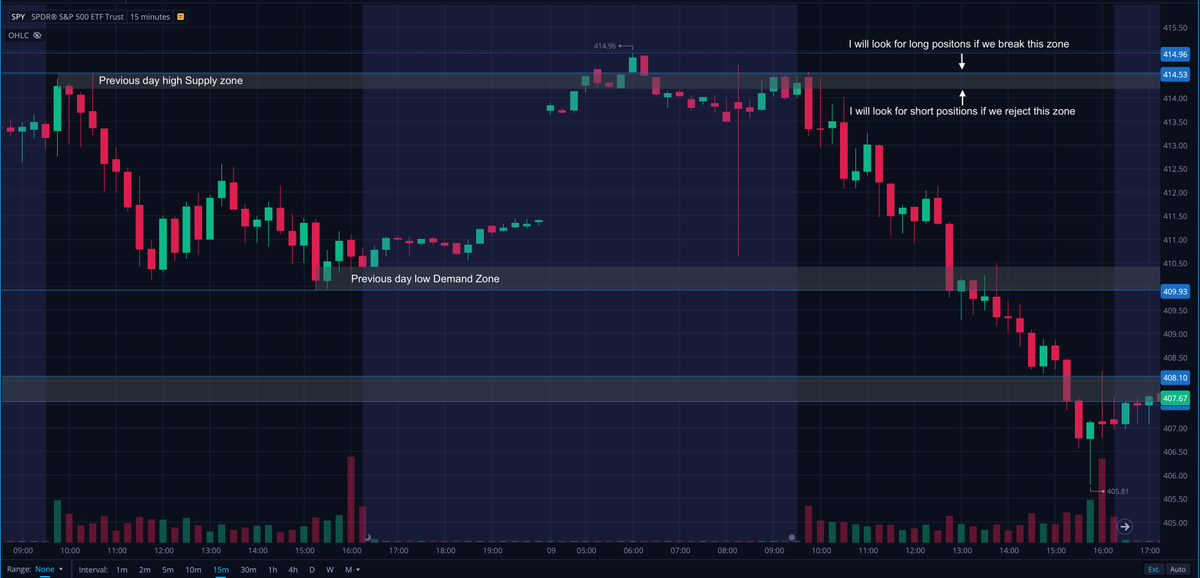
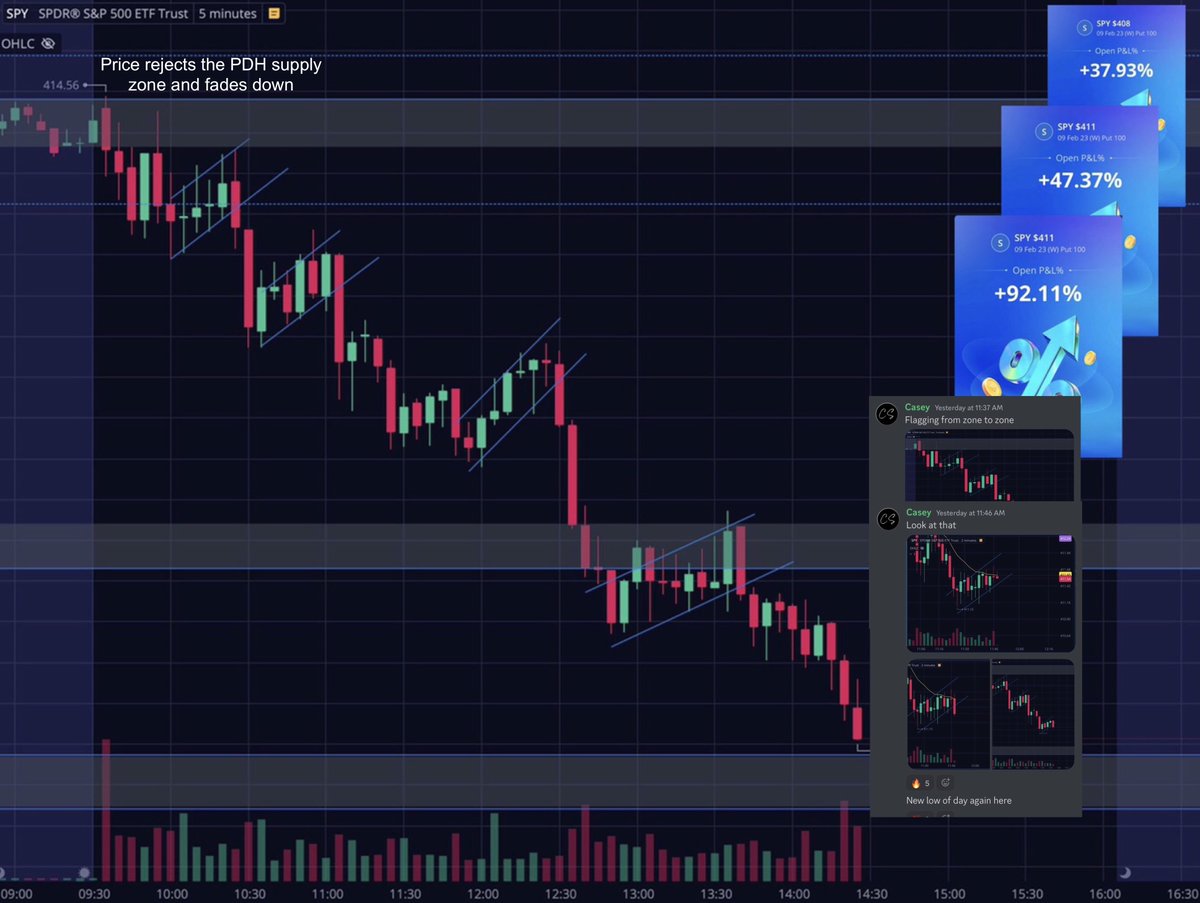
This next example is $spy on Thursday. We opened up and could not break above the PDH.
Again using the same simple previous day high/low zones made it clear which direction had the best risk to reward to play.
From there I used the 2 minute strategy to rinse and repeat 👇
Again using the same simple previous day high/low zones made it clear which direction had the best risk to reward to play.
From there I used the 2 minute strategy to rinse and repeat 👇
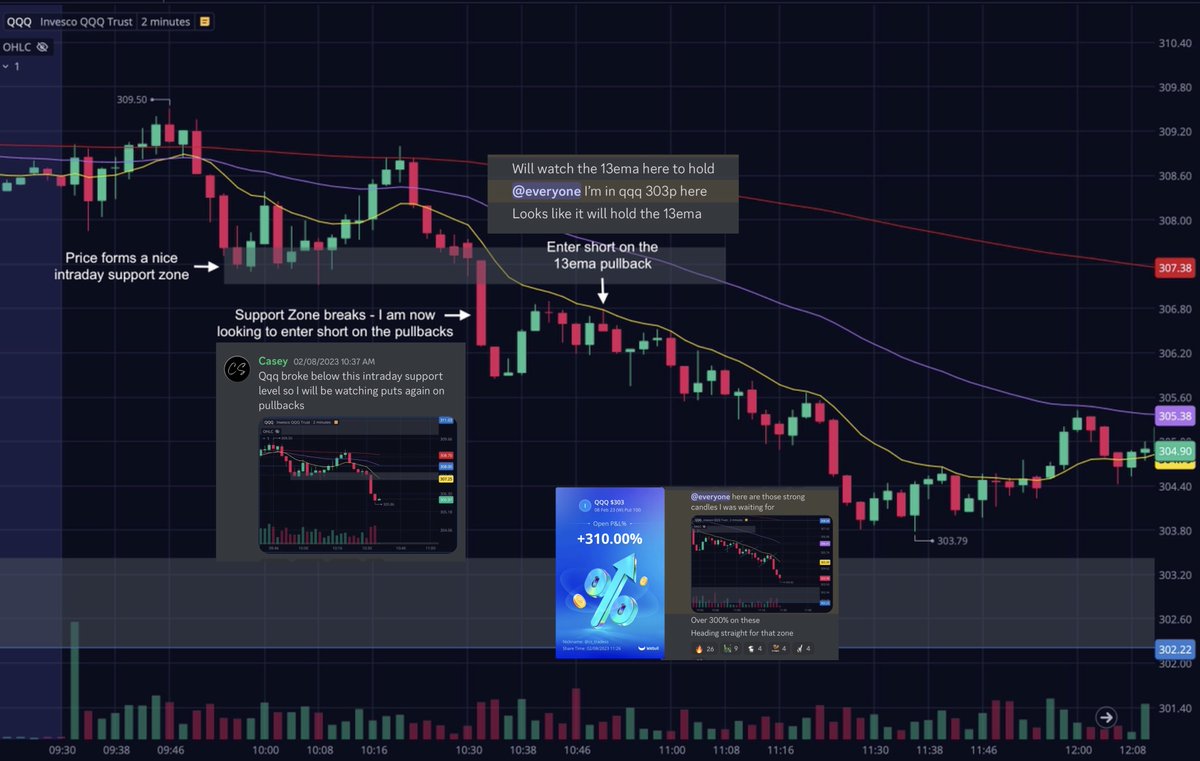
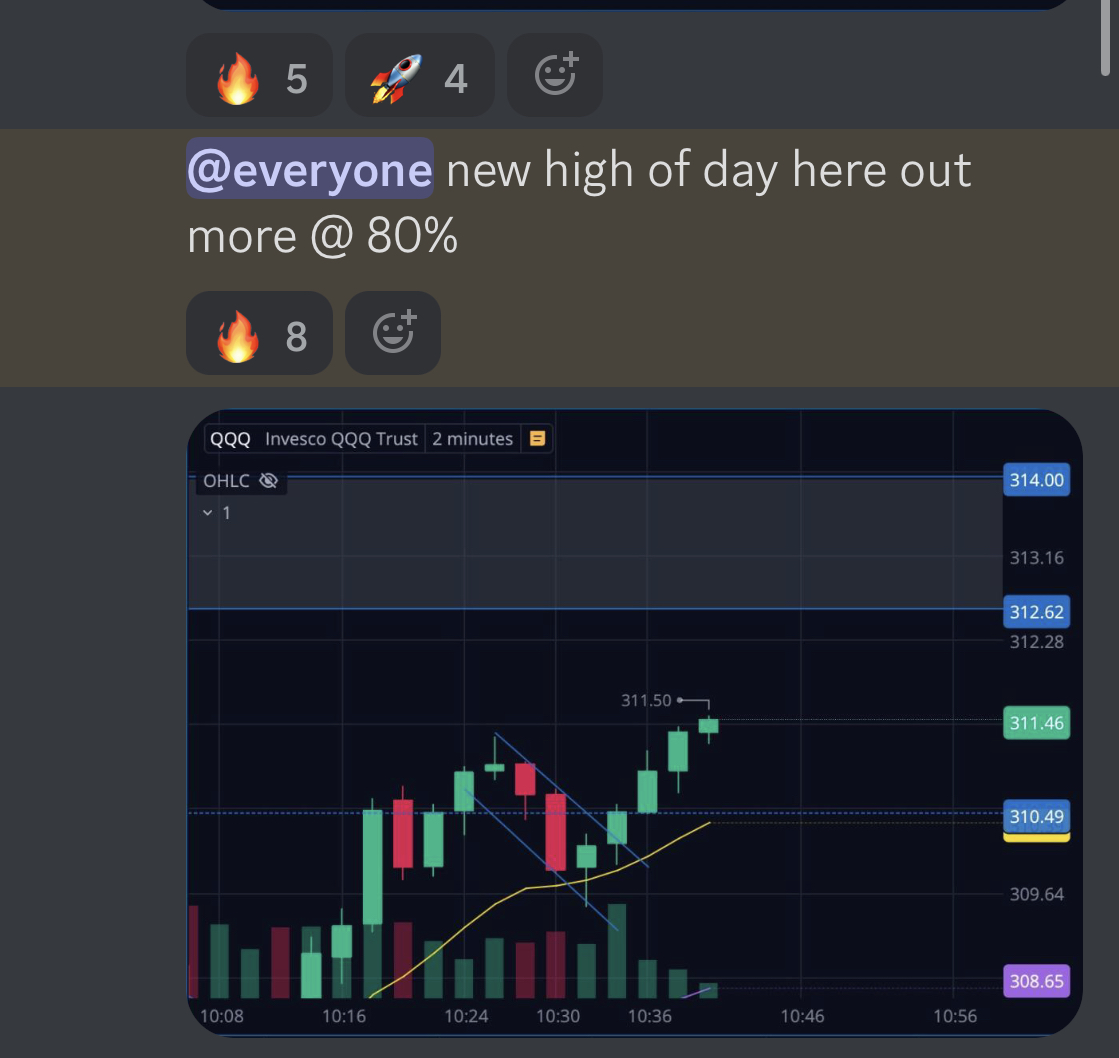
Going back 1 more day to Wednesday on $qqq now. Same technique only this time using an intraday support zone.
Zone breaks ✔️
Buy the pullback ✔️
Ride the ema down, Raise stops and scale out ✔️
Supply and Demand + 2 minute strategy 👇
Zone breaks ✔️
Buy the pullback ✔️
Ride the ema down, Raise stops and scale out ✔️
Supply and Demand + 2 minute strategy 👇
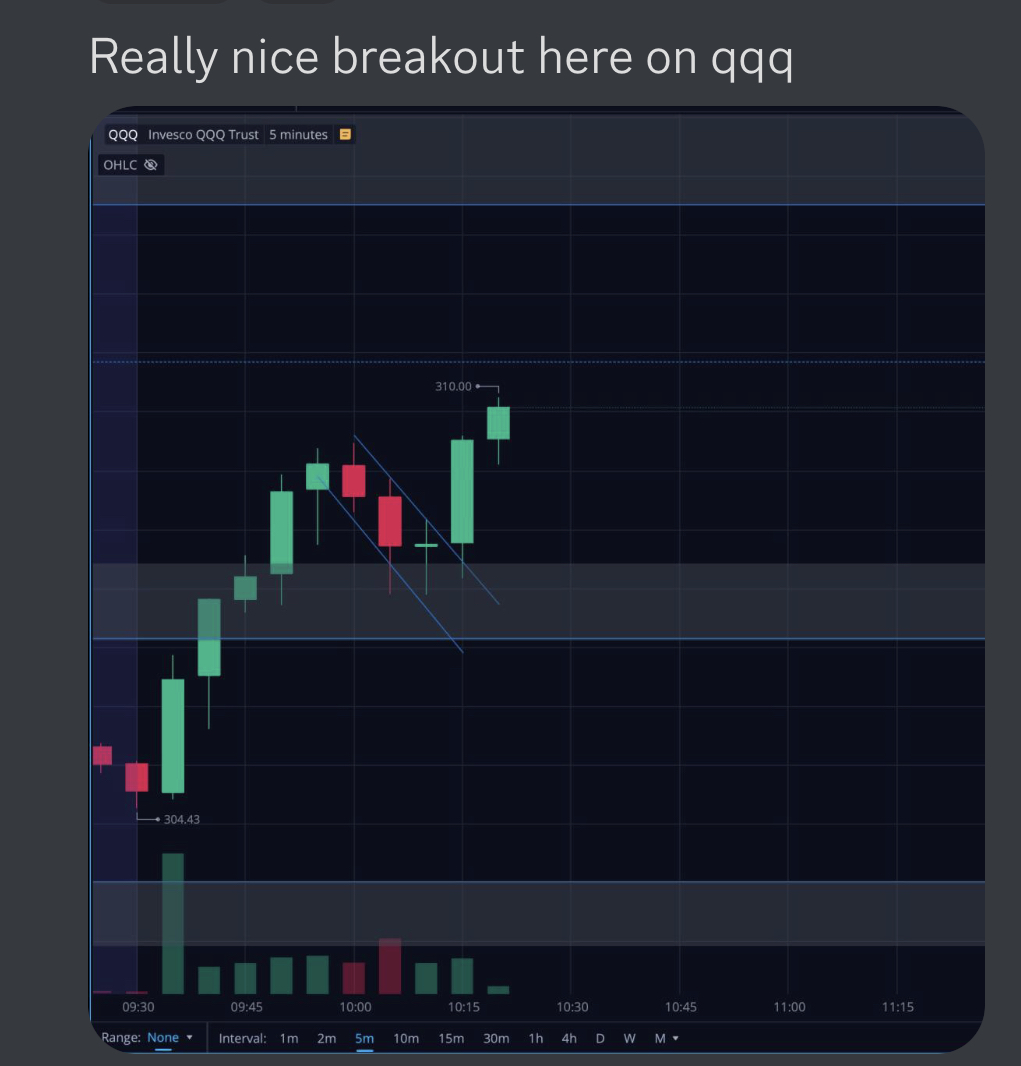
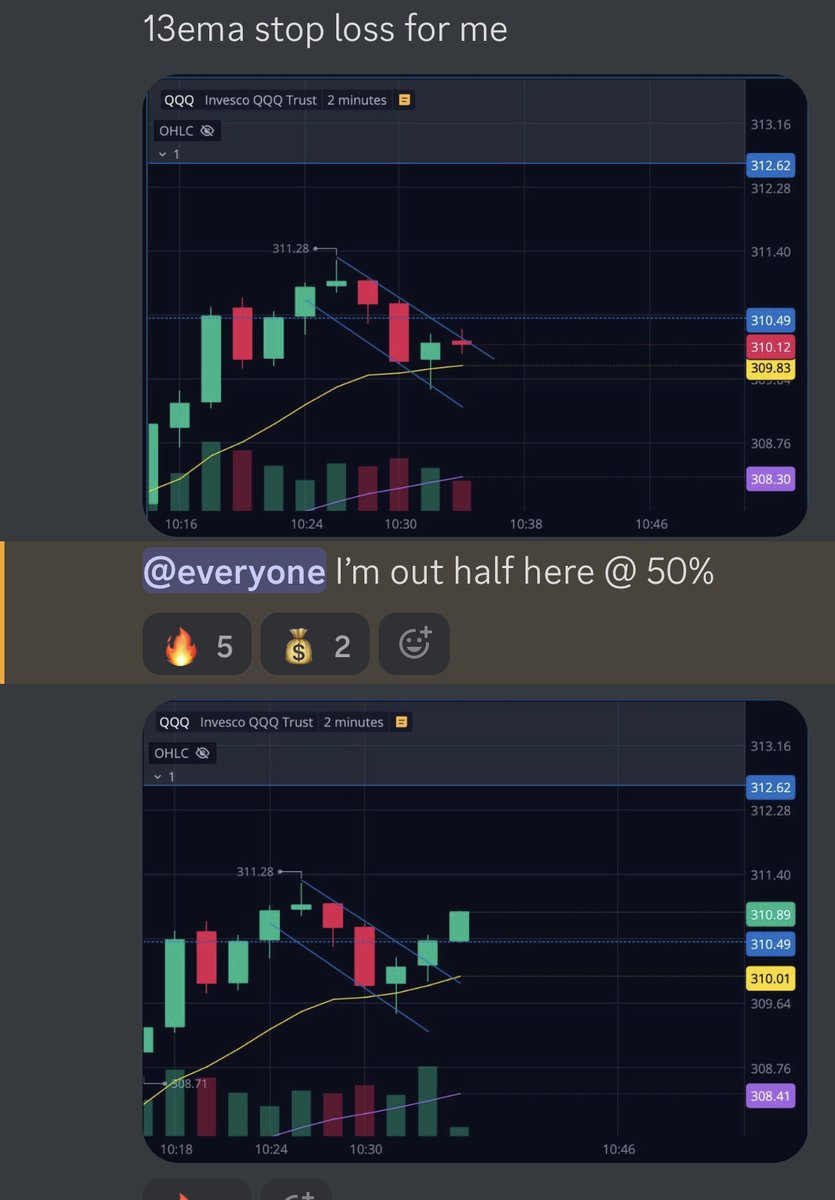
Another example here -
Zone break ✔️
Pullback entry ✔️
Set stop ✔️
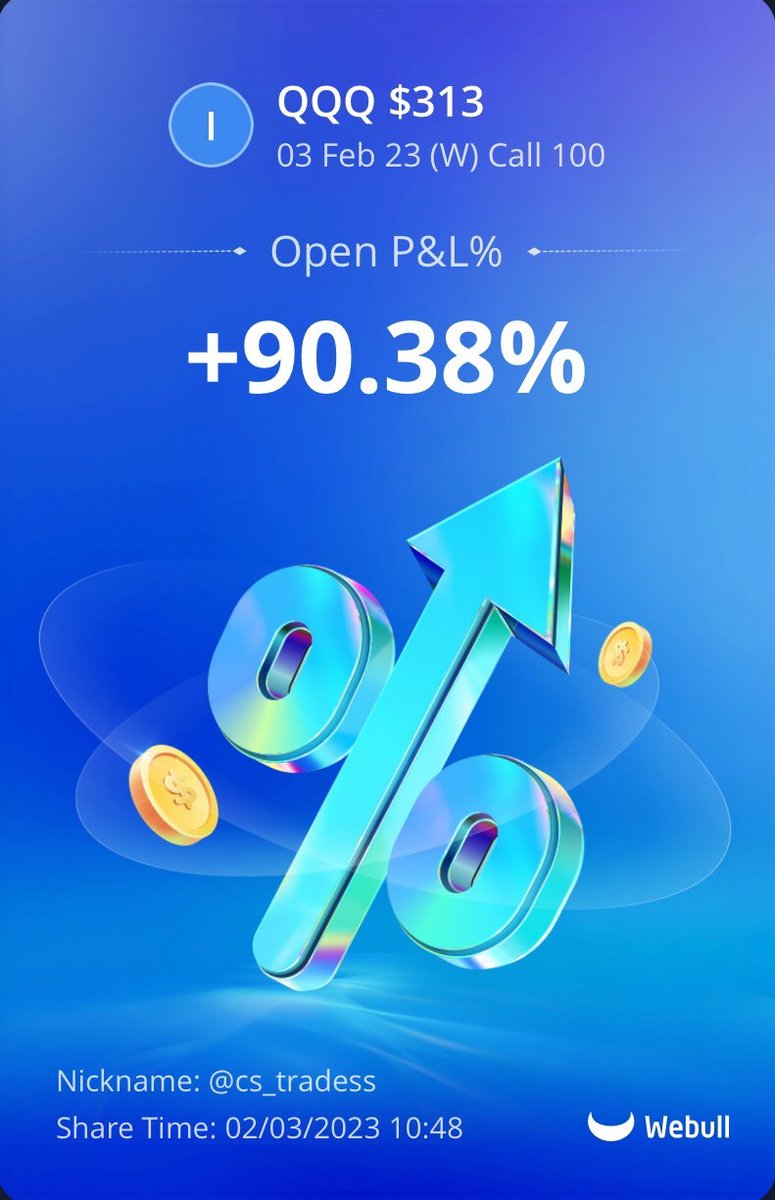
Scale out and lock in profits 💰
Zone break ✔️
Pullback entry ✔️
Set stop ✔️
Scale out and lock in profits 💰
Remember, always keep risk management your #1 priority! This means size appropriately and have your stop level planned before you enter any trade. No single trade should ever make or break your account.

This is a thread detailing my trading strategy. Its a quick read and will give more context to the setups shown above, including how to easily find your own supply and demand zone 👇
Check out part 1 of the A+ setup series, including more examples of these simple effective trading methods 👇
Loading suggestions...