

#01_ ControlNet Depth&pose Workflow Quick Tutorial #stablediffusion #AIイラスト #pose2image #depth2image
#02_ First we need to render the background and character Openpose bones separately. We will use them for Depth2image and Pose2image respectively. I used Blender. youtube.com

#03_ The reason for using the rendered depth rather than the automatically generated depth is that the sharper the boundary of the depth, the better the detail and sharpness of the image. Top: Rendered depth / Bottom: Auto-generated depth

#04_ And put the rendered depth into ControlNet. Set Model to Depth and Preprocessor to None.

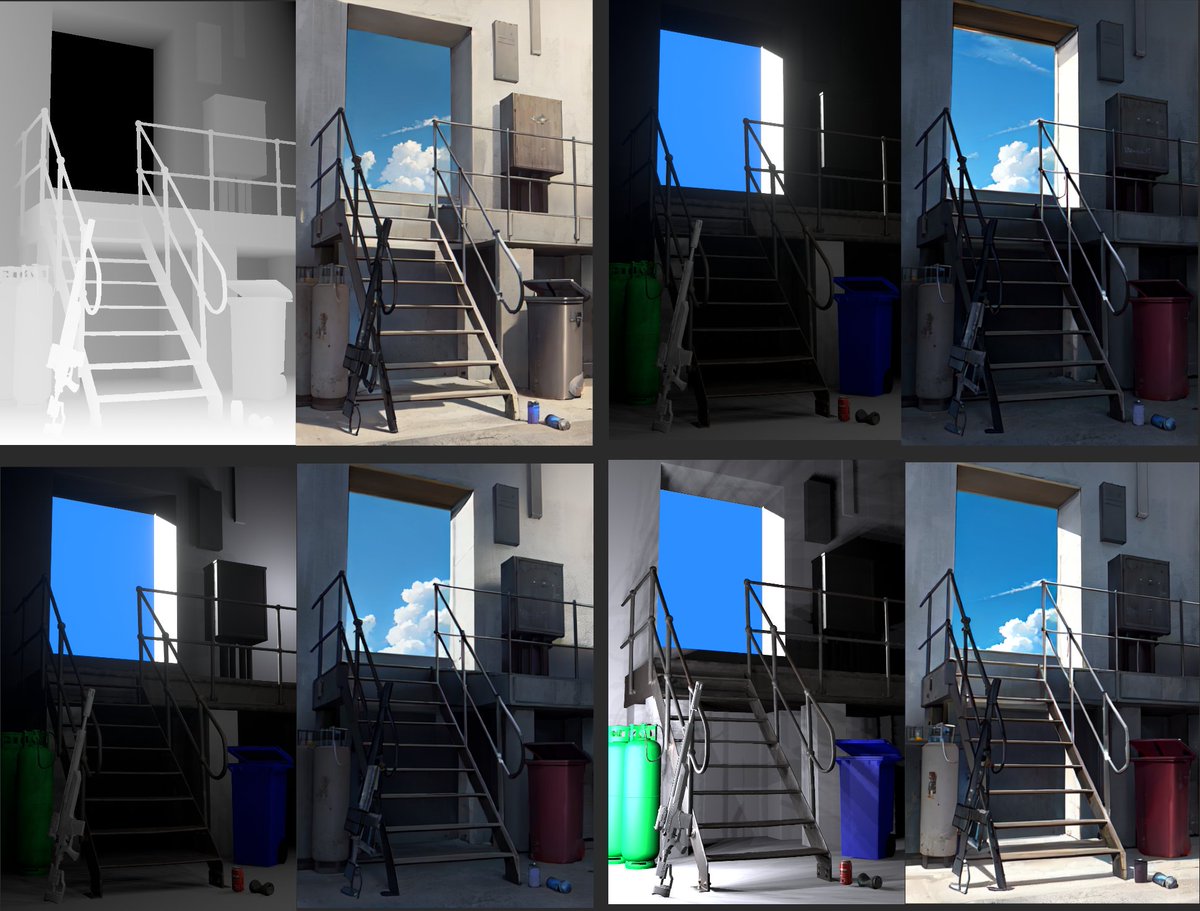
#05_ When using the Img2Img tab, it is possible to adjust the lighting of the background by adding a color image to the img2img. Even when the denoising strength is high (1.0), it is affected by the brightness and tone of the input color image. 1 : txt2img / 2,3,4 : img2img
#06_ And insert the openpose bone image to create a character. Set the model to openpose and the preprocessor to none.

#07_ ABG Remover Script makes it easy to remove the background. We need to tweak the generated mask a bit to make it cleaner. github.com


#8_ Finally, merge the background and characters and upscale them to a higher resolution. I used the Ultimate SD Upscale extension. github.com


#09_ When generating a character image, as with the background, using Img2Img instead of Txt2img makes it easier to create natural colors. Put the color image used to generate the background image into img2img and put the openpose image into the controlnet. 1:Txt2Img / 2:Img2Img

#10_ Overall Workflow

#11_ Blender model that looks like an openpose bone can be downloaded for free here. toyxyz.gumroad.com

Loading suggestions...