

Before we get to that:
It's customary to hit the button just *before* the Bovie tip hits the tissue (L picture). We usually *don't* put the Bovie tip on the tissue and then hit the button (as in R picture).
(see the next page for more explanation of this)
It's customary to hit the button just *before* the Bovie tip hits the tissue (L picture). We usually *don't* put the Bovie tip on the tissue and then hit the button (as in R picture).
(see the next page for more explanation of this)
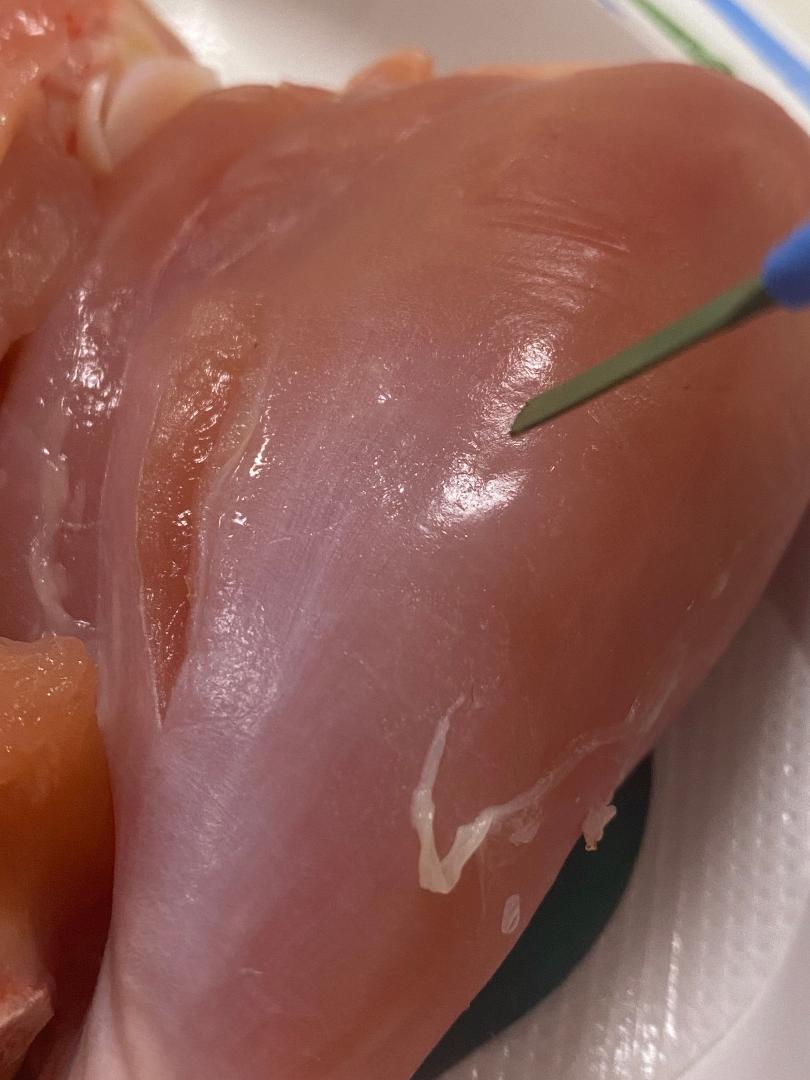
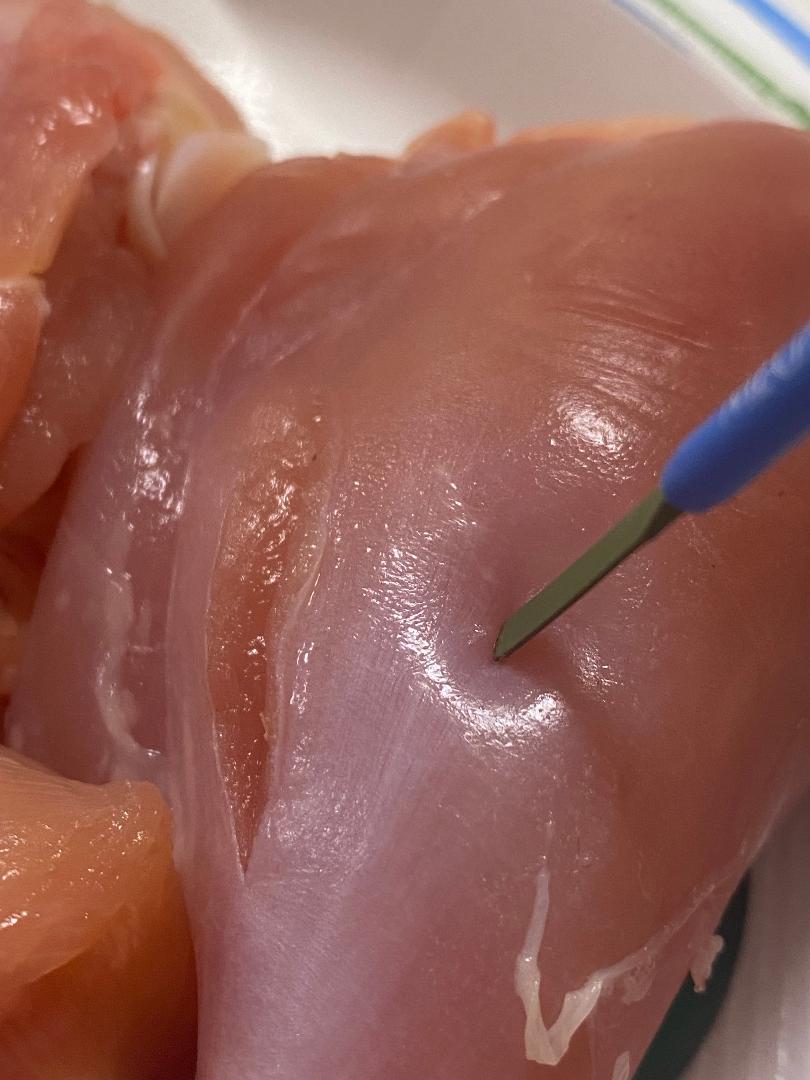
Here I hit the button just before contacting the tissue (sound on).
You hear the beep and then a split second later, you hear the 'sssskk...' of the tissue being burned.
This slight time difference helps your ears distinguish exactly when the tissue burning has started.
You hear the beep and then a split second later, you hear the 'sssskk...' of the tissue being burned.
This slight time difference helps your ears distinguish exactly when the tissue burning has started.

The Bovie uses alternating current (like an electrical outlet), rather than direct current (like a battery).
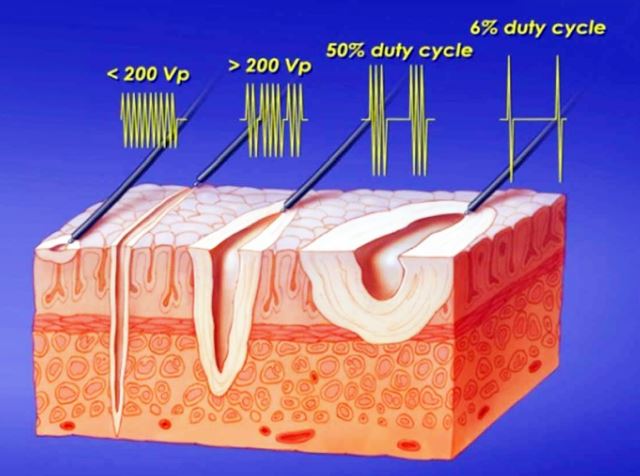
By adjusting the voltage and the duty cycle (the % of time the current is 'on'), the machine allows for the different 'modes'.
By adjusting the voltage and the duty cycle (the % of time the current is 'on'), the machine allows for the different 'modes'.
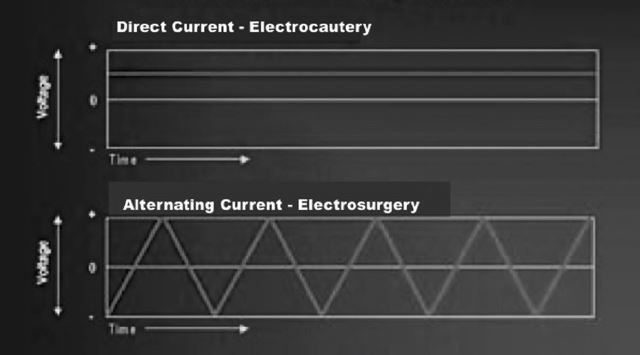
'Cut' and 'coag' are just names for predefined voltage and duty cycle settings.
In CUT mode, the voltage is lower, and the duty cycle is 100% - the current is always on.
In COAG mode, the voltage is higher, and the current is on less (depends on setting, but all are < 10%).
In CUT mode, the voltage is lower, and the duty cycle is 100% - the current is always on.
In COAG mode, the voltage is higher, and the current is on less (depends on setting, but all are < 10%).
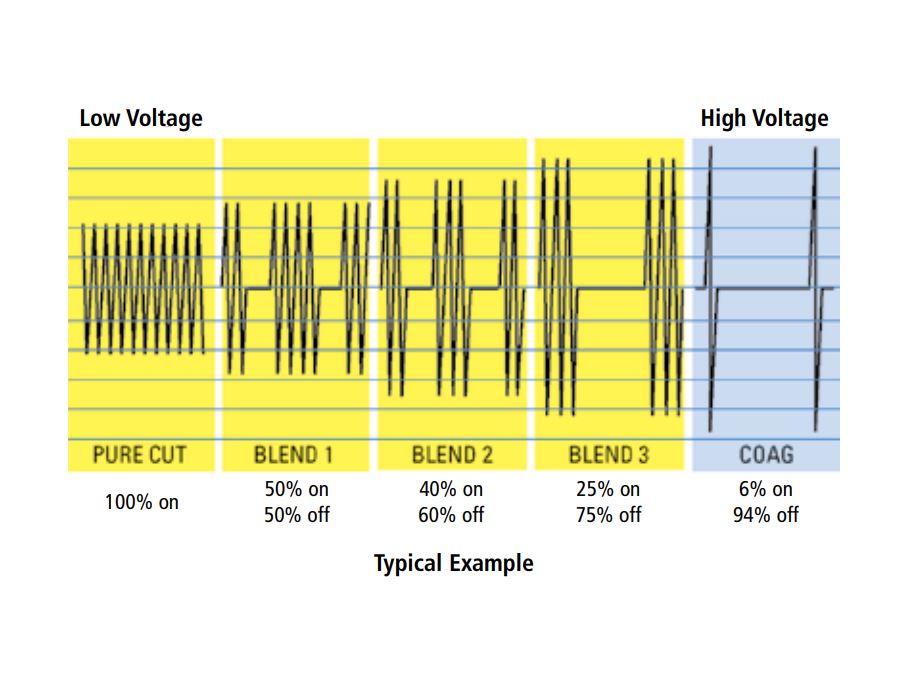
Here's a cartoon showing the effect of the modes (borrowed from Morris et al 2016, open access).
As we move from cut to blend to coag, the area of surrounding tissue coagulation and necrosis becomes larger. But we knew that. Now, let's see it in some chickens 🐔...
As we move from cut to blend to coag, the area of surrounding tissue coagulation and necrosis becomes larger. But we knew that. Now, let's see it in some chickens 🐔...
Here you can see that there is a clear difference between the modes.
The video shows 'coag' mode being used to cut the tissue right next to an incision where the 'cut' mode had been used. Clearly there is more burning and more necrosis of the surrounding tissue on 'coag' mode.
The video shows 'coag' mode being used to cut the tissue right next to an incision where the 'cut' mode had been used. Clearly there is more burning and more necrosis of the surrounding tissue on 'coag' mode.

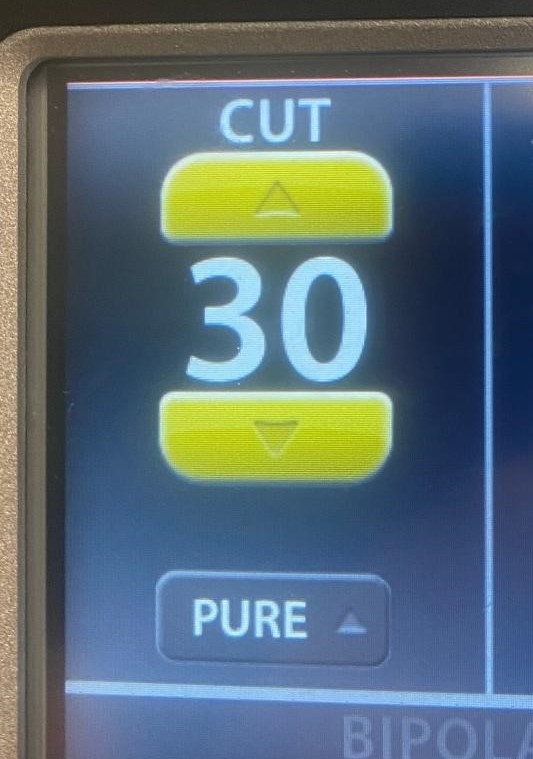
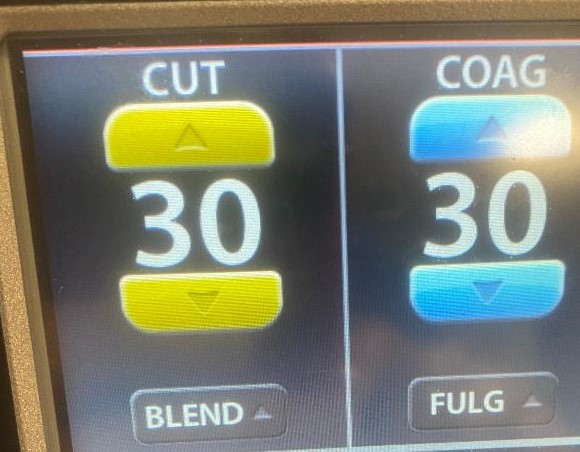
This is an example of a monitor from one of the Bovie machines (or 'energy platform' as it's called).
The default setting for 'cut' mode is called 'pure'. This is the mode we normally associate with the 'cut' mode.
If desired, we can switch to the 'blend' mode.
The default setting for 'cut' mode is called 'pure'. This is the mode we normally associate with the 'cut' mode.
If desired, we can switch to the 'blend' mode.
Here is the chicken tissue being divided with the Bovie on 'cut' at 30 watts.
There is enough heat generated that a thin zone of coagulated tissue is created in places, but it is fairly minimal.
There is enough heat generated that a thin zone of coagulated tissue is created in places, but it is fairly minimal.

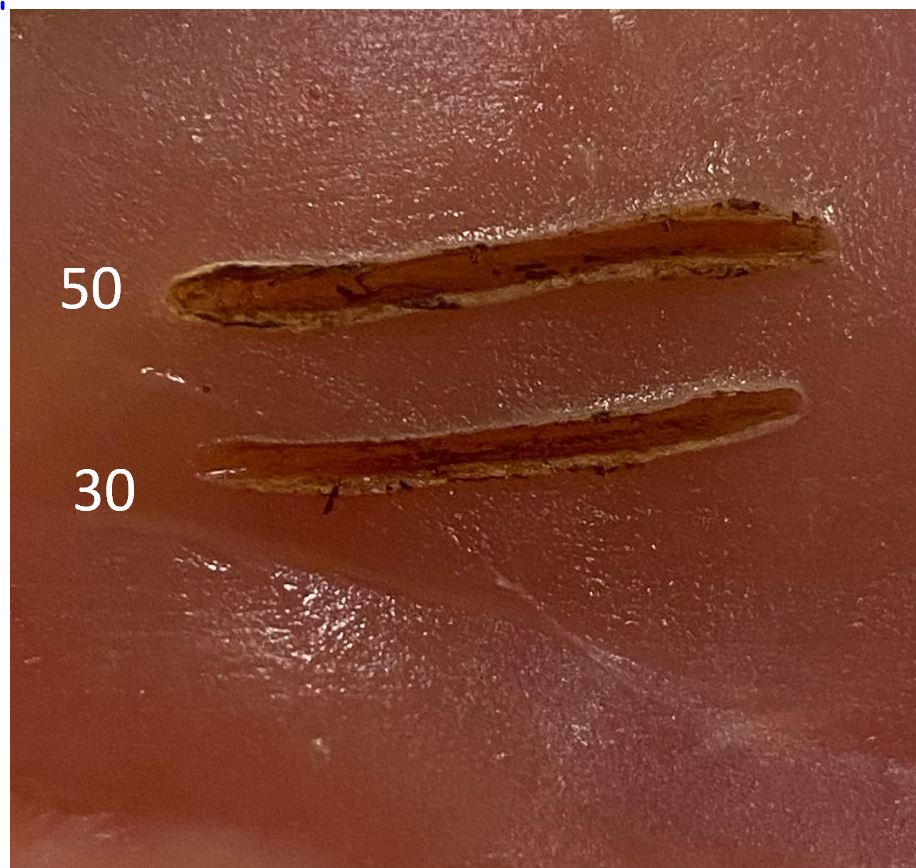
When you turn the 'cut' power setting up, the tissue will of course cut faster.
There will also be an increased area of tissue damage surrounding the tissue that is actually divided.
Here you can see similar incisions made with 'cut' at 50 versus 'cut' at 30.
There will also be an increased area of tissue damage surrounding the tissue that is actually divided.
Here you can see similar incisions made with 'cut' at 50 versus 'cut' at 30.
For fun, let's crank it up to 80 on 'cut' mode. The tissue practically explodes apart as the Bovie tip goes through it.
The only time I increase the settings this high is for a necrotizing fasciitis debridement, and even then I rarely go above 70 watts.
The only time I increase the settings this high is for a necrotizing fasciitis debridement, and even then I rarely go above 70 watts.

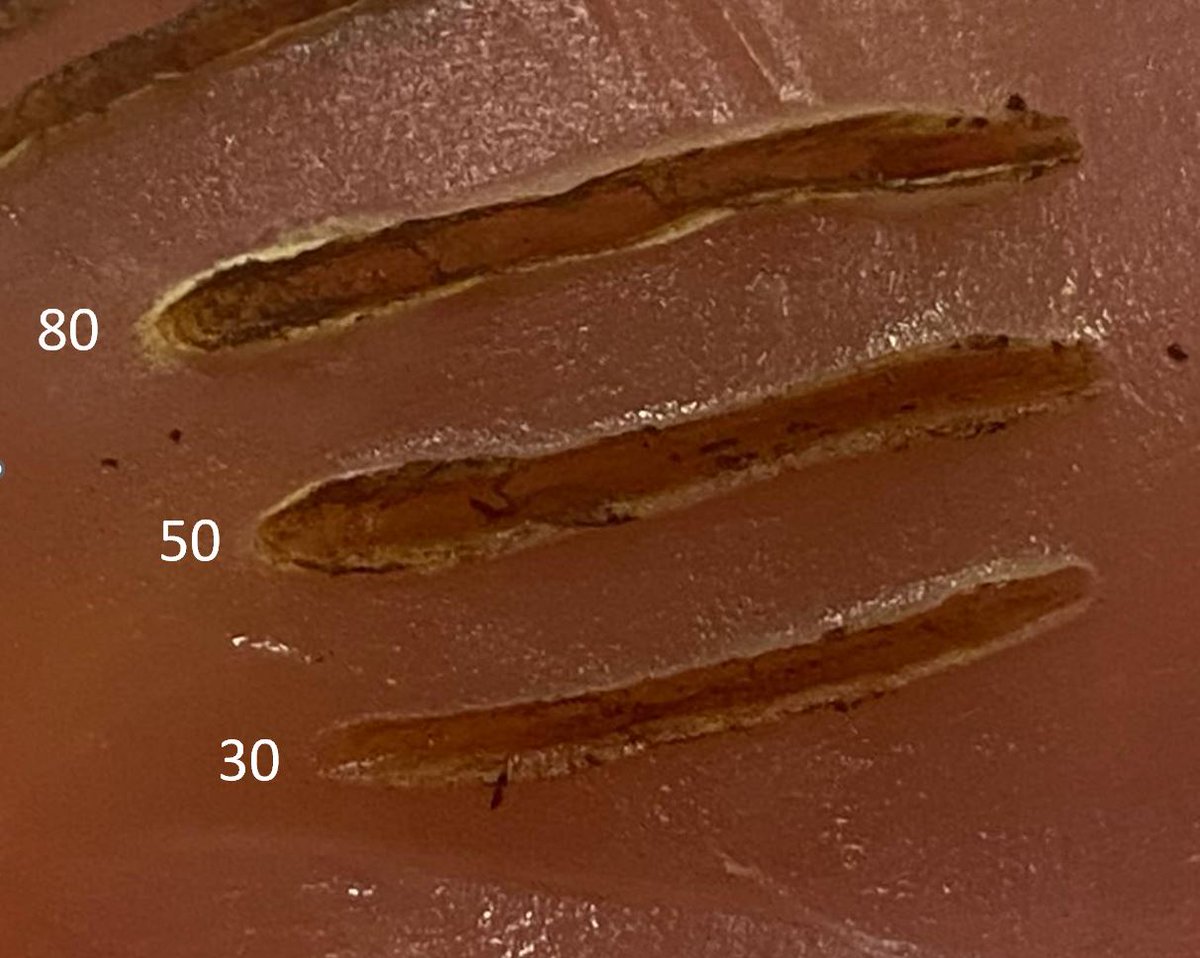
Here are some incisions made with the 'cut' setting at different power levels.
There is increased collateral damage at the higher settings, but it’s not as profound as one would think. Certainly the surrounding tissue damage at '80' is not almost 3x what is seen at '30'.
There is increased collateral damage at the higher settings, but it’s not as profound as one would think. Certainly the surrounding tissue damage at '80' is not almost 3x what is seen at '30'.
Loading suggestions...