

ChatGPT and Canva is the Ultimate Power Duo for your designs.
I use them to save 100s of hours every month.
Now you can save too.
Create viral carousels in 10 minutes or less with this step-by-step guide :
I use them to save 100s of hours every month.
Now you can save too.
Create viral carousels in 10 minutes or less with this step-by-step guide :

Let me set the expectations first.
In this quick guide, you will create a LinkedIn carousel in 10 quick steps with the help of two softwares:
1. ChatGPT
2. Canva PRO
You'll get the carousel created in less than 10 mins.
Let's dive in.
In this quick guide, you will create a LinkedIn carousel in 10 quick steps with the help of two softwares:
1. ChatGPT
2. Canva PRO
You'll get the carousel created in less than 10 mins.
Let's dive in.
STEP-1
Generate ideas using ChatGPT
• Sign in to ChatGPT website
• Click New Conversations
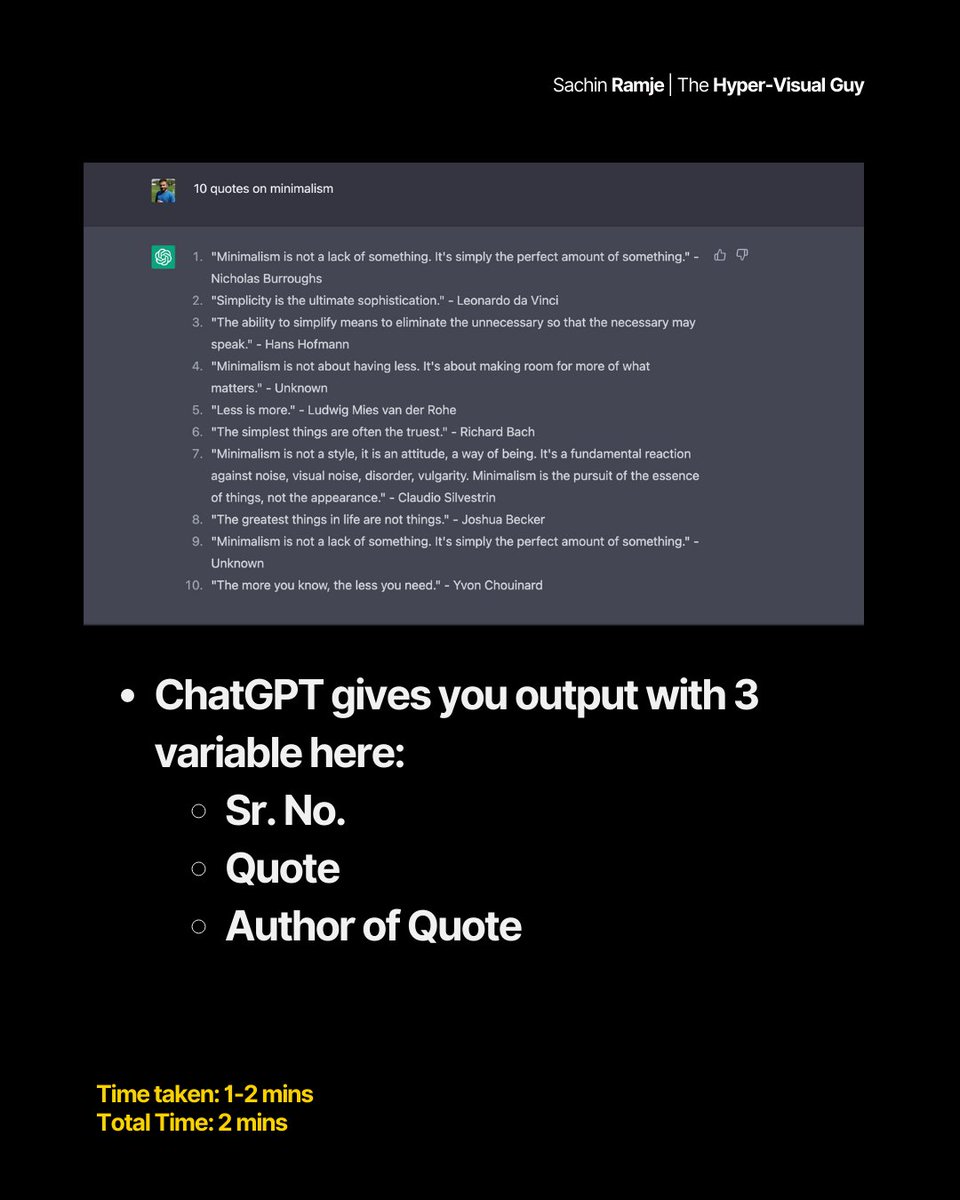
• Enter a simple prompt : "10 quotes on minimalism"
Please note that this prompt is just for showcasing the process. You can write more complex prompt for output based on your reqs.
Generate ideas using ChatGPT
• Sign in to ChatGPT website
• Click New Conversations
• Enter a simple prompt : "10 quotes on minimalism"
Please note that this prompt is just for showcasing the process. You can write more complex prompt for output based on your reqs.
STEP-2
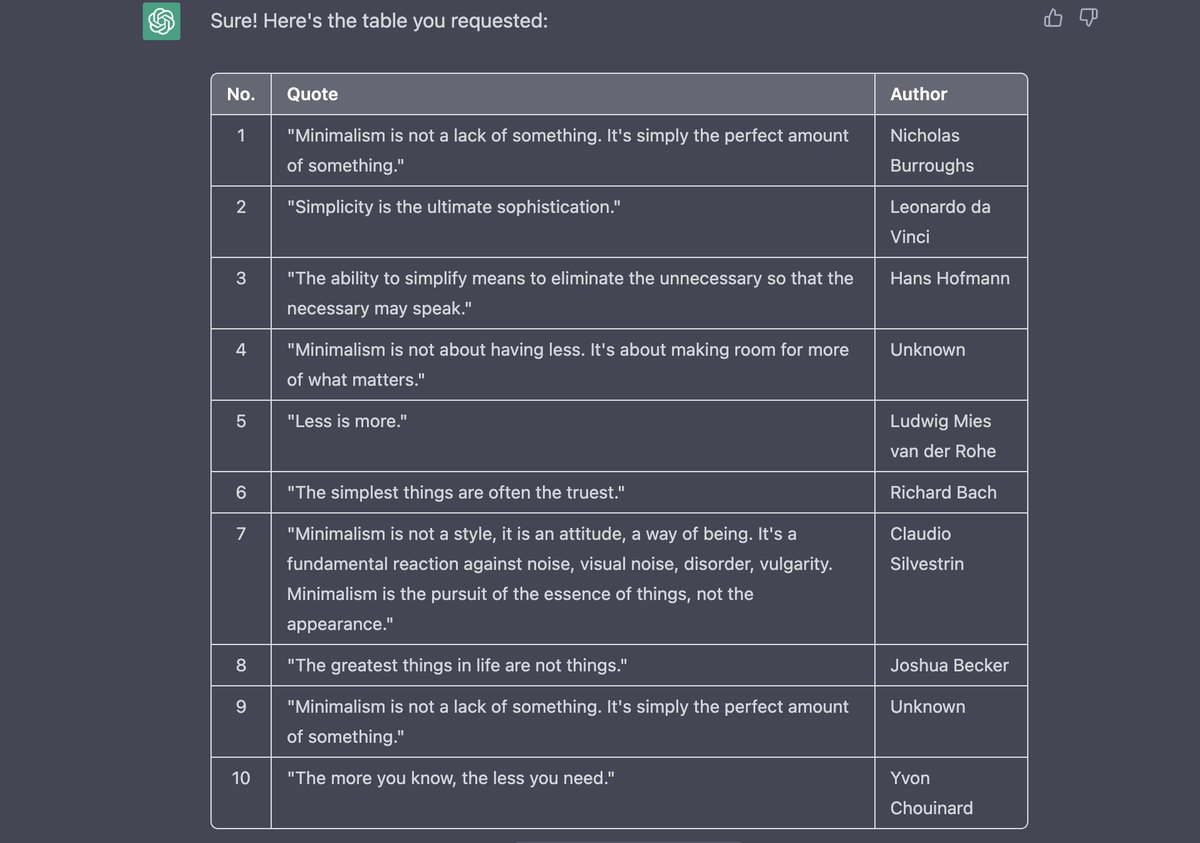
Convert the output into table with 3 columns
Now the input for the LinkedIn Carousel is ready.
It's time to leave ChatGPT and enter Canva PRO.
Convert the output into table with 3 columns
Now the input for the LinkedIn Carousel is ready.
It's time to leave ChatGPT and enter Canva PRO.
STEP-3
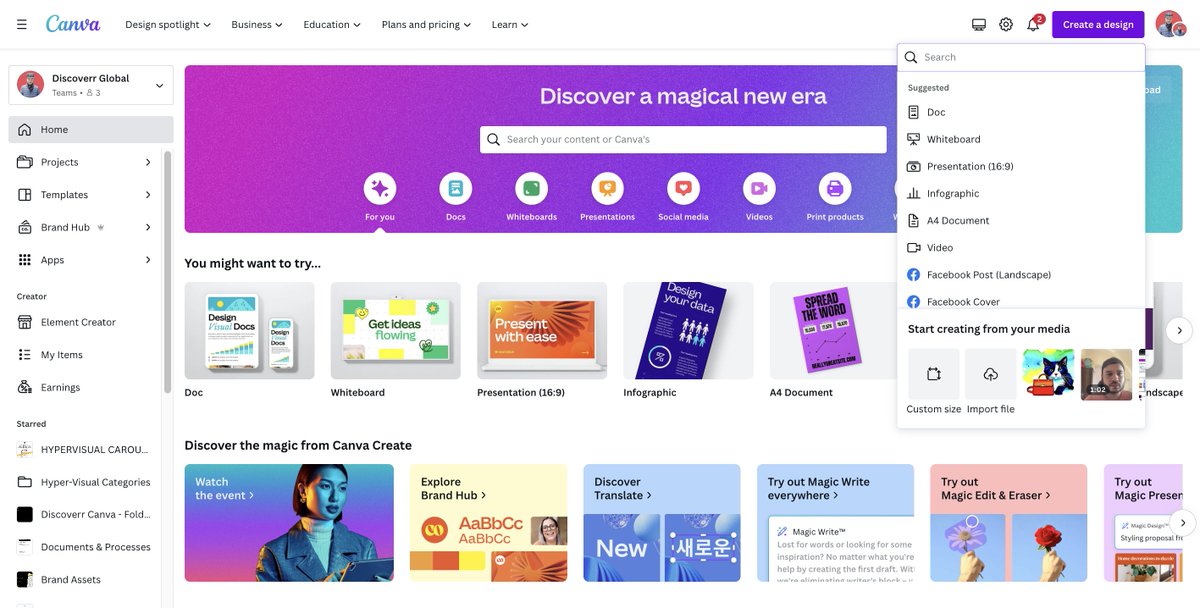
Open Canva and set up canvas for Linkedin Carousel
• Click on Create Design
• Go to Custom Size
• Enter the dimensions -1080 * 1350
Open Canva and set up canvas for Linkedin Carousel
• Click on Create Design
• Go to Custom Size
• Enter the dimensions -1080 * 1350
STEP-4
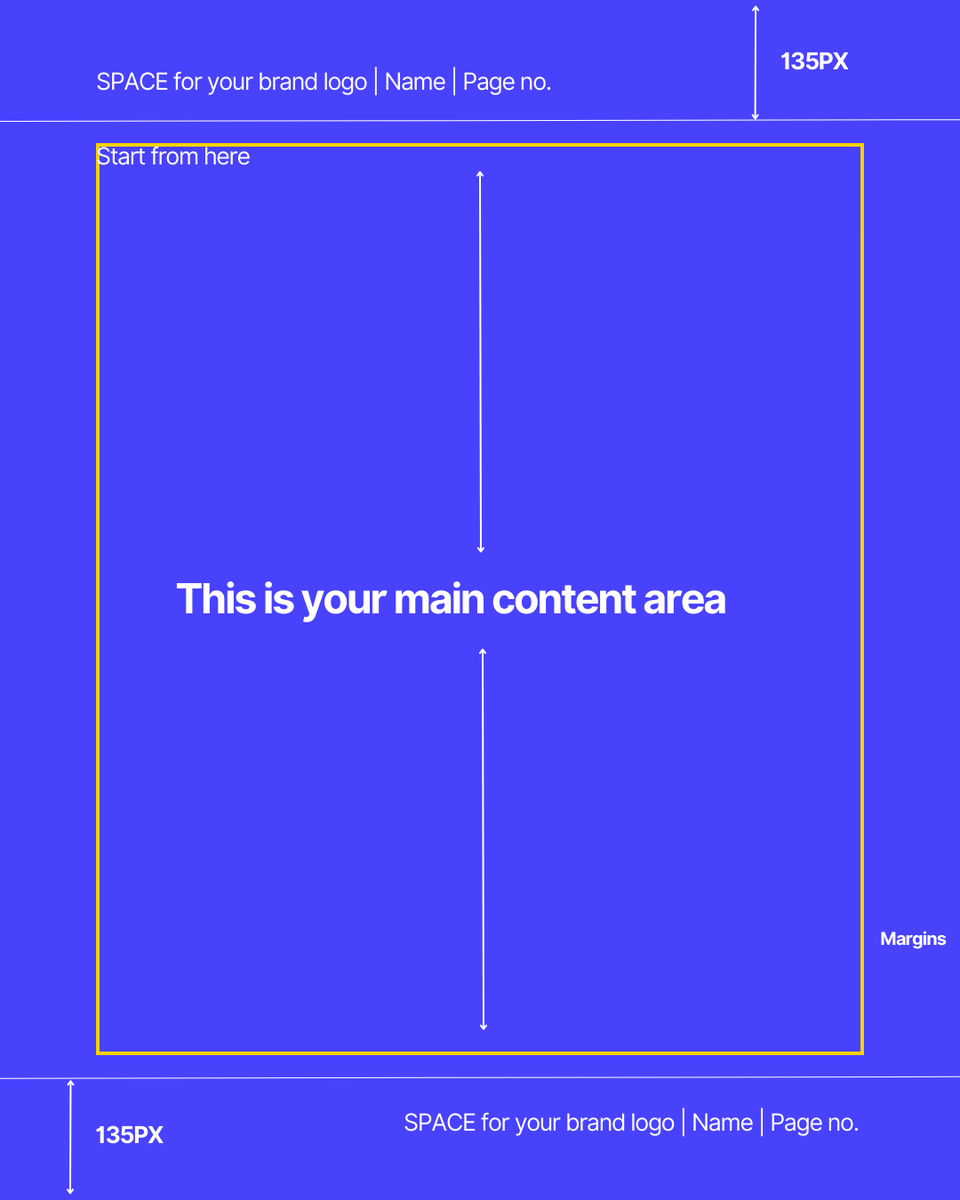
Open Rulers & Guides to setup the design areas
• Go to File →Show Rulers & Guides
• Create guides at 135PX on top & bottom to make the Canvas 1080*1080
That's the area inside which you should keep all your design elements.
Open Rulers & Guides to setup the design areas
• Go to File →Show Rulers & Guides
• Create guides at 135PX on top & bottom to make the Canvas 1080*1080
That's the area inside which you should keep all your design elements.
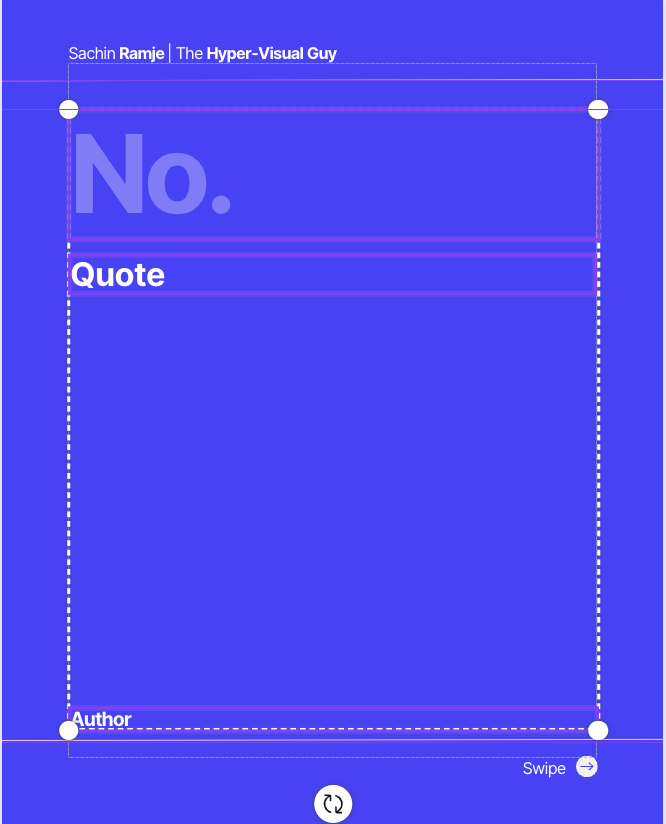
STEP-5
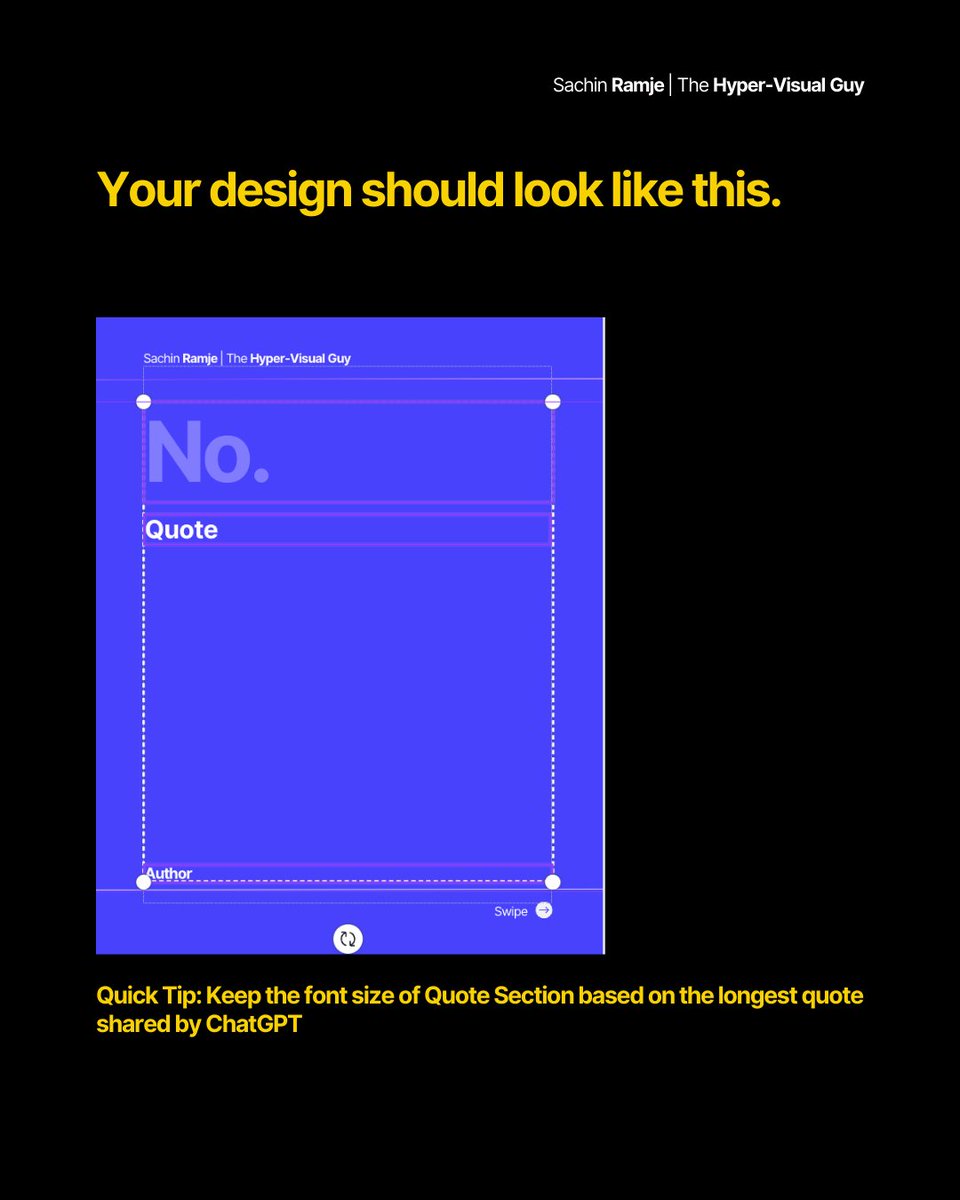
Set up the design elements based on ChatGPT Output
• Serial No.
• Quote
• Author
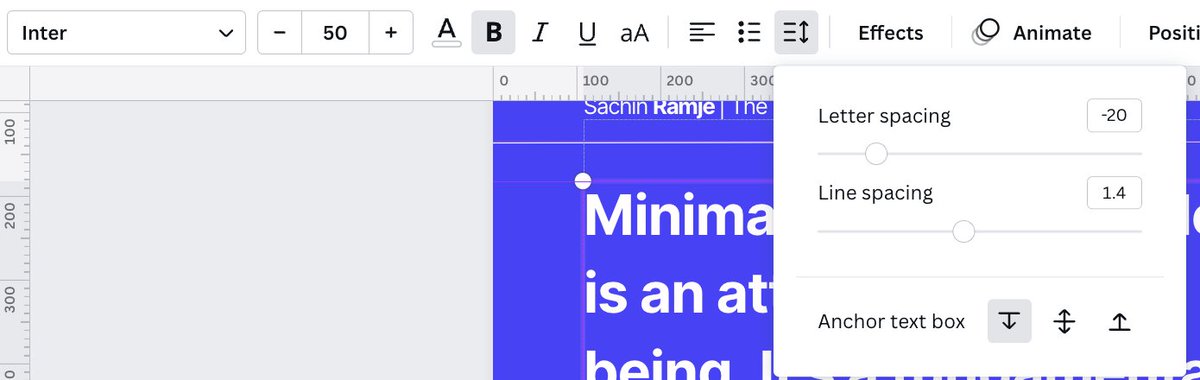
Alignment Settings
• Text box width should be equivalent to canva
• Also go to Spacing - Click the first option, align downward, additional lines of text will appear below your text box
Set up the design elements based on ChatGPT Output
• Serial No.
• Quote
• Author
Alignment Settings
• Text box width should be equivalent to canva
• Also go to Spacing - Click the first option, align downward, additional lines of text will appear below your text box
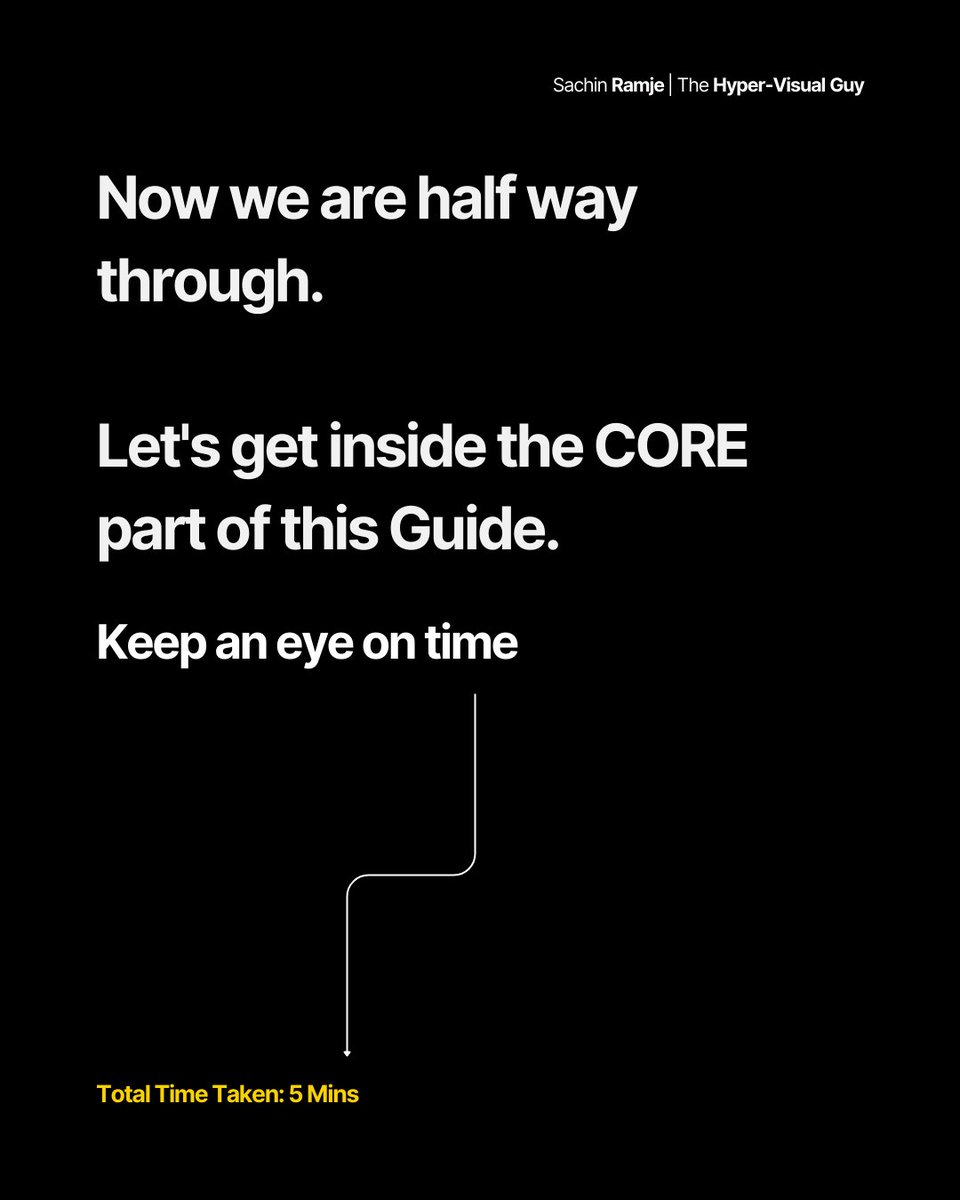
Take a break and check out the total time taken
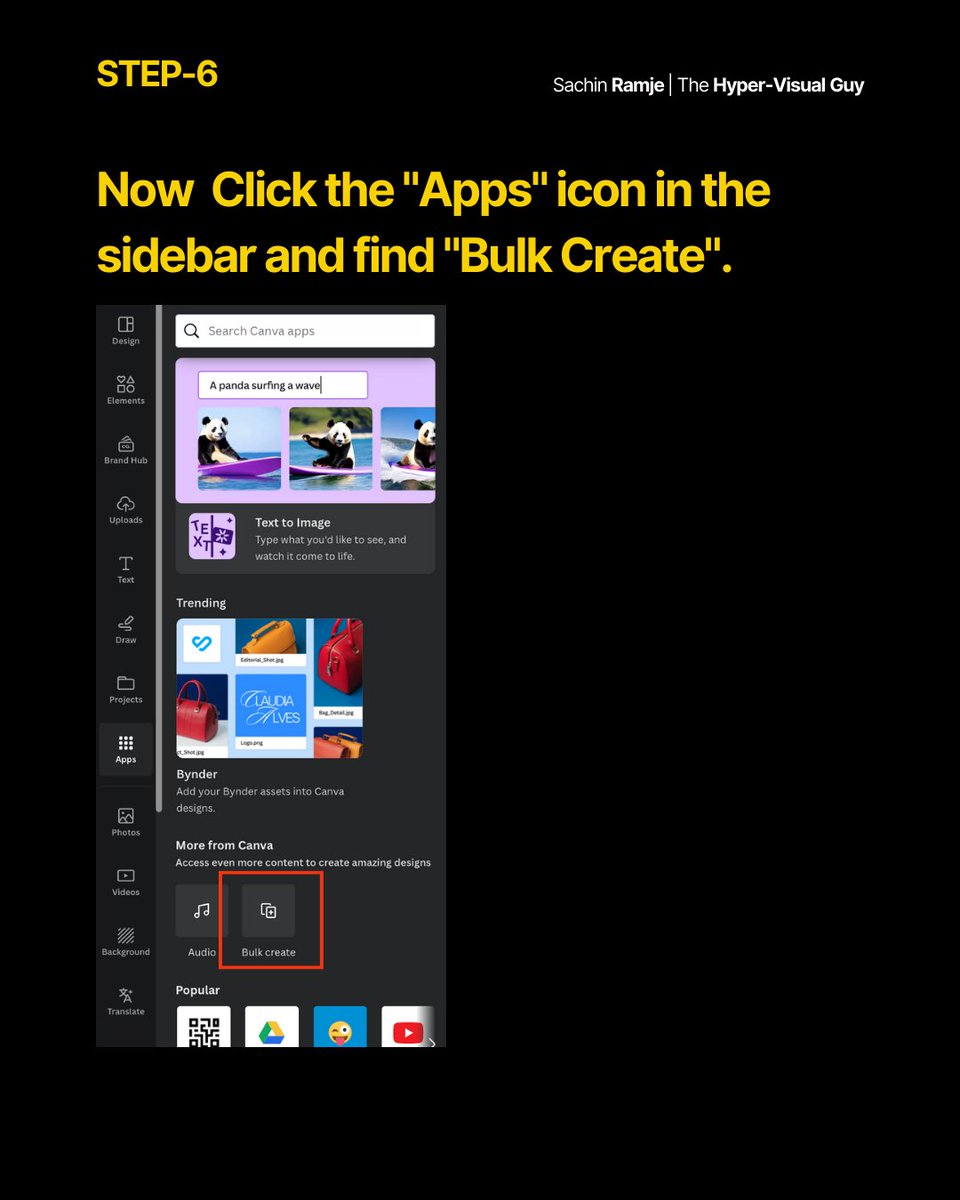
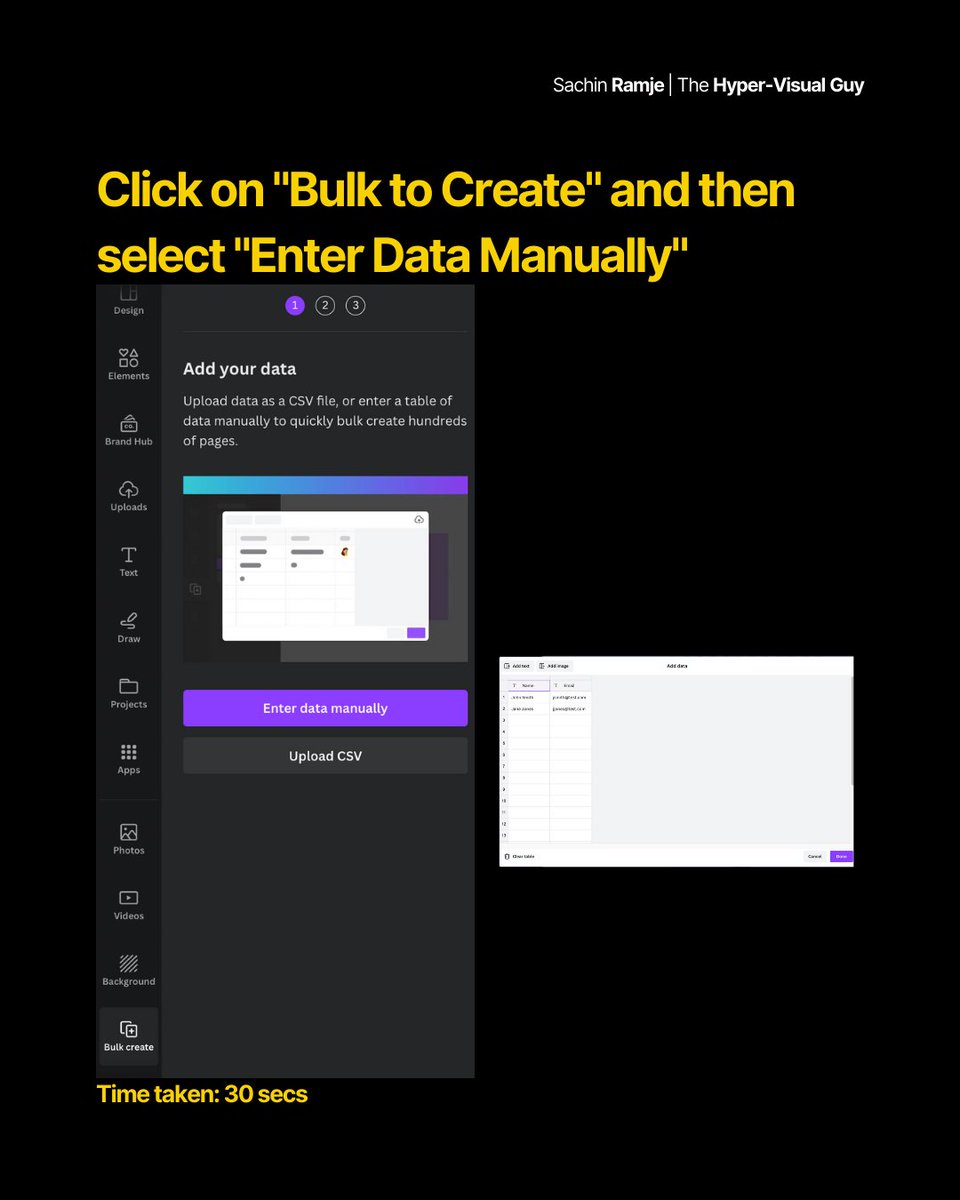
STEP-6
Introducing the "Bulk Create" Option in Canva
This feature will let you create designs in bulk.
It's like using one template and replicate upto 100 designs at once.
• Click the "Apps" icon in the sidebar and find "Bulk Create".
• Select "Enter Data Manually"
Introducing the "Bulk Create" Option in Canva
This feature will let you create designs in bulk.
It's like using one template and replicate upto 100 designs at once.
• Click the "Apps" icon in the sidebar and find "Bulk Create".
• Select "Enter Data Manually"
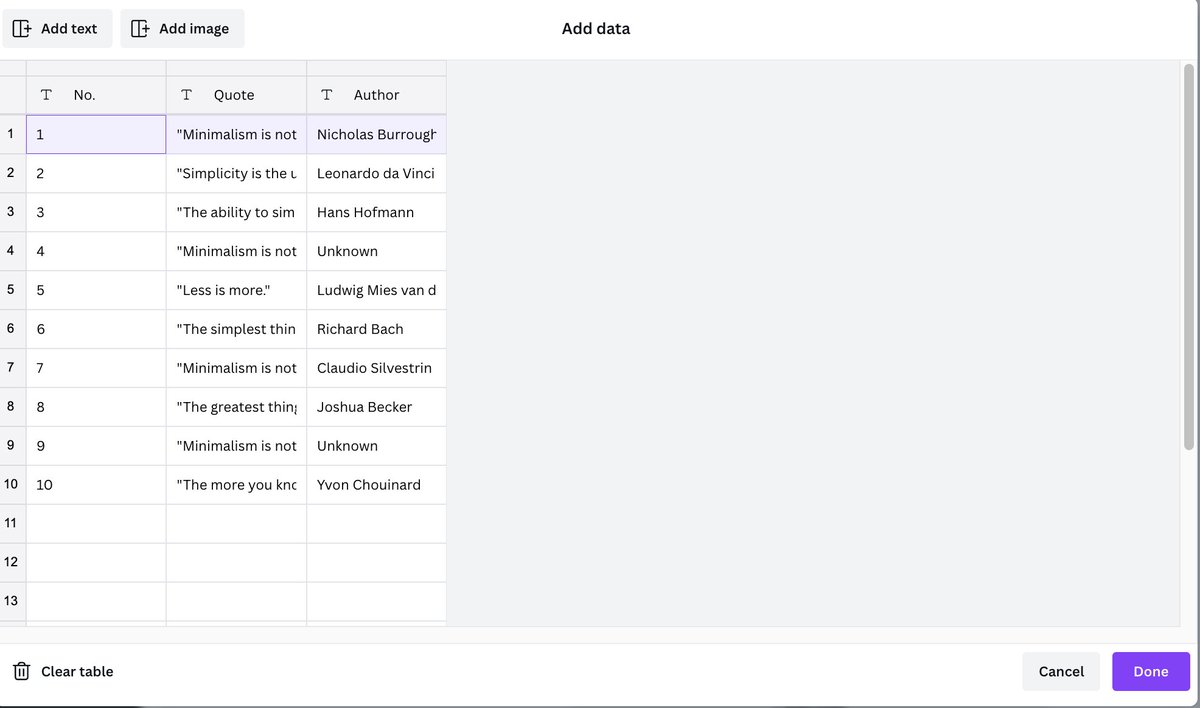
STEP-7
Transfer data from ChatGPT
Copy the table from ChatGPT and paste the data here like this.
Transfer data from ChatGPT
Copy the table from ChatGPT and paste the data here like this.
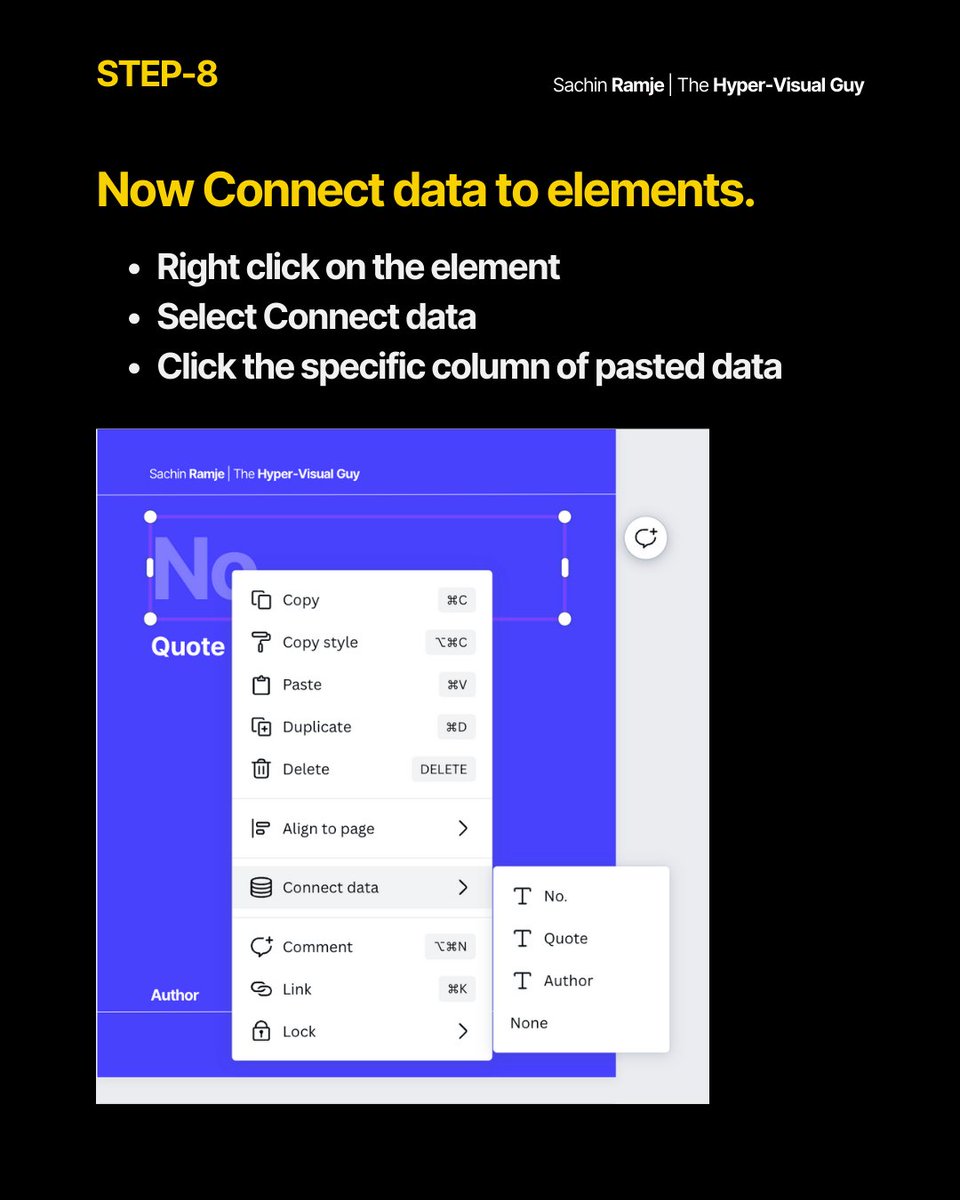
STEP-8
Connect data to elements.
How?
• Right click on the element
• Select Connect data
• Click the specific column of pasted data
Connect data to elements.
How?
• Right click on the element
• Select Connect data
• Click the specific column of pasted data
STEP-9
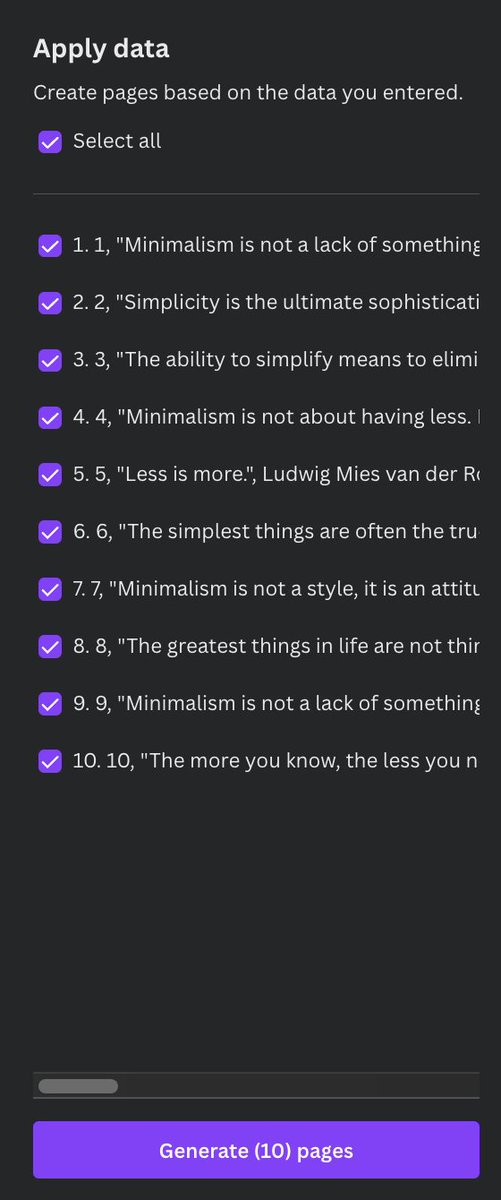
Apply the data and Create pages
• Click Continue to apply the data and create the pages based on the data you uploaded
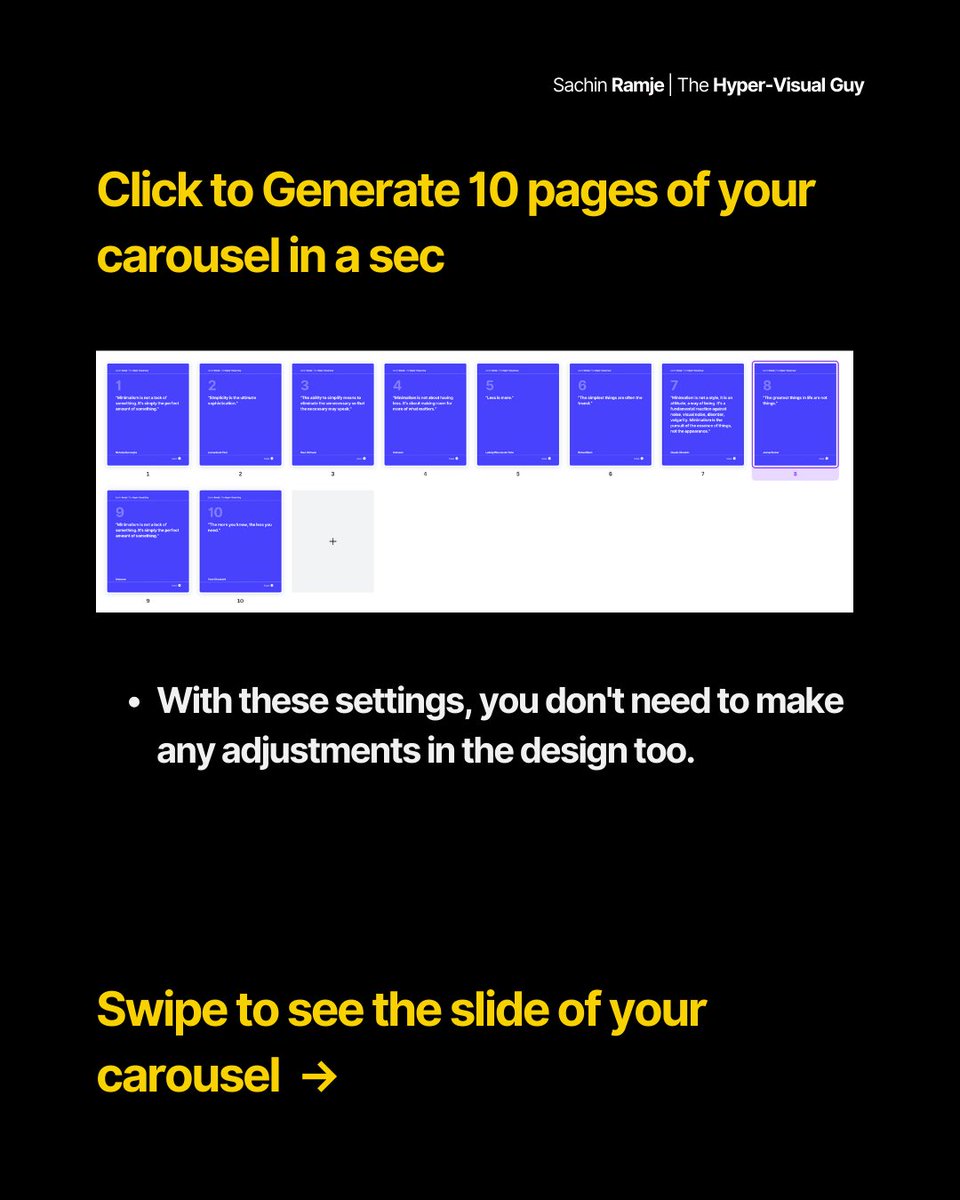
• Click to Generate 10 pages of your carousel in a sec
Apply the data and Create pages
• Click Continue to apply the data and create the pages based on the data you uploaded
• Click to Generate 10 pages of your carousel in a sec
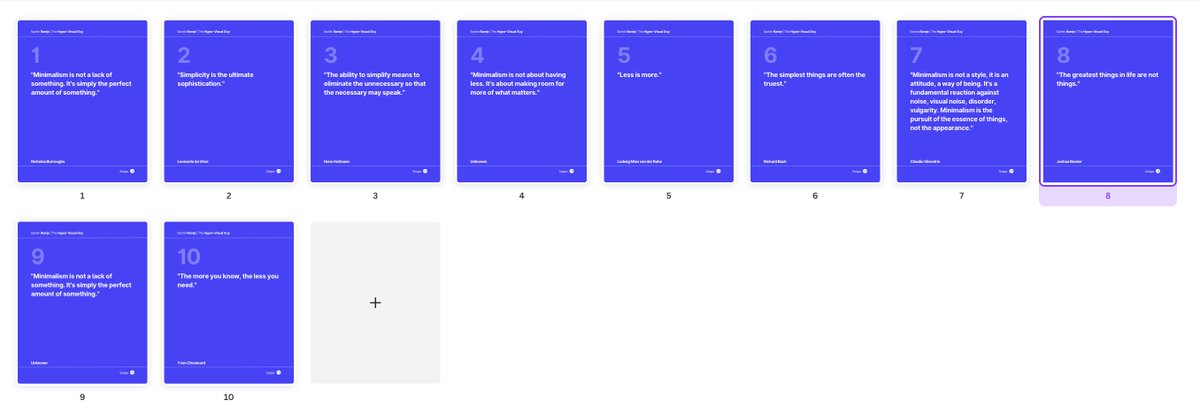
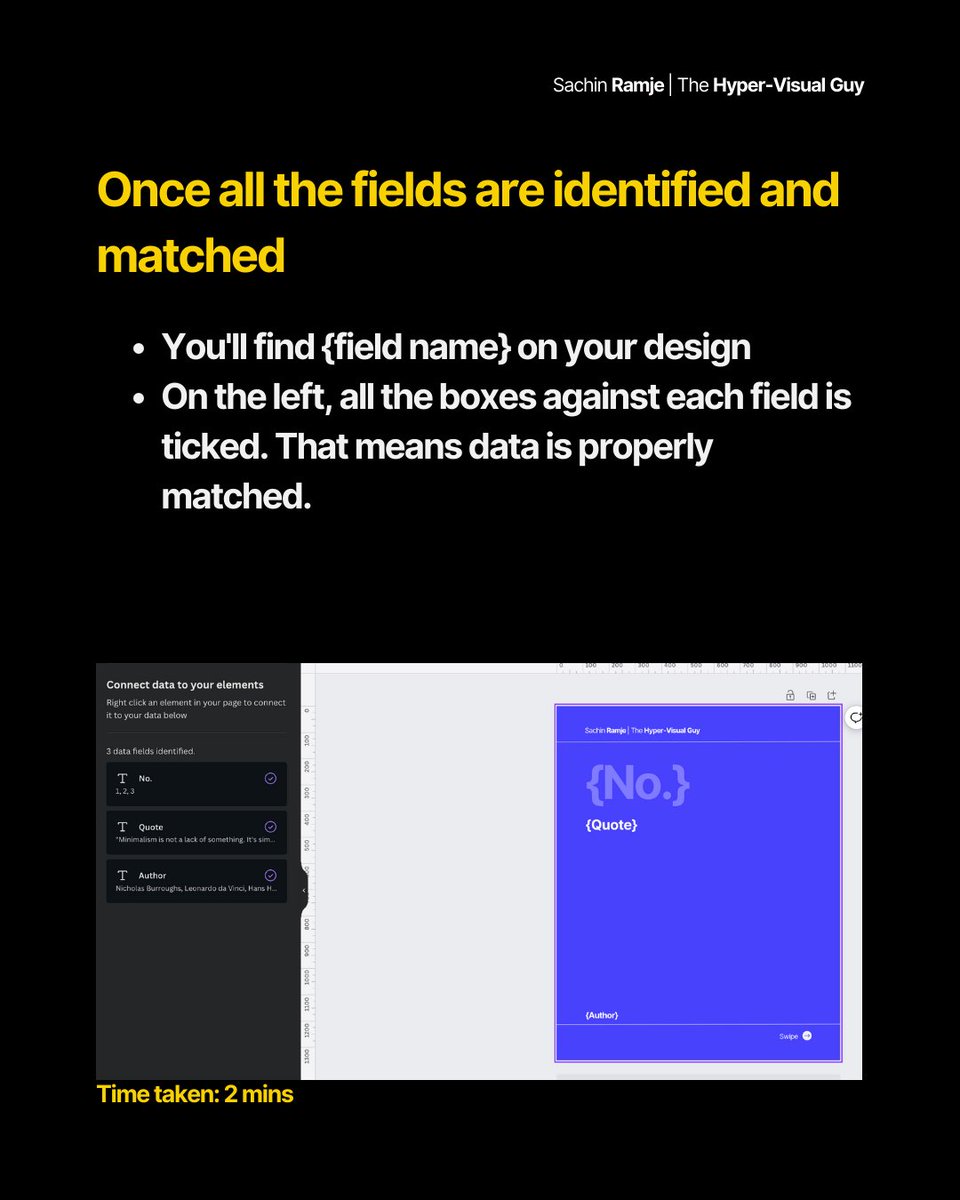
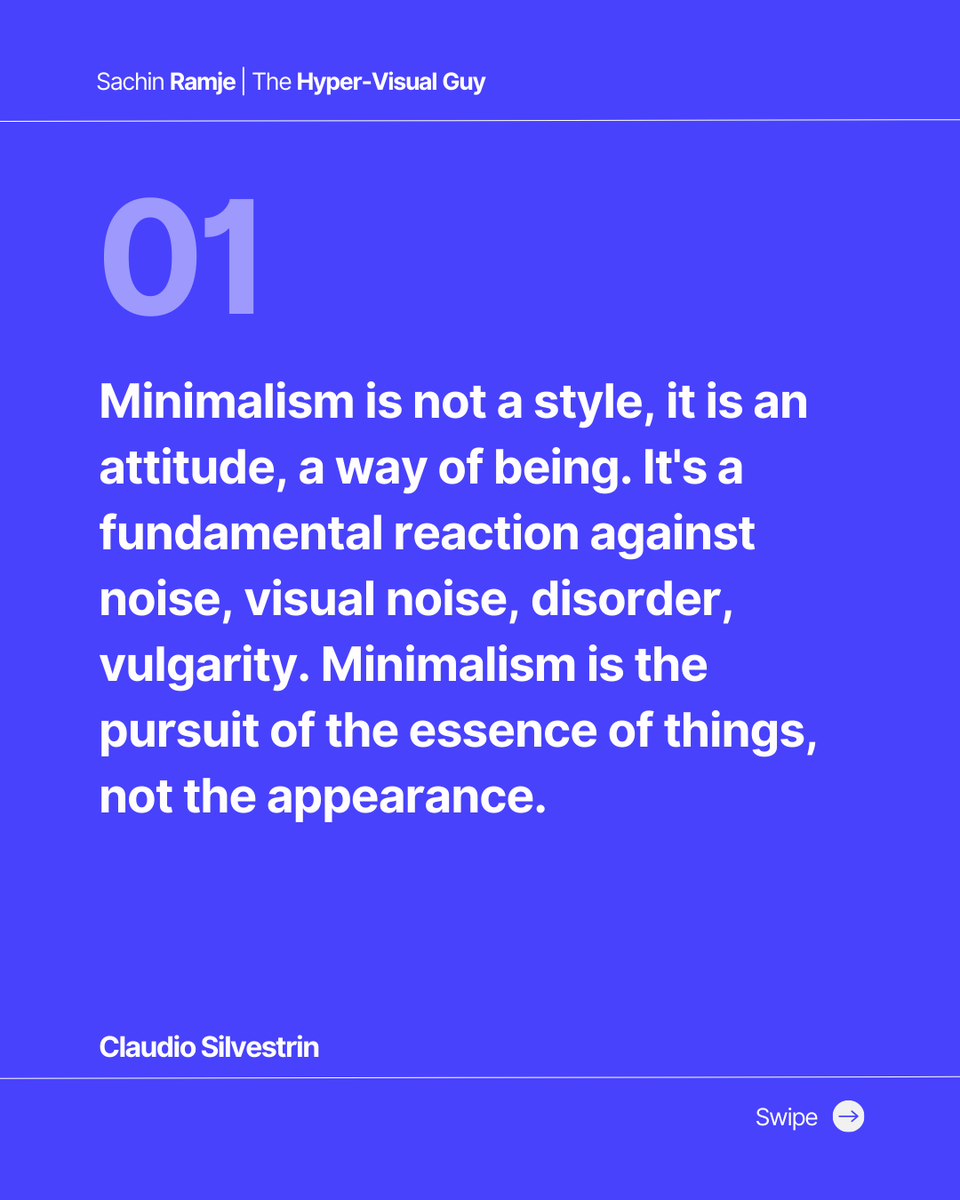
Here's how the final output will look like.
Time check: less than 10 mins.
Tip: Instead of plain background, you can set up the carousel with Image as Background as well.
Time check: less than 10 mins.
Tip: Instead of plain background, you can set up the carousel with Image as Background as well.
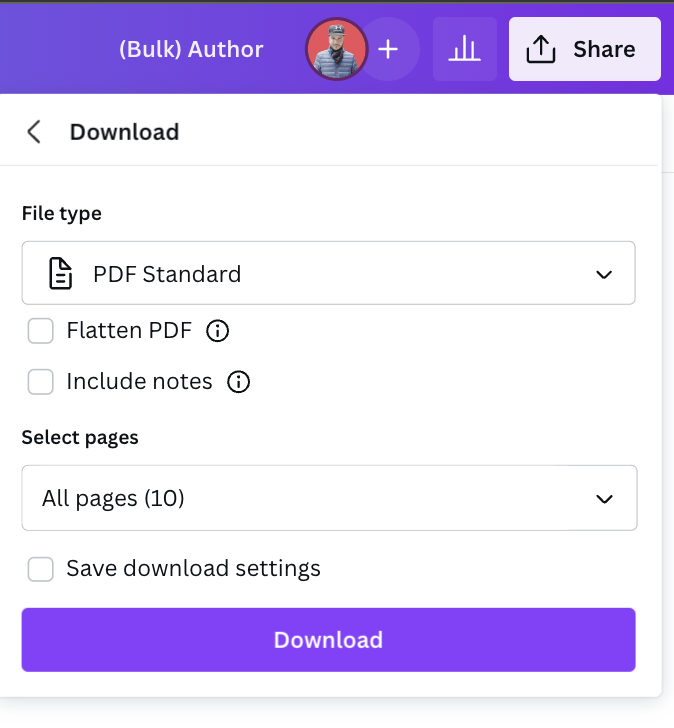
FINAL STEP:
Download it as a PDF and add as document in LinkedIn to use it as Carousel.
Download it as a PDF and add as document in LinkedIn to use it as Carousel.
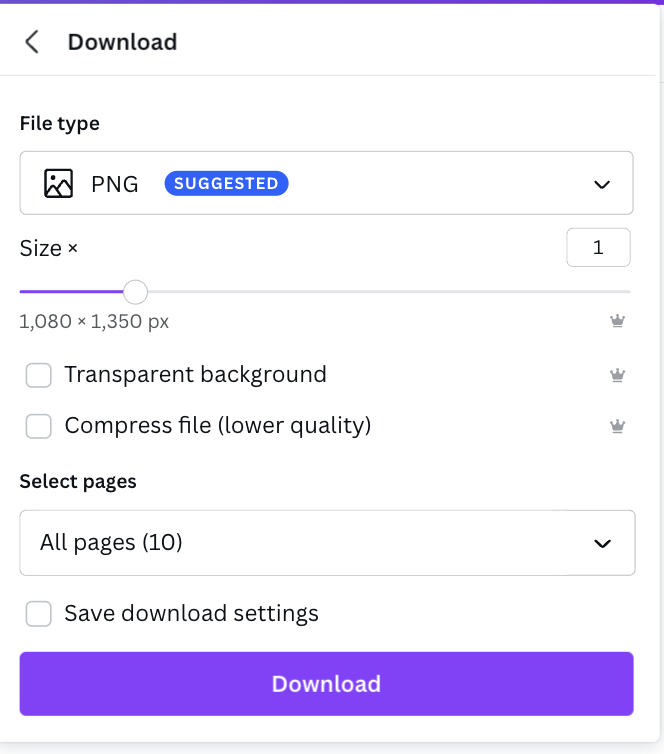
BONUS TIP:
Repurpose the carousel for 10 days of content
Download it as PNG and you just have another 10 posts ready for days you don't feel like creating content.
Repurpose the carousel for 10 days of content
Download it as PNG and you just have another 10 posts ready for days you don't feel like creating content.
Hope you've found this guide helpful?
Want to get this quick guide in PDF directly in your inbox?
Sign up with the link shared below in COMMENTs section.
dashboard.mailerlite.com
Want to get this quick guide in PDF directly in your inbox?
Sign up with the link shared below in COMMENTs section.
dashboard.mailerlite.com
That's it!
If you are just starting out and interested in learning Canva?
I'm launching a free email course on 5th April 2022 for "Canva for Beginners" to get you started with Canva.
Leave your email below to grab a seat!
forms.gle
If you are just starting out and interested in learning Canva?
I'm launching a free email course on 5th April 2022 for "Canva for Beginners" to get you started with Canva.
Leave your email below to grab a seat!
forms.gle

Loading suggestions...