

🧵regarding several ways in which you can inadvertently damage the tissues when approximating them with sutures.
These are particularly important to recognize when the tissue is thin or fragile, because this is when you may not get away with using sloppy technique.
(1/ )
These are particularly important to recognize when the tissue is thin or fragile, because this is when you may not get away with using sloppy technique.
(1/ )


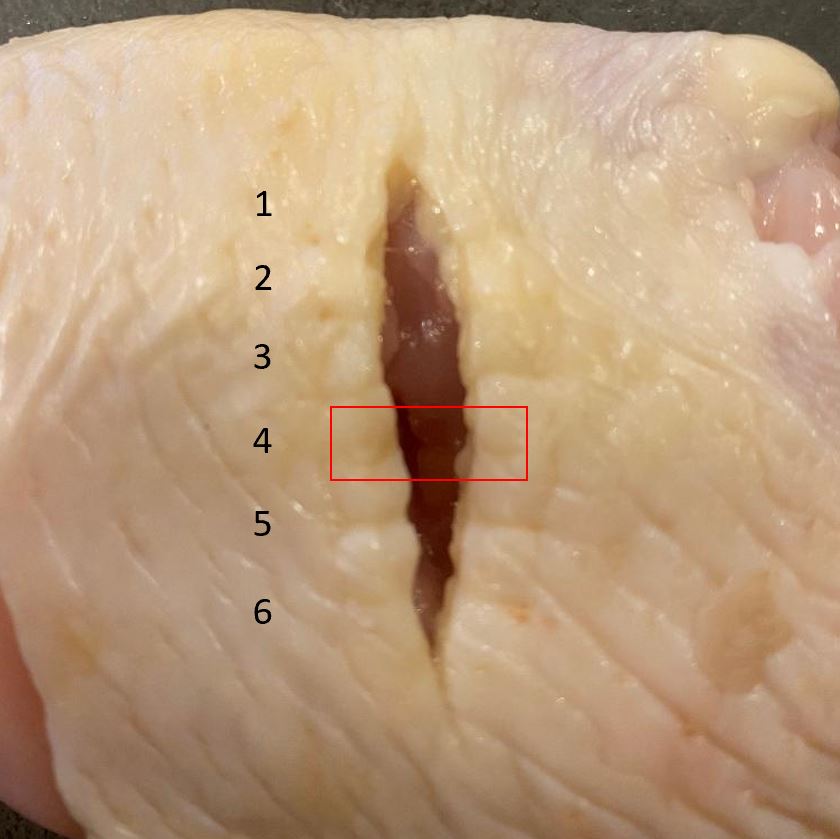
Our example suture line will require about 6 sutures.
Let's take suture #4. The responsibility of suture #4 is to approximate the tissues within the rectangle without damaging them.
This🧵will show how we might damage the tissues if we aren't careful.
Let's take suture #4. The responsibility of suture #4 is to approximate the tissues within the rectangle without damaging them.
This🧵will show how we might damage the tissues if we aren't careful.
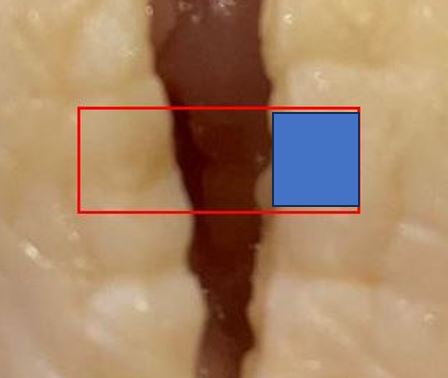
Put another way, when placing the sutures, the goal is to get the two tissue squares to become approximated without damaging them.
There are at least 4 ways you can damage them. I am R handed, so the R side (where the needle goes in) is especially prone to injury, as we'll see.
There are at least 4 ways you can damage them. I am R handed, so the R side (where the needle goes in) is especially prone to injury, as we'll see.

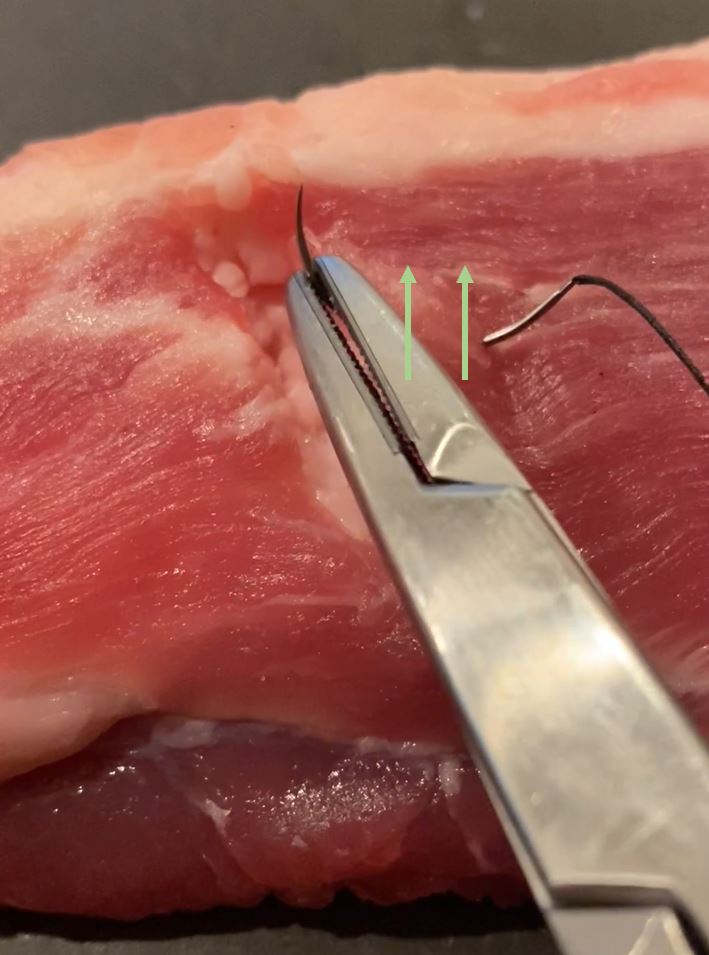
Here I am doing the first part of the throw. At first, it looks fine. But if you look carefully, I'm actually 'pulling up' on the tissue somewhat harder than I should be.
It might take a couple of views of the video clip to appreciate this.
It might take a couple of views of the video clip to appreciate this.

In the preceding video, I was pulling up on this tissue harder than I needed to. It's true that *most* of the time you'll get away with this. But if the tissue is fragile, it might cause small tears that will then get worse when the suture is tied down.
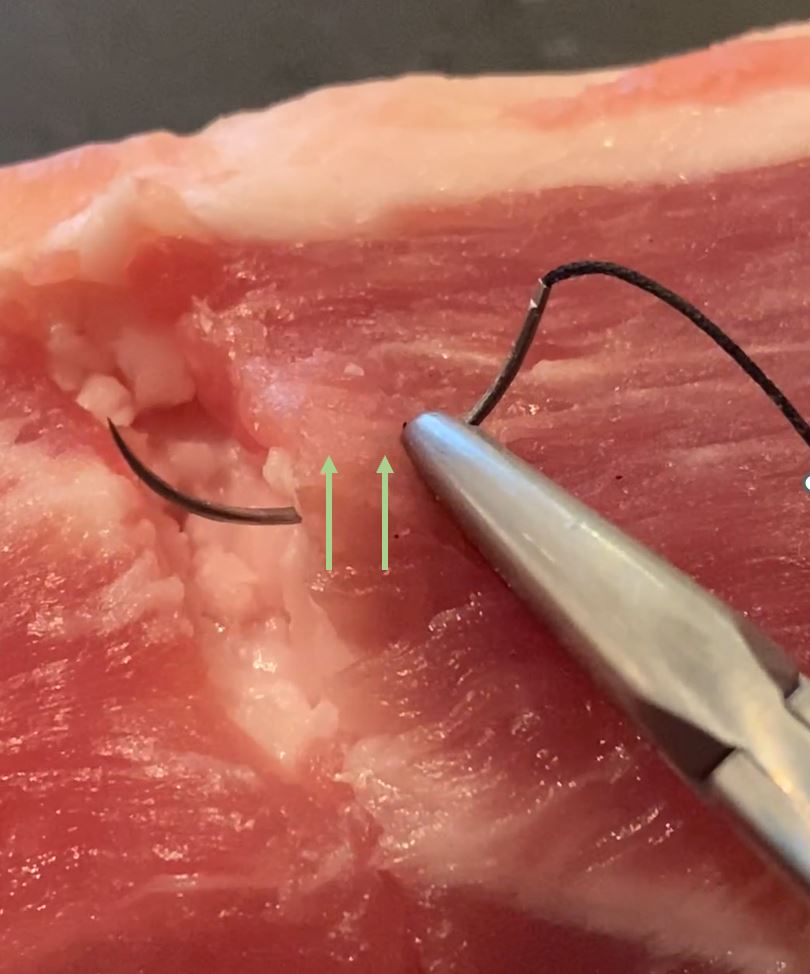
Now here's an example of doing the first suture throw, but without pulling up on the tissue at all.
In the next step after this (retrieval of the needle), it will be important to follow the curvature of the needle so I don't tear the tissue.
In the next step after this (retrieval of the needle), it will be important to follow the curvature of the needle so I don't tear the tissue.

Here is another way to cause tissue damage.
When I go to retrieve the needle after the first throw, I pull up on the tissues too much.
Again, it's a quick video, so may need to look at it a couple of times.
When I go to retrieve the needle after the first throw, I pull up on the tissues too much.
Again, it's a quick video, so may need to look at it a couple of times.

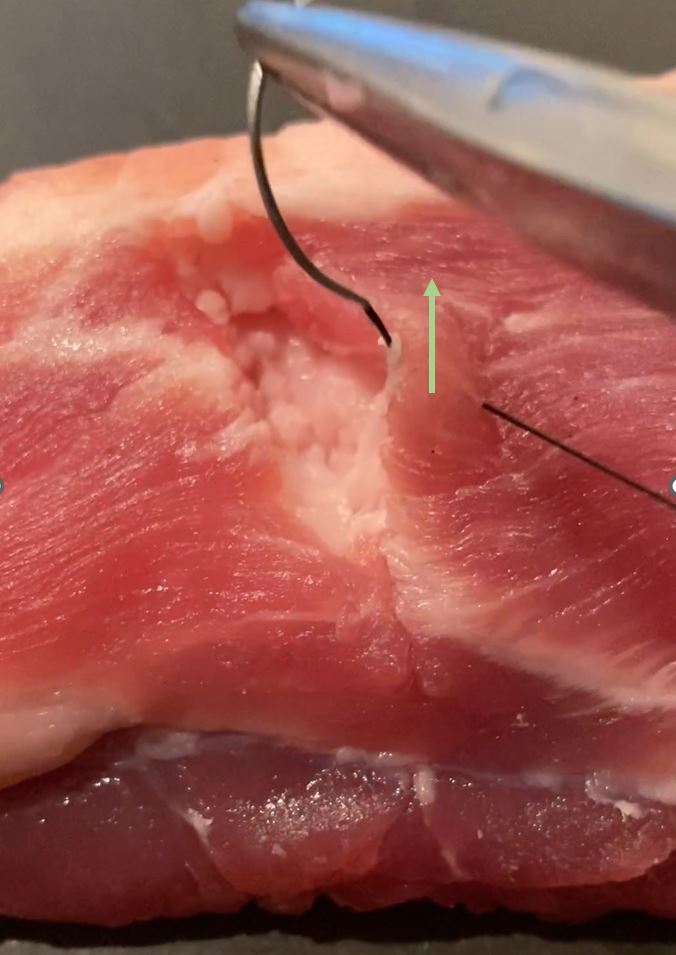
This is a still picture from the previous video.
As I go to pull the needle out, you can see that I am pulling up on the tissue too much. This starts when the needle is still in the tissue (L picture), and also continues after the needle is out (R picture).
As I go to pull the needle out, you can see that I am pulling up on the tissue too much. This starts when the needle is still in the tissue (L picture), and also continues after the needle is out (R picture).
Here, when I pull the needle out, I do a better job following the curvature of the needle. I also avoid pulling up on the tissue with the suture thread after the needle is out.
As you can see, the tissue is not pulled on at all.
As you can see, the tissue is not pulled on at all.

This is perhaps the most common way the tissue gets damaged.
Here, I am tying the suture down, but I am pulling up on the tissues *a lot*. Also I do this more than once in the process of setting the throw down. And it's only the first part of the knot.
Painful to watch 😳
Here, I am tying the suture down, but I am pulling up on the tissues *a lot*. Also I do this more than once in the process of setting the throw down. And it's only the first part of the knot.
Painful to watch 😳

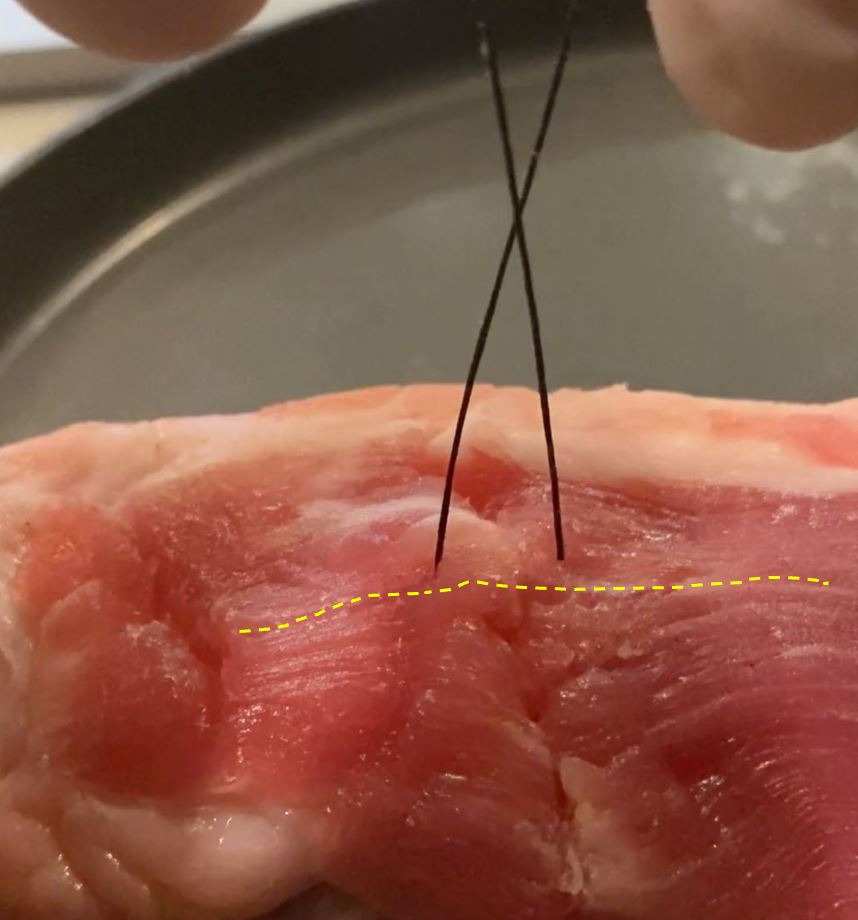
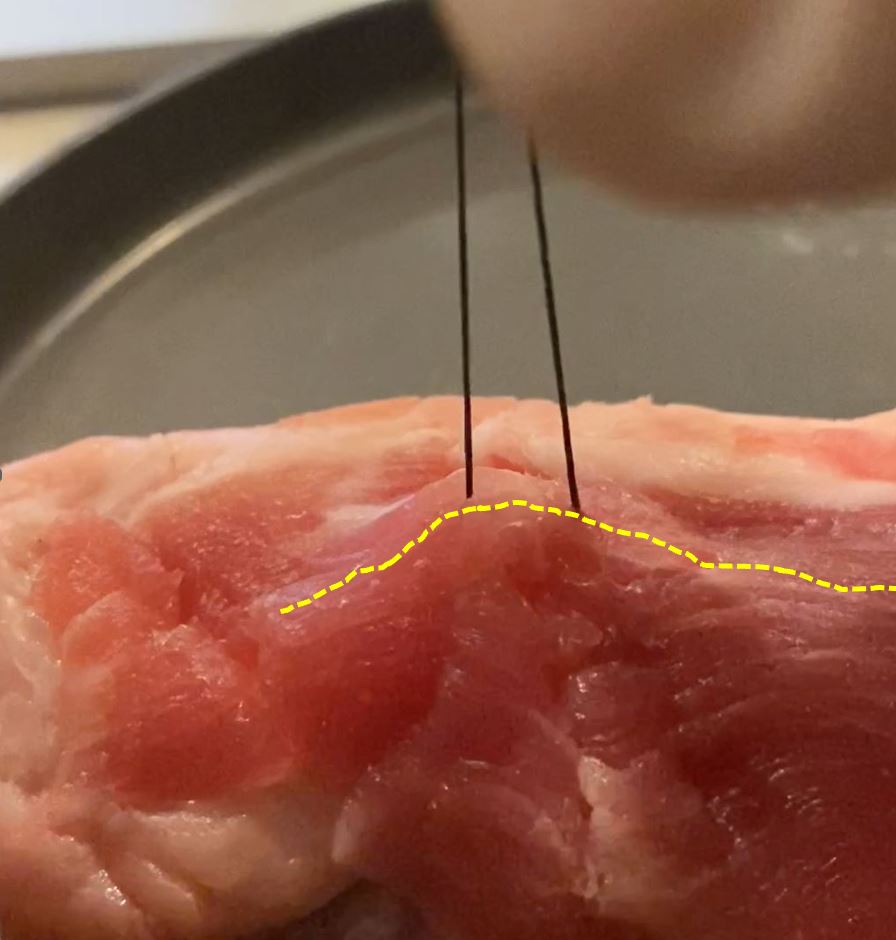
These are still shots from the previos video. Here I've carefully traced out the grooves on the beef before tying the knot (L picture).
On the R, I've just started to tie the knot and you can see how much the tissue is deformed because I'm pulling up too hard on it.
On the R, I've just started to tie the knot and you can see how much the tissue is deformed because I'm pulling up too hard on it.
Now here's an example where I have tied down the first throw of the knot without pulling up on the tissue at all.
Only the first throw is seen here, but the others are also set down without pulling up.
This is what needs to be done when the tissues are thin or fragile.
Only the first throw is seen here, but the others are also set down without pulling up.
This is what needs to be done when the tissues are thin or fragile.

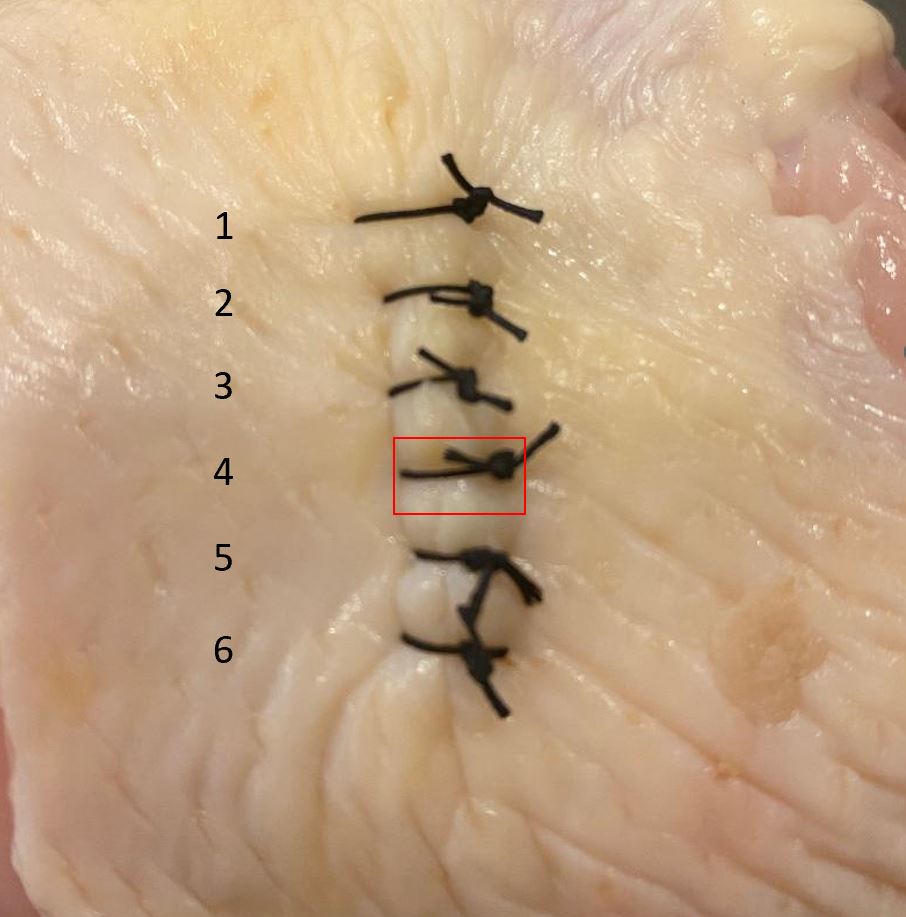
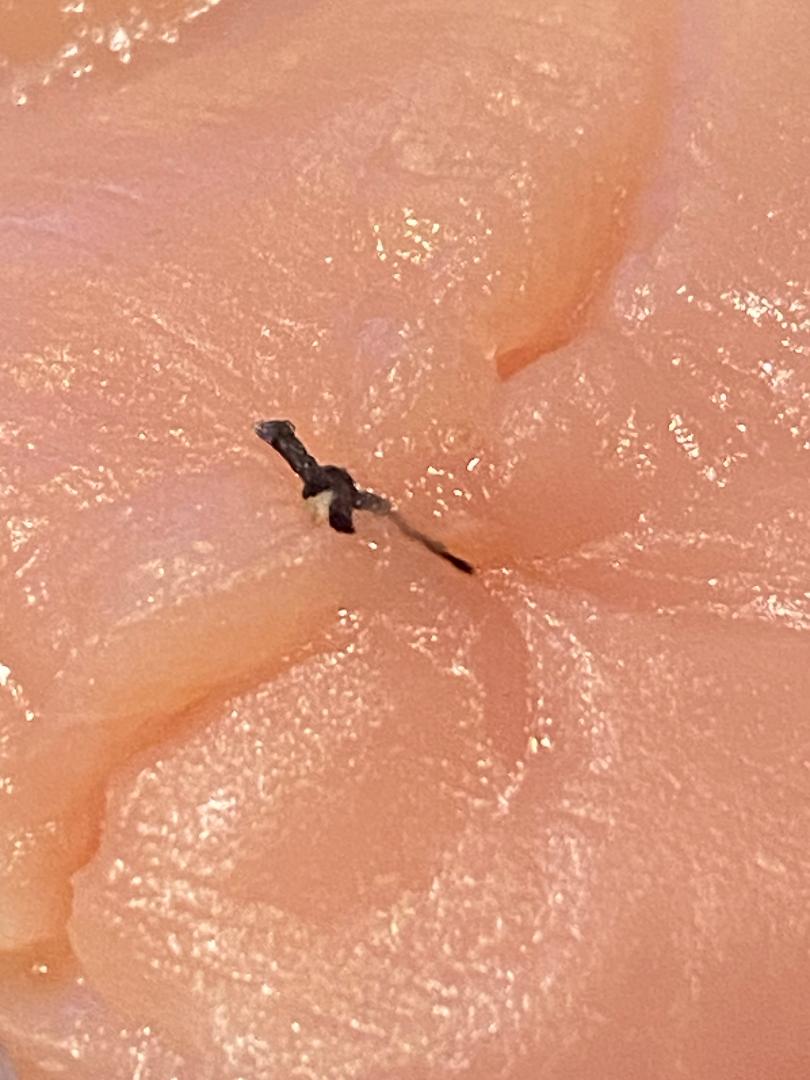
Finally, it is possible to damage the tissues by tying the sutures too tight.
This is challenging to show in video form, so here's a picture of a suture that is too tight.
Like the old adage says "approximate, but don't strangulate."
(original source unknown).
⬛️
This is challenging to show in video form, so here's a picture of a suture that is too tight.
Like the old adage says "approximate, but don't strangulate."
(original source unknown).
⬛️
Loading suggestions...